
I spent six hours on my knees, sweating over a box of expensive Carrara marble, only to realize I was ruining it. My grout was drying into concrete-hard ridges that wouldn’t budge. I thought more water was the answer, so I soaked the floor, and suddenly, my beautiful charcoal grout turned into a splotchy, light-gray nightmare. It was a total disaster. I learned the hard way that how to mix grout so the color stays perfectly consistent is only half the battle. The real magic happens with a simple tool you probably already have under your kitchen sink. Today, I’m going to show you how to avoid the heartbreak of a ruined finish and finally get those crisp, professional lines that make a room pop.
Stop Scrubbing and Start Sculpting Your Grout
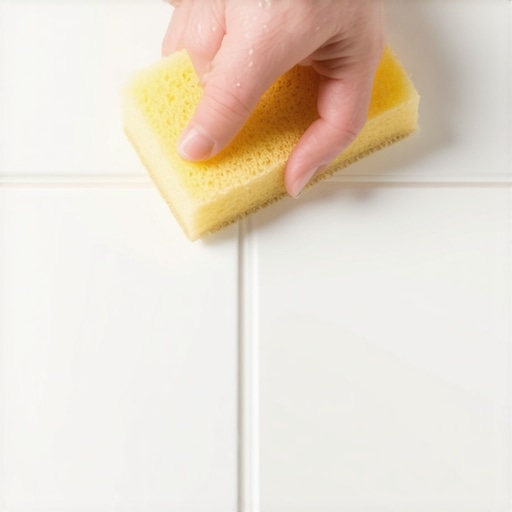
The Wet Sponge Move isn’t just about cleaning up the mess; it’s about sculpting the joint. When I first started, I treated grouting like I was washing a car—lots of water, lots of circular scrubbing. That is a recipe for failure. If you have ever dealt with why your epoxy grout is hazy and hard to clean, you know that once that residue sets, your weekend is basically over. You have to understand that the sponge is a precision tool. It’s what transitions a rough, sandy gap into a smooth, elegant channel. I used to think installing tiles like a pro was all about the layout, but the truth is, the grout is what hides your minor sins or highlights your mistakes. If the lines are wavy, the whole floor looks crooked. By mastering the moisture level in your sponge, you control the depth and the texture of the finished product. Have you ever stepped back from a finished floor only to realize your grout lines were jagged or uneven?
Can a simple sponge really ruin my tile job?
It sounds dramatic, but yes. The biggest skepticism I hear from DIYers is that they’ll accidentally wash the grout right out of the joints. It’s a valid fear! I’ve done it. I once used a sponge that was way too wet and ended up with concave lines that looked like little canyons, which later became a nightmare to keep clean. According to the Tile Council of North America (TCNA), excessive water during the cleanup phase is a primary cause of grout pigment washout and structural weakening. This is why the ‘damp, not dripping’ rule is the golden law of the job site. We aren’t just wiping away haze; we are hydrating the grout just enough to let it settle into a dense, durable bead. If you’ve been struggling with why your tile grout is cracking at the room corners or elsewhere, the culprit is often too much water or poor sponge technique during these first critical minutes. Let’s look at exactly how to hold that sponge to get the results you’re after.
Wait for the Grout to Firm Up First
Before you even dip a sponge, you must let the grout sit and begin its chemical set. I used to be so anxious about the mixture drying into a rock that I would start wiping within five minutes. That was a massive mistake; the grout was still too soft, and I essentially just painted the tiles with a slurry of gray mud. You typically need to wait about 15 to 20 minutes until the grout loses its wet sheen and takes on a dull, matte appearance. Understanding the difference between sanded and unsanded grout for tile projects is critical here, as the texture of the sand can actually scratch certain tiles if you are too aggressive during this stage. If you haven’t removed your spacers yet, this is your last chance to ensure why your tile spacers are getting stuck in the grout lines doesn’t become a permanent part of your floor design.
The Double Bucket System for a Haze-Free Finish
If you want to avoid that frustrating white film that haunts DIYers the next morning, you need to implement the two-bucket system immediately. I learned this while struggling through a massive kitchen remodel where I spent more time walking to the sink than actually grouting. Bucket one is for your first rinse to remove the heavy sludge. Bucket two is for your final, clean-water pass. This prevents you from simply moving dirt around. Even if you have followed every one of the tile installation pointers that save time and money, a single-bucket approach will leave a residue that is nearly impossible to buff out once dry.
Wring Your Sponge Like Your Project Depends on It
This is the most common point of failure. Your sponge should be damp, not wet. On my first laundry room project, I left the sponge dripping, and as I wiped, excess water pooled in the joints. This diluted the color and caused the grout to cure with a splotchy, weak finish. Now, I wring the sponge until absolutely no water drips out when I hold it. It should feel almost dry to the touch. This allows the sponge to act like a magnet for the grout on the tile surface without disturbing the grout inside the joint. If you’ve been worried about the trowel size error that leads to hollow-sounding tiles, you already know that moisture control is the key to structural integrity.
Wipe Diagonally or Risk Ruining Your Lines
The 45-degree swipe is the “Golden Rule” of grouting. Think of it like a car tire crossing a small trench in the road. If the tire goes parallel to the trench, it falls in. If it crosses at an angle, the width of the tire is supported by the road on both sides, allowing it to glide over. Your sponge is the tire. If you wipe parallel to the grout line, you will scoop the grout right out, leaving the lines looking like empty, jagged gutters. By wiping at a diagonal, the sponge is supported by the tile edges, creating a smooth, flush finish. I remember a master bathroom where I rushed and wiped vertically; the result was so uneven I had to re-grout several sections. Before you get to this final polishing stage, always verify the simple test to see if your subfloor is strong enough for tile has been completed, as even the most perfectly sculpted grout lines will crack if the subfloor has too much flex.
The Flatness Fallacy That Ruins Expensive Installations
Most DIYers and even some ‘pros’ obsess over the floor being perfectly level. I have seen guys spend hundreds of dollars on self-leveling compound trying to get a bubble to sit perfectly in the center of a level, only to have their tiles crack six months later. Here is the contrarian truth: a floor does not necessarily need to be level to be successful, but it must be flat. You can have a floor that slopes half an inch across a room, and as long as there are no dips or humps, your tile or hardwood will sit perfectly. If you are chasing a level bubble instead of a flat surface, you are likely overcomplicating the ultimate guide to floor leveling for a perfect finish. I always tell people to put down the laser and pick up a straightedge. Use the 3-foot level test for checking subfloor flatness like a pro to find the actual valleys that need filling, rather than trying to lift the entire room to a mythical horizon line.
Never Pour Leveler Directly onto Dry Concrete
The most common ‘oops’ factor I encounter is the skipped primer. People treat self-leveling compound like a thick soup that will just stick to whatever it touches. It won’t. Concrete is incredibly thirsty; it will suck the moisture out of your leveling mix so fast that the compound won’t have time to flow. This results in a gritty, brittle mess. This is exactly why your self-leveling compound is cracking like a dry lake bed. You must understand that why you must prime concrete before every leveling job is about creating a chemical bond and a moisture barrier. Without it, the compound just sits on top like a loose cracker. According to the Tile Council of North America (TCNA), substrate preparation is the single most important factor in the longevity of a floor. If you fail here, no amount of expensive grout or high-end tile will save you.
Why do my perfect grout lines still crack after three months?
If you have followed every cleaning tip and your lines are still failing, the culprit is almost always subfloor flex. I used to think that thick thinset could act like a bridge over a bouncy floor. It can’t. If your plywood subfloor has even a tiny bit of ‘give’ when you walk on it, that movement will telegraph straight through to the grout. Before you even think about the aesthetic finish, you need to know how to fix a bounce in your plywood subfloor. Rigid materials like porcelain or stone are not designed to bend. When the subfloor moves, the grout is the first thing to snap. This is also a major concern for wood-look enthusiasts; why wide planks need more than just nails to stay flat often comes down to the subfloor’s ability to resist seasonal shifts.
Acclimation is About Moisture Not Minutes
Another ‘pro’ myth is that leaving hardwood in a room for 48 hours is enough. I once ruined a gorgeous cherry floor because I followed the ‘two-day rule’ during a humid summer. The wood looked fine when I nailed it down, but as soon as the winter heater kicked in, the planks shrunk, leaving gaps big enough to hide a credit card. Real expertise means knowing how to acclimate your hardwood without taking over the whole house by using a moisture meter. You are looking for the wood’s moisture content to be within 2% of the subfloor’s moisture. Time is irrelevant; chemistry is everything. If you rush this, you’ll be searching for how to fix a large gap in your floating floor row by Christmas. Have you ever fallen into this trap and had to watch your beautiful floor change shape? Let me know in the comments.
Don’t Skimp on the Tools That Save Your Back
When I first started, I thought a standard rubber mallet and a prayer were enough to seat a floor. I was wrong. If you want to avoid those nagging gaps, you need 7 tools you actually need for a professional diy hardwood install. My absolute non-negotiable is a high-quality pinless moisture meter. It is the only way to truly know if your subfloor is ready. I’ve seen guys rely on the ‘feel’ of the wood, and three months later, they are looking up how to identify water damage in hardwood before it starts to rot. Before I ever crack a box of flooring, I perform the bucket test how to check your concrete slab for excessive moisture to ensure I’m not trapping a swamp under my new investment. For the actual installation, I swapped my rubber mallet for a 4-lb dead blow. Why? Because a standard mallet bounces, wasting half your energy. A dead blow hammer uses sand or steel shot to drive the force directly into the plank, which is why you should use a dead blow hammer for floor capping and tight transitions without marring the surface finish.
How do I keep my new floor looking like Day One?
Maintenance is where most DIYers fail. I’ve watched homeowners spend five figures on a floor only to ruin it with a $30 steam mop. According to the National Wood Flooring Association (NWFA) Technical Manual, excessive heat and moisture are the leading causes of finish delamination. This is exactly why you should never use a steam mop on engineered wood floors; the steam forces moisture into the core layers, causing them to swell and peel. Instead, focus on hardwood floor care secrets to longevity and shine, which usually involve a simple microfiber mop and a pH-neutral cleaner. If you’ve just finished a project, knowing how to clean hardwood floors after a major renovation is critical because construction dust is highly abrasive. If you don’t get that grit up immediately, it acts like sandpaper under your shoes, dulling the finish before you even move the furniture back in.
Where Flooring Technology is Headed in 2025
The industry is moving toward ‘intelligent’ substrates and hybrid materials that resist thermal expansion better than ever. I predict that within the next few years, we will see self-leveling compounds with built-in color-change indicators that tell you exactly when the moisture levels are low enough to install. We are already seeing the beginning of this with advanced primers that prevent why your self leveler is peeling off the concrete in sheets by creating a literal chemical bridge. For those working with tiles, we are seeing a massive shift toward larger formats that require precise floor leveling techniques to achieve flawless surfaces. The days of ‘eyeballing’ a flat floor are gone; lasers and digital levels are becoming the standard even for weekend warriors. If you want to stay ahead of the curve, I highly recommend you master the basics of the ultimate guide to floor leveling for a perfect finish now. Before you make your next cut, try the tape trick for preventing splinters when cutting lvp planks—it’s a small, advanced step that makes your edges look like they were cut in a factory.
The Expensive Mistakes I’ll Never Make Again
After years of wrestling with grout and subfloors, I’ve realized that the difference between a DIY look and a professional finish comes down to the things you can’t see. First, prep isn’t just a phase; it’s the entire foundation. If you spend three days prepping and only one day laying tile, you’re on the right track. I once rushed the prep and ended up with a beautiful floor that started clicking and shifting within six months. Second, moisture is your greatest enemy and your most fickle friend. Whether you are avoiding the 7 mistakes that ruin your luxury vinyl plank installation or waiting for grout to set, humidity control is everything. Finally, never ignore the ‘bounce.’ If you feel a slight dip under your feet before you start, that dip will become a crack later. Fixing it now is much cheaper than tearing it up later.
The Toolkit That Never Leaves My Truck
I don’t believe in buying every gadget in the aisle, but there are a few non-negotiables that turned my work from ‘okay’ to ‘exceptional.’ A pinless moisture meter is my most-used tool because it takes the guesswork out of the subfloor. I also swear by a 3-foot straightedge for a quick check, following the step-by-step guide to flooring installation and leveling success to ensure the surface is flat. For those of you tackling LVP or hardwood, a dead blow hammer is essential for seating planks without damaging the tongues. These aren’t just tools; they are the guardians of your project’s longevity. I trust these specifically because they address the structural integrity of the floor, not just the aesthetics.
Building Something That Lasts
Flooring installation is more than just a home improvement task; it’s an investment in the legacy of your space. It can be overwhelming to look at a bare subfloor and wonder where to start, but by mastering floor leveling pro secrets for perfect installations, you are already ahead of 90% of homeowners. Take your time, trust the process, and remember that every professional result starts with a solid understanding of flooring installation fundamentals. You have the tools, the knowledge, and the strategy to create something beautiful. Now, it’s time to get to work. Have you ever had a flooring project go sideways because of a subfloor surprise? Let me know in the comments below!