
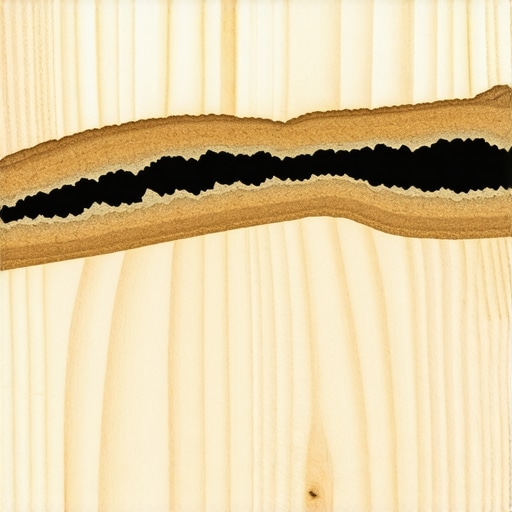
I still remember the smell of toasted oak filling my living room three years ago. I was standing behind a heavy drum sander, feeling like a DIY champion, confident that I was about to breathe new life into my tired floors. Then, in a fraction of a second, the beautiful golden oak grain gave way to a dull, gray patch of plywood. My heart sank straight through the subfloor. I had sanded right through the wear layer of my engineered wood planks. It was an expensive, embarrassing mistake that required replacing several boards, and it taught me a lesson I will never forget: unlike solid timber, engineered flooring has a very strict boundary line.
The Thin Line Between Beauty and Ruin
Engineered wood is a marvel of modern home design, offering the gorgeous look of real hardwood with much better stability against humidity. But many homeowners don’t realize just how thin that top veneer actually is. When you are undertaking a hardwood floor refinishing project, treating engineered wood like solid oak is a recipe for disaster. Once you sand through that precious top layer, there is no magic stain or finish that can restore it; your only option is a costly replacement.
Today, we are going to dive into exactly why engineered wood cannot handle aggressive sanding, how to identify your floor’s limits, and how to preserve your floors for decades without ruining them. According to the National Wood Flooring Association, some thin engineered veneers are less than 2 millimeters thick, meaning a single pass with a heavy-grit sandpaper can completely destroy them. Before you even touch a sanding machine, you must learn how to tell if your hardwood can handle another sanding to avoid the exact heartbreak I experienced.
Is sanding your engineered floors actually worth the risk?
It is a question I hear from neighbors all the time. They want to get rid of surface scratches but are absolutely terrified of ruining their investment. The truth is, light scuffing and recoating is usually all you need to restore that beautiful luster. If you do need to sand, you have to use an incredibly light touch. If you are dealing with deeper issues, like uneven subfloors causing your planks to flex and wear unevenly, you might actually be facing a subfloor issue. In those cases, proper prep work like floor leveling during the initial install is what prevents the uneven wear that tempts people to sand too deep in the first place.
Have you ever noticed a thin spot in your flooring, or perhaps you are standing in your living room right now, sandpaper in hand, wondering if you are about to make a huge mistake? Tell me about your flooring projects in the comments below, and let’s make sure you don’t make the same costly mistake I did! Next, we will look at how to safely assess your floor’s wear layer before taking action.
Step-by-Step Verification and Safe Refinishing Techniques
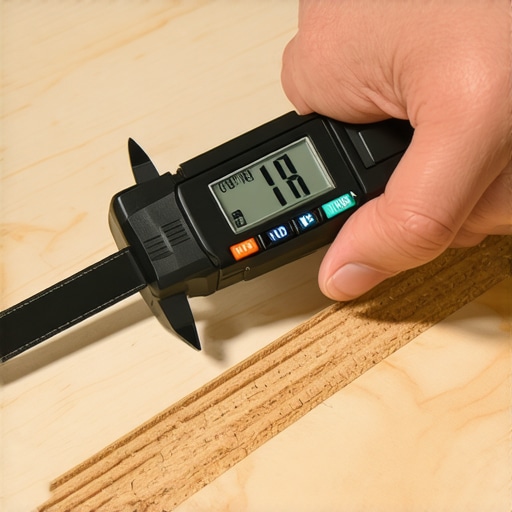
Before you ever switch on a powerful floor machine, you must determine exactly how much wood you have left to work with. Think of your engineered wood floor like an ice-capped lake. The ice layer is your real hardwood veneer, and the dark water beneath is the plywood core. If you do not measure the thickness of that ice, you will break through. The safest way to verify this is to find a floor register or a transition strip where the edge of the flooring is exposed. Take a digital caliper or a simple ruler and measure that top wood layer. If it is less than 2 millimeters thick, put the heavy sanders away. Your only safe option is a light chemical recoat or very gentle hand scuffing.
How to Safely Scuff Your Floors Without Sanding Through
When I was working on my brother-in-law’s master bedroom, I faced a highly sensitive veneer that measured exactly 2 millimeters. Instead of renting a heavy drum sander, which behaves like a hungry lawnmower on soft wood, I opted for a buffer equipped with a fine maroon screening pad. This process is called screening or recoating. It does not strip the wood down to its raw state, but rather scuffs up the old polyurethane coat so that a new finish layer can bond directly to it. I carefully swept the floor, ran the buffer in slow, overlapping passes, and successfully erased years of surface scuffs without touching the underlying veneer. If you want to make sure your floors last, mastering hardwood floor care secrets to longevity and shine is far safer than aggressive sanding cycles.
Prepping Your Surface and Eliminating Minor Imperfections
If you have confirmed your veneer is thick enough for a light sanding, you must prepare the surface perfectly. Vacuum every ounce of grit from the room. A tiny piece of trapped gravel under a sanding pad acts like a diamond tip, carving deep gouges that you cannot easily buff out of a thin wear layer. Keep your sander moving constantly; never let it sit in one spot for even a second. If you encounter deep gouges or spots where the finish is completely gone, focus on localized repairs. For rooms where your wood transitions to other surfaces, you may want to look into best tile trends for complementing hardwood floors this year to create gorgeous, durable boundaries that reduce wear in high-traffic areas.
Applying the Protective Finish for Long Term Defense
Once your floor is scuffed and perfectly clean, apply a high-quality water-based polyurethane. Water-based formulas dry quickly and do not amber over time, keeping the natural tone of your wood pristine. However, you must apply thin, even coats to prevent pooling. If you notice any rough texture as the finish dries, it is often due to dust settling or raised wood grain. Learning why your hardwood finish feels rough after drying can save you from having to restart the entire process. Apply two to three coats, allowing proper drying time between each, to build a thick shield that keeps everyday wear far away from your precious wood veneer.
When you read standard DIY blogs, the advice for updating your home seems incredibly straightforward. They tell you to just sand down your old boards, throw down some leveler, and start your flooring installation with confidence. But after spending years fixing both my own blunders and those of well-meaning friends, I have realized that the common wisdom is often dangerously incomplete. In fact, many standard practices actually set you up for long-term structural failure.
The Great Leveling Lie and Why Your Subfloor is Screaming
Everyone in the home improvement space seems to treat self-leveling underlayment like magic liquid eraser. The common belief is that if you have a dip in your subfloor, you can simply pour some leveler over it and walk away. But in my experience, pouring leveler without addressing why the floor is uneven in the first place is a recipe for cracked tile and popping floor joints. If your subfloor is bouncing because of loose joists, that expensive leveler will eventually crack and turn to dust under your feet. Before you pour a single bag, you need to understand the shim trick for fixing a bouncy plywood subfloor to stabilize the structure first.
Another massive trap is ignoring how the leveler bonds. I once watched a neighbor pour self-leveler directly onto dry plywood without using a primer. Within months, the leveler began cracking and lifting. The dry plywood had instantly sucked all the moisture out of the wet leveler before it could cure properly. You absolutely must use the best primer for installing leveler over plywood to seal the wood first. Otherwise, you are just throwing money down the drain.
Why does your floor click and pop when you walk across it?
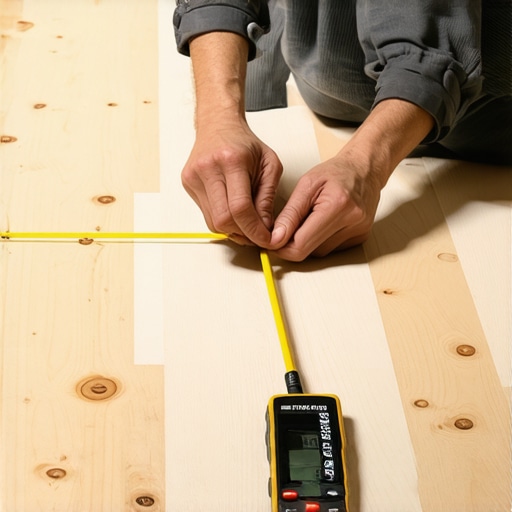
If you have installed a beautiful floating floor and now hear a distinct clicking or popping sound with every step, you are likely dealing with localized high or low spots. Standard industry guidelines from organizations like the National Wood Flooring Association (NWFA) state that subfloors must be flat to within 3/16 of an inch over a 10-foot radius. Most people try to eyeball this, which is a major mistake. Instead, professionals rely on simple, precise diagnostic tricks. I highly recommend using the string line method for checking floor flatness over 20-feet to catch these problematic slopes before your new planks go down.
The Polyurethane Trap That Ruins Perfectly Sanded Wood
Another classic mistake happens right at the finish line. Homeowners spend hours carefully scuffing their engineered wood, only to rush the topcoat. They think that applying one thick, heavy layer of polyurethane will save them time and provide extra protection. This is a massive illusion. Thick coats of polyurethane trap moisture underneath, leading to a cloudy finish, bubbles, or worse—peeling. You should always apply thin coats, and you must lightly abrade the surface between each application. Skipping this step is the primary reason why your hardwood polyurethane is peeling in sheets after just a year of foot traffic. The mechanical bond between coats is what gives the finish its strength.
Have you ever fallen into this trap or ended up with a bubbly, peeling floor finish? Let me know in the comments below! If you are planning your next project, take your time on the preparation. Whether you are working on a transition to a new tile layout or refreshing an engineered wood wear layer, success is always found in the microscopic details of your prep work.
That is why I have completely changed how I approach my tool selection and long-term maintenance routines. After years of relying on whatever was cheapest on the shelf, I realized that high-quality, specialized gear is what actually stands between a professional-looking job and a ruined floor that has to be ripped out. Having the right tool in your hand changes your entire posture, giving you the patience to execute steps correctly instead of rushing to finish.
The Tools That Keep My Flooring Projects on Track
When it comes to maintaining precision, I do not go anywhere without my three essential weapons. First is my pinless moisture meter. Before I lay a single strip of hardwood, I scan the subfloor and the new planks to verify that their moisture levels are within 4% of each other. Skipping this step is the fastest way to invite cupping or gapping down the road. If you are preparing a project, you absolutely need to know how to use a moisture meter before installing wood floors to prevent structural shifts.
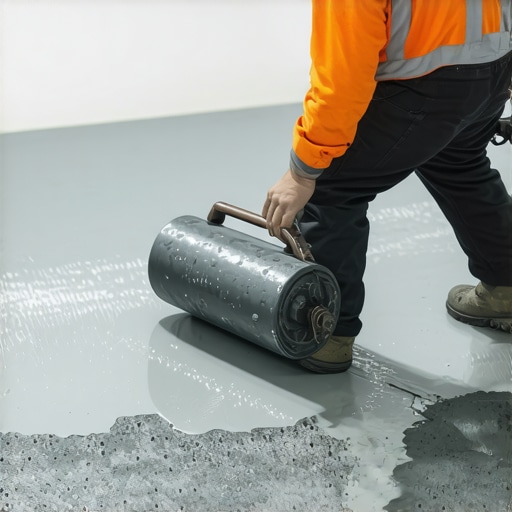
Second, when dealing with self-leveling compounds, I completely abandoned standard hand trowels. Instead, I use a heavy gauge underlayment rake paired with a spiked roller. This specific combination is not a luxury; it is a absolute necessity to release trapped air bubbles that would otherwise weaken the cured underlayment. I highly recommend learning how to use a spiked roller for the perfect leveling pour to achieve that glassy, mirror-flat surface that is vital for large-format tiles. Finally, for sanding those tight areas near baseboards where my large machines would chew up the trim, I rely on a detail detail-sander with a dedicated triangular nose profile. It allows me to get flush against the walls without leaving ugly gouges.
How do I maintain my floors over a lifetime?
True floor longevity is not achieved by applying a new coat of finish every year. Instead, it is about controlling the environment. Wood is a living material that breathes, expanding in the summer heat and contracting during dry winter months. The absolute best way to protect your investment is to run a dedicated humidifier in the colder months to keep your indoor relative humidity between 35% and 55%. This single habit prevents the wood fibers from drying out and pulling apart. If you notice seasonal changes in your living room, you should read up on how to keep your hardwood floors from gapping in the winter to stay ahead of the natural movement of your timber.
Smart Maintenance and the Future of Smart Floor Systems
As we look to the future, the flooring industry is moving rapidly toward high-performance waterborne sealers and embedded sensor technologies. According to the technical specifications from the National Wood Flooring Association (NWFA), future residential installations will likely feature subfloor moisture sensors that sync directly with smart home thermostats to auto-adjust indoor humidity levels. For now, we must rely on our own vigilance. For daily cleaning, always avoid harsh chemicals. The pH-neutral cleaners specifically formulated for polyurethane-coated wood are your safest bet. If you want your hardwood to truly stand the test of time, you need to understand the deeper hardwood floor care secrets to longevity and shine to maintain that perfect luster without damaging the surface.
I highly encourage you to try one advanced tip today: next time you are preparing a room, grab a long, straight board and perform a manual flatness check rather than assuming your floor is ready. Taking that single extra step to verify your subfloor will completely change the quality of your installation.
The Hardest Lessons I Learned on My Own Flooring Journey
Refinishing and prepping floors is not just a weekend chore; it is an unforgiving science where small missteps lead to permanent damage. Here are the core truths I learned the hard way so you can save your budget and your sanity:
- Veneer thickness is absolute: If you ignore the initial measurement of your wear layer, you are playing Russian roulette with your engineered timber. Once the ply backing shows through, there is no going back.
- Never rush the drying window: Trying to accelerate polyurethane drying times by skipping sanding steps always backfires. You must understand why you must sand between polyurethane coats to ensure the chemical and mechanical bonds lock the finish in place.
- Your subfloor dictates your finish: A gorgeous wood plank or tile installation is only as good as the foundation beneath it. If you bypass checking the flatness, your surface materials will flex, squeak, and fail prematurely.
The Field-Tested Tools I Keep in My Work Van
Over the years, I have stopped buying whatever is cheapest at the big-box stores. Instead, I rely on a curated set of specialized tools that ensure a flawless finish every single time:
- Pinless Moisture Meter: This tool is non-negotiable for reading the moisture content of your subfloor and engineered boards before nailing or gluing.
- Maroon Buffing Pads: Excellent for gently abrading the surface of sensitive veneers without eating through the actual wood layer.
- Detail Corner Sanders: Crucial for tight spaces. If you do not have one, you should learn how to sand tight corners where your power sander can’t reach to prevent ugly, uneven transitions near your baseboards.
Take Control of Your Next Flooring Transformation
Do not let the fear of making a mistake keep you from restoring the beauty of your home. When you take the time to measure your wear layers, prepare your subfloor with precision, and apply finishes with a patient hand, you will achieve professional-grade results that stand up to years of heavy foot traffic. Your home deserves a foundation that is both structurally sound and visually stunning, and you have all the knowledge you need to make that happen. Have you ever run into a surprise while sanding engineered wood or leveling an uneven subfloor? Let me know your experiences and questions in the comments below!