
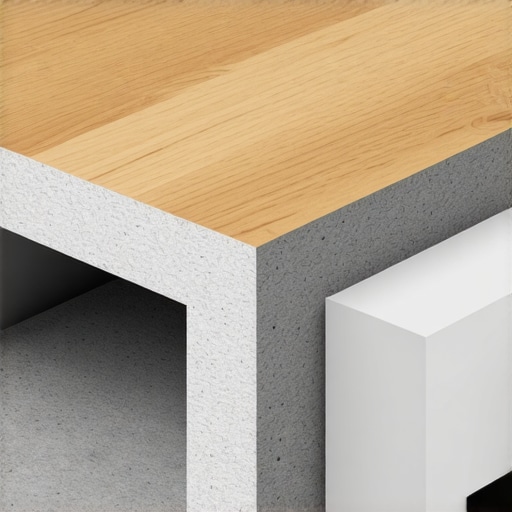
It was 11:15 PM on a Tuesday when I heard the unmistakable, rhythmic thudding of my downstairs neighbor’s broom handle striking my floorboards. I was frozen in place, holding a heavy ceramic mug, terrified to take another step. That was my painful wake-up call. I had just finished a gorgeous flooring remodel, but in my haste, I ignored the critical layers underneath. My beautiful new space had essentially become a giant drum, projecting every single footstep directly into the home of the poor soul living below me.
Why Condo Soundproofing Isn’t Just Nice to Have—It’s Survival
Living in close quarters means sharing more than just a property line; you are sharing a structural envelope. When you decide to tackle a flooring installation, you cannot just think about what looks good under your feet. You have to consider the acoustics. If you install hardwood or tile without the proper barrier, you will quickly find yourself receiving strongly worded emails from your condo association. Most multi-family buildings enforce strict Impact Insulation Class (IIC) ratings, which measure how much impact noise travels through the floor grid. Ignoring this is easily one of the most expensive flooring installation mistakes to avoid, because fixing it later means tearing up your beautiful new floor entirely.
Is soundproofing underlayment actually worth the extra cost?
I used to think thin foam sheets were enough to get by. They are cheap, easy to lay down, and surely they do something, right? Wrong. That was the exact mistake I made during my first DIY remodel, and I paid for it dearly with a ruined relationship with my neighbor and a massive headache. Cheap, low-density foam does practically nothing to dampen low-frequency footstep thuds. If you want real, peaceful silence, you need high-density materials like natural cork or specialized acoustic rubber. In fact, the secret to soundproofing an upstairs floor with cork lies in its unique cellular structure, which acts as millions of microscopic shock absorbers. According to acoustic engineering data from the Acoustical Society of America, dense materials like cork can reduce impact noise transmission by up to 20 decibels or more compared to standard foam. Have you ever had a neighbor complain about your floors, or are you trying to proactively prevent that nightmare right now?
First Lay the Groundwork with Perfect Subfloor Prep
You cannot build a quiet floor on an uneven foundation. Think of your subfloor as the chassis of a car; if it is warped, everything else will rattle and squeak. During my first condo renovation, I tried to install dense rubber acoustic underlayment directly over a wavy concrete subfloor. Within weeks, the underlayment flexed into the low spots, causing the interlocking joints of my beautiful hardwood floors above to flex, rub, and creak like a wooden ship in a storm. To prevent this soundproofing disaster, you must first master the art of subfloor prep.
Before you roll out a single inch of underlayment, grab a long straightedge to measure flatness. If you find low spots, you must address them immediately. The most efficient way to achieve a glass-smooth base is with self-leveling underlayment, but you have to seal the area properly first. If you do not, your expensive compound will run straight through any gaps. Learning how to stop your floor leveler from leaking through the subfloor is the first crucial step in preserving your acoustics and your budget.
How to Check for High Spots and Low Spots
To pinpoint exactly where your floor deviates, throw away the small spirit level. Instead, use the laser level trick for perfectly flat subfloors or run a tight string line across the room. Any gap wider than 3/16 of an inch over a 10-foot span must be leveled out. If you are dealing with a concrete slab, use the flashlight scan for finding high spots in concrete to cast shadows over subtle ridges, which you can then grind down before pouring your leveler. Once your subfloor is perfectly flat, you have eliminated the air pockets that trap and amplify footsteps.
How to Lay Acoustic Underlayment Without Creating Sound Bridges
When you lay your soundproofing barrier, you are creating a floating island. If that island touches the surrounding walls, sound vibrations will bypass the underlayment entirely and travel directly into the wall framing. This acoustic short-circuiting is called sound bridging, and it completely ruins your soundproofing investment. To avoid this, you must run your acoustic underlayment slightly up the walls, creating a continuous tub-like barrier. Only trim the excess underlayment flush after you have finished installing your hardwood floors or tile.
If you are installing tile over your soundproofing layer, the process is even more delicate. You need to use a high-performance elastomeric membrane or thick cork that can handle the weight of mortar. When working with thinset adhesive, you must be extremely precise. Using the wrong tool can cause the mortar to squeeze up through the joints, solidifying into hard bridges that transmit impact sound. If you are not careful with your application, you might find that why your trowel size is ruining your tile bond is actually the root cause of both a poor adhesive hold and increased noise transmission.
The Floating Floor Secret for Hardwood
If you are installing hardwood floors, opt for a floating click-lock or glue-joint system over a loose-laid acoustic pad. Glue-down installations are incredibly secure, but unless you use a highly specialized, expensive acoustic adhesive, the cured glue can act as a bridge for sound. By keeping the hardwood physically separated from the subfloor with high-density cork, you dampen the energy of every footstep. To ensure the floor remains stable and doesn’t bounce under your feet, make sure your subfloor leveling was flawless before laying the pad.
When you dive deep into condo acoustic preparation, you quickly realize that the most common advice on the internet is not just overly simplistic—it is often flat-out wrong. Most online forums will tell you to simply throw down a standard underlayment, slap your floor on top, and call it a day. But in my years of renovating tight spaces, I have learned that sound is like water; it will find the absolute path of least resistance. If you do not understand how physical resonance actually behaves in a multi-family building, your beautiful project will ultimately fail to deliver the peace you are paying for.
Why is your high-end underlayment failing to stop the noise?
The most pervasive myth in the flooring industry is that you can solve sound transmission issues solely by buying an underlayment with a high nominal rating. People shell out thousands of dollars for top-tier acoustic barriers, only to discover that their downstairs neighbor can still hear every single footstep. What they do not realize is that those laboratory-tested ratings are achieved under perfect, clinically controlled conditions that do not match the real-world physics of your home. If you have ever wondered why your new tile floor is making a cracking sound or failing to block impact vibrations, the culprit is almost always a micro-layer of air trapped beneath an uneven subfloor. The Acoustical Society of America has repeatedly demonstrated in field tests that structural flanking—where sound travels around a barrier rather than through it—can reduce the real-world performance of an acoustic underlayment by up to 50% if the subfloor is not perfectly flat and sealed.
This is why skipping the initial prep is the ultimate trap. When you install a floating floor over even minor dips, the floorboards flex into those voids. This movement acts like a bellows, pushing air and sound waves through the joints and directly into the structural slab below. To prevent this, you must master how to achieve flawless floor leveling before tile laying or hardwood installation. Doing so ensures that your acoustic underlayment remains fully compressed and functioning as a true dampener, rather than a hollow amplifier.
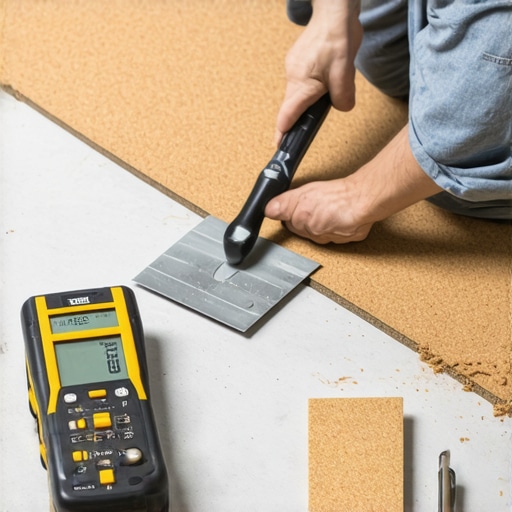
Another critical mistake is choosing materials based on convenience rather than density. Many DIYers gravitate toward cheap foam because it is easy to cut and roll out. However, if you are working with premium materials, you must pair them with an equally robust base. When combining hardwood and tile in adjacent rooms, for instance, you need an underlayment that can handle two completely different structural loads. Understanding tile selection tips for elegant hardwood floors in 2025 is not just about matching colors; it is about ensuring both materials are decoupled from the subfloor at the same finished height to prevent acoustic bridging at the transitions. Have you ever fallen into this trap and had to pull up your finished floor? Let me know in the comments below.
Once you have painstakingly isolated your floor from the building’s structural frame, the job is not truly over. Soundproof systems are dynamic, and maintaining that peace requires a deliberate approach to care. I have seen incredibly quiet installations ruined months down the road simply because the homeowner used the wrong maintenance tools or let humidity levels swing wildly. When it comes to preserving your investment, you need to think long-term and equip yourself with the exact tools that professional flooring contractors rely on daily.
How do I maintain an acoustic floor installation over time?
The secret to keeping a sound-dampened floor quiet for decades lies in strict environmental control and avoiding destructive cleaning habits. If you have installed floating hardwood over cork, you must monitor your indoor climate. Wood naturally expands and contracts with seasonal humidity shifts, and if the relative humidity drops too low, the boards will shrink. This can cause the interlocking joints to rub against each other, creating annoying micro-squeaks. To combat this, I always keep a digital hygrometer in the room to maintain a steady 35% to 55% humidity level. Additionally, avoid introducing excessive moisture during cleanup. For example, learning why you should never use a steam mop on click-lock floors is critical; the intense heat and moisture from a steam mop can bypass the top wear layer, swell the core, and warp the planks, completely misaligning your perfectly leveled acoustic foundation.
The Diagnostic Tools Every Advanced Installer Needs
If you want to achieve professional results, you must stop guessing and start measuring. The absolute most important diagnostic tool in my bag is a pinless moisture meter. Before you even think about mixing your leveler or laying down an underlayment, you need to know what is happening deep inside the subfloor. I personally use the Wagner Meters Orion 950 because it provides deep-depth moisture readings without damaging the wood or concrete. According to technical bulletins from the National Wood Flooring Association (NWFA), installing flooring over a subfloor with high moisture content is the number one cause of adhesive failure and structural cupping. Understanding how to use a moisture meter before installing wood floors is the absolute line of defense between a lifetime of silent comfort and a warped, squeaky disaster.
For leveling prep, skip the standard hand levels. I swear by my self-leveling cross-line laser. It projects a perfectly flat reference line across the entire room, allowing you to instantly identify low spots that need compound or high spots that require grinding. If you are preparing to pour self-leveling underlayment to achieve that glass-smooth surface, make sure you use a heavy-duty mixing drill and a spiked roller. Standard drills will burn out, and without a spiked roller, trapped air bubbles will rise and pop, leaving your self-leveler looking like a slice of Swiss cheese. Mastering the secret to mixing leveler for a glass smooth finish is only possible when you combine the right speed with these professional tools.
The Future of Quiet Flooring Solutions
Looking ahead, the demand for high-performance acoustic floors is skyrocketing as urban density increases. I predict that within the next five years, building codes will move away from relying on retrospective IIC ratings and transition toward strict real-world testing of completed installations. We are already starting to see smart, composite underlayments hit the market that integrate ultra-thin, recycled rubber grids with vapor-barrier films. These innovations will make it easier than ever to achieve superior sound dampening in a single, fast installation step. But remember, even the smartest materials will fail if your subfloor prep is sloppy. I highly recommend taking action right now: grab a straightedge, find your laser level, and commit to checking your room’s flatness before you buy your flooring material. Taking that one extra step will save you thousands of dollars and guarantee a lifetime of quiet luxury.
What the Pros Won’t Tell You About Noise Isolation
When you are planning a high-end flooring installation, relying solely on retail product packaging specs is a recipe for disaster. The biggest secret in the industry is that true acoustic isolation cannot be bought in a roll; it must be built step-by-step. Let’s look at three critical lessons that changed my entire approach to soundproofing:
- Air gaps are acoustic amplifiers: Any tiny pocket of air under an uneven subfloor turns your room into a drum. Perfecting your floor leveling process is actually the single most important soundproofing step you can take.
- Flexibility beats rigidity: Rigid adhesives act like telephone lines for impact vibrations. If you are laying down premium flooring, you must keep the system completely decoupled from the walls.
- Waterproof does not mean soundproof: Many homeowners assume thick vinyl backing blocks noise, but standard underlayment lacks the density needed to stop structural vibration.
The Diagnostic Gear I Never Go To Work Without
If you want to move past guesswork and start getting professional results, you need a highly specific set of tools. Over the years, I have refined my toolkit down to these absolute essentials:
- Wagner Meters Orion 950: Before you pour any leveling compound or spread adhesive, you must know your subfloor’s moisture content. To avoid catastrophic failure, you need to know how to use a moisture meter before installing wood floors or tiles.
- A Self-Leveling Cross-Line Laser: Forget traditional bubble levels. I rely on a sharp green laser to cast a perfectly level datum line across the entire room, which is the only way to accurately map high and low spots.
- A Heavy-Duty Mixing Drill & Spiked Roller: When working with self-levelers, you cannot use a standard drill. A specialized mixer prevents heat buildup, and a spiked roller is required to release trapped micro-bubbles during your pour.
Bring Peace and Quiet Back to Your Home
Taking control of your building’s acoustics does not just protect you from angry neighbors; it transforms your home into a true sanctuary. By taking the extra time to properly prep your subfloor, decouple your materials, and select high-performance barriers like cork or specialized rubber, you can enjoy beautiful hardwood or tile without the stress. Make sure you don’t take shortcuts during your next flooring installation, and you will enjoy a silent, solid floor for decades to come.
Have you ever had a neighbor complain about your floors, or did you encounter a tricky leveling challenge on your last DIY project? Let me know in the comments below!