

I still remember the sinking feeling in my chest. It was my very first solo tile job in a cramped upstairs hallway. I had measured twice, bought the expensive polymer-modified thinset, and felt incredibly confident. Three hours later, I stood back to admire my handiwork, only to realize the entire layout had slowly drifted into a crooked, wedge-shaped disaster. What looked straight to my eye at the starting threshold was off by almost two full inches by the time I hit the back wall. It was a humiliating, expensive mistake that forced me to spend hours performing the best way to remove thinset from a plywood subfloor before the mess fully cured.
The Simple Snap That Saves Your Sanity
That day, I learned that your eyes will lie to you, but a snapped chalk line never does. Whether you are prepping for a gorgeous hardwood install or setting heavy porcelain, relying on a wall to be perfectly square is a recipe for disaster. Today, I want to show you how to master the art of snapping layout lines so you never have to rip up cured adhesive or stare at a crooked room for the next twenty years. We are going to establish a foolproof, straight-as-an-arrow reference grid that ensures your very first tile or plank aligns perfectly with your last.
Is a basic string line really worth the hype?
You might be tempted to think that a high-tech, self-leveling laser has rendered the humble chalk box obsolete. I used to think so too. But lasers can get bumped, their batteries die, and in a brightly lit room, their lines can vanish entirely. A physical, snapped line of chalk stays exactly where you put it, offering a crisp, physical guide that does not shift when you step in front of the beam. Before you even think about snapping that string, though, you must ensure your subfloor is completely flat. No amount of perfect layout lines will save you if you skip the critical step of learning how to measure subfloor flatness before you start installing. If you have ever fought with a crooked floor layout halfway through a project, drop a comment below—I would love to hear how you got out of that jam!
Getting Your Grid Square with the 3-4-5 Triangle Method
To keep your layout from drifting, you cannot trust a single wall. Walls bow, curve, and twist. Instead, you need to build a perfectly perpendicular grid right on the subfloor. To do this, I rely on the classic 3-4-5 triangle method. It is basic geometry, but it acts like an absolute compass for your flooring installation. I once tried to eyeball a transition area between a hallway and a living room, and by the time I reached the fireplace, my tiles looked like a staircase. Since that day, I never start a job without measuring out a perfect 90-degree intersection using this exact technique.
First, find the center point of your two opposing end walls and snap a straight line connecting them down the middle of the room. This is your primary control line. Mark a point directly in the center of this line. From this center point, measure exactly 3 feet along your control line and make a clear mark. Next, from that same center point, you will measure outward at what looks like a 90-degree angle and make a temporary mark at 4 feet. To verify it is perfectly square, measure diagonally from your 3-foot mark to your 4-foot mark. If the diagonal distance is exactly 5 feet, your secondary line is perfectly square. Adjust your 4-foot mark until that diagonal hitches exactly on the 5-foot mark, then snap your cross-line. This cross-line is critical when you are learning installing tiles like a pro step-by-step strategies for 2025 because it guarantees your grout joints will not skew as you work outward.
The Right Way to Load and Pull the Chalk String
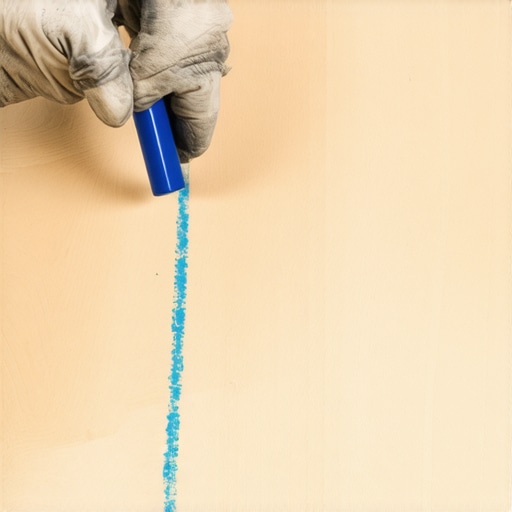
Even with perfect math, a sloppy snap will give you a fuzzy, useless line. A chalk box is like a bow and arrow; if you pull it too high, the string bounces and leaves a wide, blurry double-image on the plywood. Start by giving your chalk box a few good shakes to coat the string, but do not over-saturate it. Pull the string taut across your two established reference marks. Press the string firmly against the floor on both ends with your fingers, or use a helper to hold the dumb end. Reach out toward the middle of the span, pinch the string between your thumb and forefinger, lift it straight up about three inches, and let it snap cleanly. If you have to deal with a dark or dusty concrete slab, blue or red chalk works best, while white chalk is great for delicate surfaces where you worry about bleed-through.
Adapting Your Lines for Complex Patterns
Once you have your perpendicular crosshairs, you can easily map out more complex designs. For instance, if you want to layout a diagonal layout or a complex herringbone design, you simply bisect your 90-degree angles to create 45-degree guide paths. This is especially useful when mastering the chalk line method for perfectly centered room layouts, as it prevents your focal points from looking off-center. If you are prepping the floor for different materials, like matching a slate entry to a wood living room, these lines will keep your boundaries incredibly sharp. However, before you lay a single trowel of mortar along these lines, make sure you know how to stop thinset from skimming over before you set tile so your adhesive remains sticky enough to bond securely to the prepped subfloor.
When you are deep in the zone, snapping lines and dry-laying pieces, it is incredibly easy to fall victim to the ‘good enough’ mindset. I used to think that a millimeter off here or there on my primary grid would just get swallowed up in the grout lines or hidden under a baseboard. But the reality of flooring installation fundamentals is that small errors do not stay small; they compounding exponentially across a large room. Let us dig deeper into why standard layout habits often fail us and look at the advanced nuances that pros use to keep their projects flawless.
Why does my perfectly snapped grid still result in crooked lines?
The biggest myth in the flooring world is that a snapped line is always a straight line. Many installers believe that if they pull a string tight and snap it, the physics of tension guarantees a perfect reference. However, a study by the National Wood Flooring Association highlights how subfloor surface friction and minor debris can deflect a chalk line mid-snap, introducing a slight bow over long spans. If your subfloor has tiny wood chips, dried drywall mud, or pitting, the string can catch on these obstructions. When you lift and release the string, it does not snap straight down—it deflects sideways off the high spot, creating a curved line. This is why I always run a scraper over my path first, then use the string line method for checking floor flatness over 20 feet to guarantee there are no physical obstructions to throw off my chalk box.
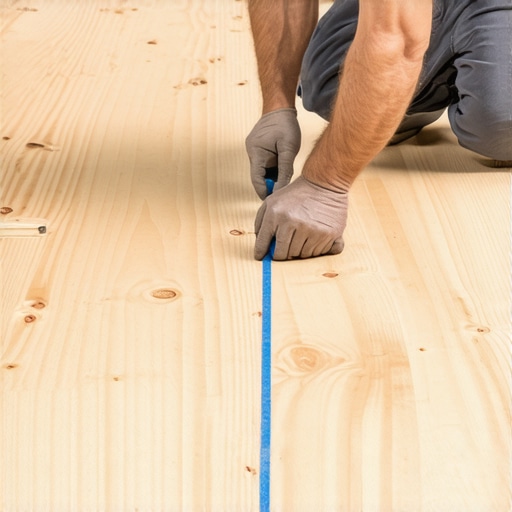
Another major trap is neglecting the thickness of your chalk line itself. A standard heavy-duty construction string leaves a line that is almost 1/16 of an inch wide. If you consistently align your tile or wood planks to the ‘left side’ of the line on one row, and then shift to the ‘right side’ on the next, you have just introduced a massive variance into your layout. To combat this, master installers use ultra-thin micro-lines, often filled with black or violet dye for extreme contrast. When you are executing precise tile installation pointers, always pick a single side of your snapped line—either bury the line completely or keep it fully visible—and stick to that exact reference boundary across the entire floor.
If you ignore these tiny variances, you will eventually face the dreaded ‘lippage’ or wedge joints where nothing seems to fit quite right. Have you ever fallen into this trap and had your grid slowly drift on you? Let me know in the comments below! If you are already dealing with a slightly uneven layout and need to salvage it, learning how to fix a lippage problem in your new tile layout is your next logical step to ensure a smooth, professional finish.
Once you have conquered the complex math of your grid, your layout is only as good as the tools and long-term care practices you use to defend it. For my personal projects, I no longer reach for cheap big-box store chalk lines. I exclusively use the Tajima Ultra-Thin Chalk-Rite box. It produces a razor-sharp 0.5mm line that eliminates the margin of error entirely. This level of precision is exactly what you need to avoid compounding errors when diving into mastering floor leveling pro secrets for perfect installations. In the future, I predict we will see augmented reality (AR) glasses completely project digital layout grids onto subfloors, but until that tech becomes dirt cheap and highly durable for dusty jobsites, a physical micro-line remains the absolute gold standard for precision.
How do I maintain my floor alignment over time?
True floor alignment is not just about the day of the install; it is about managing the structural shift of your home. To prevent your hard work from buckle-cracking or shifting, you must protect your expansion gaps and control joint lines. Wood and tile expand at vastly different rates due to seasonal humidity changes, a physical reality thoroughly documented in the Forest Products Laboratory’s wood handbook. If you fail to maintain these perimeter gaps, your meticulously aligned lines will eventually buckle. Keeping your hardwood floors in pristine condition also requires knowing hardwood floor care secrets to longevity and shine so that moisture does not seep into the seams and ruin the straight profile you worked so hard to establish.
When transitioning between different materials, I always suggest reviewing step-by-step guide to flooring installation and leveling success to ensure your subfloor heights match perfectly across doorways. I highly encourage you to try one specific advanced tip on your next job: scrape your layout path perfectly clean with a razor scraper before snapping your line to completely eliminate string deflection. If you want more professional guidance, feel free to visit our contact us page to get in touch with our team.
I still remember the sinking feeling in my chest. It was my very first solo tile job in a cramped upstairs hallway. I had measured twice, bought the expensive polymer-modified thinset, and felt incredibly confident. Three hours later, I stood back to admire my handiwork, only to realize the entire layout had slowly drifted into a crooked, wedge-shaped disaster. What looked straight to my eye at the starting threshold was off by almost two full inches by the time I hit the back wall. It was a humiliating, expensive mistake that forced me to spend hours performing the best way to remove thinset from a plywood subfloor before the mess fully cured.
The Simple Snap That Saves Your Sanity
That day, I learned that your eyes will lie to you, but a snapped chalk line never does. Whether you are prepping for a gorgeous hardwood install or setting heavy porcelain, relying on a wall to be perfectly square is a recipe for disaster. Today, I want to show you how to master the art of snapping layout lines so you never have to rip up cured adhesive or stare at a crooked room for the next twenty years. We are going to establish a foolproof, straight-as-an-arrow reference grid that ensures your very first tile or plank aligns perfectly with your last.
Is a basic string line really worth the hype?
You might be tempted to think that a high-tech, self-leveling laser has rendered the humble chalk box obsolete. I used to think so too. But lasers can get bumped, their batteries die, and in a brightly lit room, their lines can vanish entirely. A physical, snapped line of chalk stays exactly where you put it, offering a crisp, physical guide that does not shift when you step in front of the beam. Before you even think about snapping that string, though, you must ensure your subfloor is completely flat. No amount of perfect layout lines will save you if you skip the critical step of learning how to measure subfloor flatness before you start installing. If you have ever fought with a crooked floor layout halfway through a project, drop a comment below—I would love to hear how you got out of that jam!
Getting Your Grid Square with the 3-4-5 Triangle Method
To keep your layout from drifting, you cannot trust a single wall. Walls bow, curve, and twist. Instead, you need to build a perfectly perpendicular grid right on the subfloor. To do this, I rely on the classic 3-4-5 triangle method. It is basic geometry, but it acts like an absolute compass for your flooring installation. I once tried to eyeball a transition area between a hallway and a living room, and by the time I reached the fireplace, my tiles looked like a staircase. Since that day, I never start a job without measuring out a perfect 90-degree intersection using this exact technique.
First, find the center point of your two opposing end walls and snap a straight line connecting them down the middle of the room. This is your primary control line. Mark a point directly in the center of this line. From this center point, measure exactly 3 feet along your control line and make a clear mark. Next, from that same center point, you will measure outward at what looks like a 90-degree angle and make a temporary mark at 4 feet. To verify it is perfectly square, measure diagonally from your 3-foot mark to your 4-foot mark. If the diagonal distance is exactly 5 feet, your secondary line is perfectly square. Adjust your 4-foot mark until that diagonal hitches exactly on the 5-foot mark, then snap your cross-line. This cross-line is critical when you are learning installing tiles like a pro step-by-step strategies for 2025 because it guarantees your grout joints will not skew as you work outward.
The Right Way to Load and Pull the Chalk String
Even with perfect math, a sloppy snap will give you a fuzzy, useless line. A chalk box is like a bow and arrow; if you pull it too high, the string bounces and leaves a wide, blurry double-image on the plywood. Start by giving your chalk box a few good shakes to coat the string, but do not over-saturate it. Pull the string taut across your two established reference marks. Press the string firmly against the floor on both ends with your fingers, or use a helper to hold the dumb end. Reach out toward the middle of the span, pinch the string between your thumb and forefinger, lift it straight up about three inches, and let it snap cleanly. If you have to deal with a dark or dusty concrete slab, blue or red chalk works best, while white chalk is great for delicate surfaces where you worry about bleed-through.
Adapting Your Lines for Complex Patterns
Once you have your perpendicular crosshairs, you can easily map out more complex designs. For instance, if you want to layout a diagonal layout or a complex herringbone design, you simply bisect your 90-degree angles to create 45-degree guide paths. This is especially useful when mastering the chalk line method for perfectly centered room layouts, as it prevents your focal points from looking off-center. If you are prepping the floor for different materials, like matching a slate entry to a wood living room, these lines will keep your boundaries incredibly sharp. However, before you lay a single trowel of mortar along these lines, make sure you know how to stop thinset from skimming over before you set tile so your adhesive remains sticky enough to bond securely to the prepped subfloor.
When you are deep in the zone, snapping lines and dry-laying pieces, it is incredibly easy to fall victim to the ‘good enough’ mindset. I used to think that a millimeter off here or there on my primary grid would just get swallowed up in the grout lines or hidden under a baseboard. But the reality of flooring installation fundamentals is that small errors do not stay small; they compounding exponentially across a large room. Let us dig deeper into why standard layout habits often fail us and look at the advanced nuances that pros use to keep their projects flawless.
Why does my perfectly snapped grid still result in crooked lines?
The biggest myth in the flooring world is that a snapped line is always a straight line. Many installers believe that if they pull a string tight and snap it, the physics of tension guarantees a perfect reference. However, a study by the National Wood Flooring Association highlights how subfloor surface friction and minor debris can deflect a chalk line mid-snap, introducing a slight bow over long spans. If your subfloor has tiny wood chips, dried drywall mud, or pitting, the string can catch on these obstructions. When you lift and release the string, it does not snap straight down—it deflects sideways off the high spot, creating a curved line. This is why I always run a scraper over my path first, then use the string line method for checking floor flatness over 20 feet to guarantee there are no physical obstructions to throw off my chalk box.
Another major trap is neglecting the thickness of your chalk line itself. A standard heavy-duty construction string leaves a line that is almost 1/16 of an inch wide. If you consistently align your tile or wood planks to the ‘left side’ of the line on one row, and then shift to the ‘right side’ on the next, you have just introduced a massive variance into your layout. To combat this, master installers use ultra-thin micro-lines, often filled with black or violet dye for extreme contrast. When you are executing precise tile installation pointers, always pick a single side of your snapped line—either bury the line completely or keep it fully visible—and stick to that exact reference boundary across the entire floor.
If you ignore these tiny variances, you will eventually face the dreaded ‘lippage’ or wedge joints where nothing seems to fit quite right. Have you ever fallen into this trap and had your grid slowly drift on you? Let me know in the comments below! If you are already dealing with a slightly uneven layout and need to salvage it, learning how to fix a lippage problem in your new tile layout is your next logical step to ensure a smooth, professional finish.
Once you have conquered the complex math of your grid, your layout is only as good as the tools and long-term care practices you use to defend it. For my personal projects, I no longer reach for cheap big-box store chalk lines. I exclusively use the Tajima Ultra-Thin Chalk-Rite box. It produces a razor-sharp 0.5mm line that eliminates the margin of error entirely. This level of precision is exactly what you need to avoid compounding errors when diving into mastering floor leveling pro secrets for perfect installations. In the future, I predict we will see augmented reality (AR) glasses completely project digital layout grids onto subfloors, but until that tech becomes dirt cheap and highly durable for dusty jobsites, a physical micro-line remains the absolute gold standard for precision.
How do I maintain my floor alignment over time?
True floor alignment is not just about the day of the install; it is about managing the structural shift of your home. To prevent your hard work from buckle-cracking or shifting, you must protect your expansion gaps and control joint lines. Wood and tile expand at vastly different rates due to seasonal humidity changes, a physical reality thoroughly documented in the Forest Products Laboratory’s wood handbook. If you fail to maintain these perimeter gaps, your meticulously aligned lines will eventually buckle. Keeping your hardwood floors in pristine condition also requires knowing hardwood floor care secrets to longevity and shine so that moisture does not seep into the seams and ruin the straight profile you worked so hard to establish.
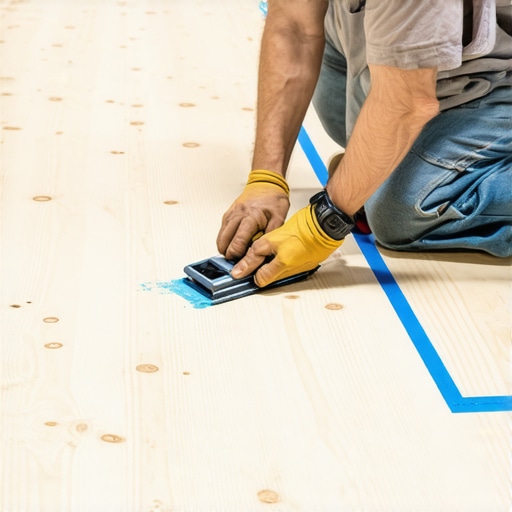
When transitioning between different materials, I always suggest reviewing step-by-step guide to flooring installation and leveling success to ensure your subfloor heights match perfectly across doorways. I highly encourage you to try one specific advanced tip on your next job: scrape your layout path perfectly clean with a razor scraper before snapping your line to completely eliminate string deflection. If you want more professional guidance, feel free to visit our contact us page to get in touch with our team.
Three Hard Lessons My Crooked Subfloors Taught Me
Over the years, I have made enough mistakes to fill a textbook. The first major lesson is that a beautiful tile does not cover up an un-prepped surface; floor leveling challenges will always make themselves known. Second, do not trust your walls to be straight just because the house is brand new. In fact, newer tract homes often have more framing variances than century-old craftsmanship. Finally, always budget for extra material to account for the unique cuts that happen when you approach the perimeter of your snapped lines. It is far better to have an extra box of tile sitting in the garage than to realize you are two pieces short on a Sunday afternoon.
The Precise Gear I Count on to Maintain True Alignment
I do not travel to any jobsite without a reliable, heavy-duty scraping tool to guarantee there is zero grit beneath my chalk lines. My primary layout toolkit contains a high-quality braided string line, a solid brass plumb bob, and a professional-grade micro-chalk box that leaves incredibly crisp marks. For more intensive preparation, I always refer to detailed the ultimate guide to floor leveling for a perfect finish to make sure my structural base matches the precision of my layout tools. These simple items are inexpensive, but they completely change your confidence level when you begin dropping down your first rows of material.
Bringing Your Dream Floor into Perfect Alignment
At the end of the day, taking an extra hour to measure, sweep, and carefully snap a grid is what separates an amateur DIY job from a breathtaking, professional-grade floor. Whether you are laying down classic ceramic squares or creating a custom pattern with hardwood floors, a little patience during the setup phase will pay massive dividends. Do not rush the geometry—trust the math, secure your lines, and build a layout that will remain perfectly square for decades to come.
Have you ever had a flooring installation slowly drift out of alignment on you? Let me know in the comments below which step gave you the most trouble!