
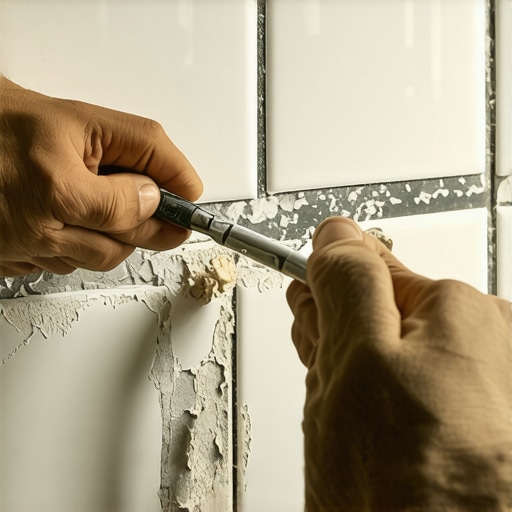
My morning coffee was still steaming when I heard that dreaded, dry crunch under my left heel. I looked down at the entryway of our home and saw it. Another tiny, chalky fissure snaking through the slate tile joints. The house was settling, and it felt like my tile floor was slowly grinding itself into fine powder. I had spent hours the previous spring carefully scraping and packing those joints with standard cement grout, only to watch my hard work crumble away. It was a classic, frustrating cycle that felt like trying to glue a cracked glass back together while someone was gently shaking the table. If you are dealing with a home that breathes, shifts, and moves with the seasons, standard techniques simply will not hold up to the pressure.
The Real Reason Your Grout Keeps Cracking
Houses are not static boxes. They expand, contract, and settle into the earth. When you lock a rigid material like standard cement grout between beautiful tiles, something has to give. Early in my DIY journey, I made the amateur mistake of thinking that mixing a thicker batch of grout or buying an expensive brand would magically solve the movement problem. It did not. I ended up with a dusty, cracked mess because I did not understand how structural shifting impacts rigid flooring joints. If you have ever suffered from why your new tile floor is making a cracking sound, you already know the sinking feeling of realizing the bond underneath has failed.
The secret lies in flexibility. To survive a settling foundation or seasonal joist movement, you must use materials designed to bend without breaking. This is why I eventually abandoned old-school cement grout for high-performance acrylic or siliconized alternatives in high-stress transition zones. According to the Tile Council of North America (TCNA), expansion joints filled with a flexible sealant are actually mandatory for large tiled areas to accommodate naturally occurring structural movement. Today, we are going to look at exactly how to prep those damaged joints and choose the right flexible materials so you only have to do this job once.
Is flexible grout really worth the extra money?
I get this question all the time from skeptical neighbors who look at the price tag of high-performance polymer additives or pre-mixed urethane grouts and recoil. Why spend more when a standard bag of cement grout is so cheap? The short answer is that you pay with your time. Standard grout has zero tensile strength when it comes to lateral movement, meaning you will be scraping it out and redoing it every single year. Spending a little more on elastomeric materials up front saves your knees and your sanity down the road.
Before you even think about putting down new material, you have to get the old, failing stuff out of there. Skipping the prep work is easily the biggest flooring installation mistake to avoid if you want your repairs to last. If you do not clean the channel completely, the new flexible grout won’t adhere properly to the tile edges, and it will peel right out like a piece of old tape. Have you ever spent a weekend fixing a grout line only to see it fail a month later? Let me know in the comments below, because I want to make sure we get it right for you this time around.
Step-by-Step Joint Restoration for Active Subfloors
To keep your joints from crumbling under pressure, you have to treat the channel like a miniature expansion gap. Think of your tile joint as a bridge between two moving highway sections. If you pack that bridge with solid, unyielding stone, the next tremor will buckle the pavement. To avoid this, you need to clear the way for a dynamic, rubberized buffer. My first attempt at this years ago was an absolute disaster. I tried to scrape out old cement grout using a screwdriver, chipped three expensive porcelain tiles in the process, and ended up with a wavy, uneven channel that refused to hold any sealant. Here is how you do it without ruining your floor.
Clear the channel without chipping your tile
First, grab a dedicated hand grout saw or an oscillating multi-tool fitted with a diamond-grit grout removal blade. If you are using power tools, keep your speed low and run a strip of painters tape along the edge of the tile to prevent the blade from jumping and marking the glaze. It is critical to clean out at least two-thirds of the tile depth. If you only scrape off the surface, your new flexible material will be too thin, causing it to tear away when the house shifts. Once the bulk is out, use a shop vacuum with a brush attachment to suck up every speck of dust, then wipe down the joints with a damp microfiber cloth.
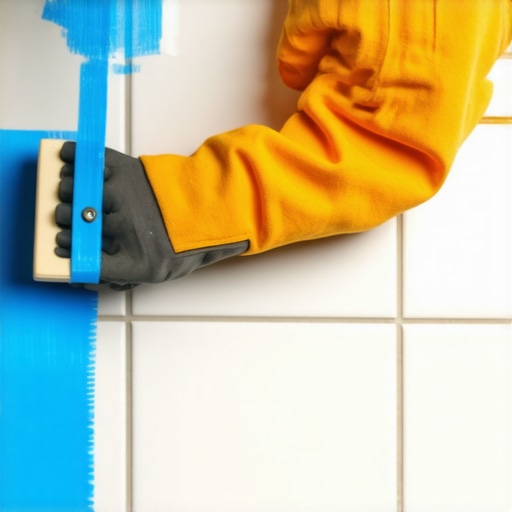
The tape barrier trick for flawless clean lines
Unlike standard cement mixtures, flexible polymer-modified siliconized sealants do not easily wipe away with a damp sponge once they skin over. If you smear them across the tile surface, you will be scrubbing for days. The secret is to run blue painter’s tape directly along both sides of the cleaned joint, leaving only the open channel exposed. When I did this in my master bathroom, it felt tedious to tape every single line, but it saved me hours of cleanup. Once the tape is down, use the blue painters tape trick for perfect caulk lines to achieve a clean, professional finish.
Applying the flexible bead and tooling the joint
Cut your sealant nozzle at a 45-degree angle, making sure the opening matches the width of your grout line. Hold the caulking gun at a consistent angle and pull it steadily toward you, forcing the flexible material deep into the joint rather than just letting it sit on top. After filling a section, drag a silicone tooling spatula or a gloved finger dipped in soapy water over the joint to pack it tight and create a smooth, slightly concave profile. Immediately peel away the painter’s tape while the compound is still wet to prevent tearing the edges of your clean new joint.
Correcting underlying movement issues first
Remember that even the best flexible materials cannot save a tile job if your subfloor has severe deflection. If your floor feels bouncy or springy, the underlying wood structure is flexing beyond acceptable standards. When dealing with extreme leveling issues on a concrete base before you ever lay tile down, you have to make sure the foundation is solid. To get that perfect, flat starting point, you should learn how to achieve flawless floor leveler prep before tile laying so that your tile and flexible joints do not have to work overtime to fight structural shifting.
While upgrading to high-performance flexible sealants is a massive step in the right direction, simply buying the right cartridge won’t save your floor if you fall for the industry’s most persistent myths. Many well-meaning DIYers and even some hurried professionals assume that modern chemical additives can overcome any structural shortcut. In my years of troubleshooting failed renovations, I have learned that relying solely on material flexibility without understanding the mechanics of your subfloor is a recipe for silent disaster.
Why does my new flexible joint still pull away from the tile edge?
The most common complaint I hear is that a highly rated siliconized sealant has peeled clean away from the tile within a few months, leaving a gap that invites moisture. Everyone tells you to focus on the movement of the floor, but in my experience, the real culprit is microscopic dust contamination and moisture surface tension. When you scrape out old cement, a fine powdery film remains on the microscopic pores of the tile edge. If you do not chemically neutralize and wipe those edges, the flexible sealant bonds to the dust rather than the tile itself. When the floor shifts, the sealant pulls the dust away, destroying the adhesion. To prevent this, always wipe the cleaned joint channels with rubbing alcohol—never just water—to strip away residual oils and microscopic debris before cartridge application.
Another massive trap is ignoring how the underlying concrete or wood breathes before you even start the leveling process. I once watched a neighbor pour high-end self-leveling underlayment directly over a dry plywood subfloor without a dedicated primer, believing the leveler would naturally key into the wood. It cracked and bubbled within a week. The Hydration Science Lab at the Portland Cement Association has repeatedly shown that dry wood rapidly sucks the crucial water out of leveling compounds before they can properly cure, leading to a weak, powdery interface. Skipping steps like applying the proper primer or failing to understand why your self leveler is bubbling over plywood will guarantee that even the most expensive flexible tile joints fail, because the floor beneath them is actively disintegrating.
If you are preparing a concrete foundation, you must perform a basic moisture test. Installing tile or pouring leveler over damp slab concrete traps hydrostatic pressure, which will eventually force its way up and shear the bond of your thinset. To avoid this, mastering flooring installation fundamentals leveling for a seamless look is non-negotiable. Have you ever fallen into this trap and watched your beautiful new grout lines or leveler pop loose? Let me know in the comments below so we can troubleshoot your floor together.
When you transition from diagnosing subfloor disasters to actually preserving your tile lines over the next decade, your focus must shift toward long-term maintenance and using the absolute right tools for the job. In my early days, I wasted hundreds of dollars on cheap trowels, manual scrapers, and generic sponges. Today, my toolkit is highly optimized, and I never start a tile rehabilitation project without a dedicated professional-grade mechanical mixer and a premium carbide-grit hand file. Using the right gear is the difference between a repair that lasts through the next seasonal shift and one that crumbles in three months.
The Critical Tools I Rely on for Flawless Repairs
For clearing out old joints safely, the absolute gold standard is an oscillating multi-tool paired with a specialized segment diamond blade. Unlike manual scrapers, which require immense physical force and easily slip to chip your porcelain, a high-frequency oscillating blade eats through cured cement grout like butter with zero lateral vibration. When preparing my own home for repairs, I also rely heavily on a digital pinless moisture meter to inspect the subfloor. Before laying down any new material, you must be absolutely certain that your subfloor isn’t holding onto trapped dampness. To avoid structural failure, make sure you know how to use a moisture meter before installing wood floors or tiles.
How do I maintain flexible tile joints over time?
Unlike cementitious grout, which requires harsh scrubbing and acidic cleaners to remove stains, flexible polymer and silicone joints require a gentle touch. Acidic cleaners will rapidly degrade the chemical bonds of siliconized sealants, causing them to turn yellow, dry out, and lose their elasticity. To keep your joints performing beautifully, clean them exclusively with pH-neutral cleaners and a soft-bristled brush. Additionally, you should inspect the perimeter expansion joints of your rooms at the start of every spring and autumn. If you notice any pinch points where the tile meets the baseboard, trim back any expanding material immediately to keep pressure from building up across your entire floor.
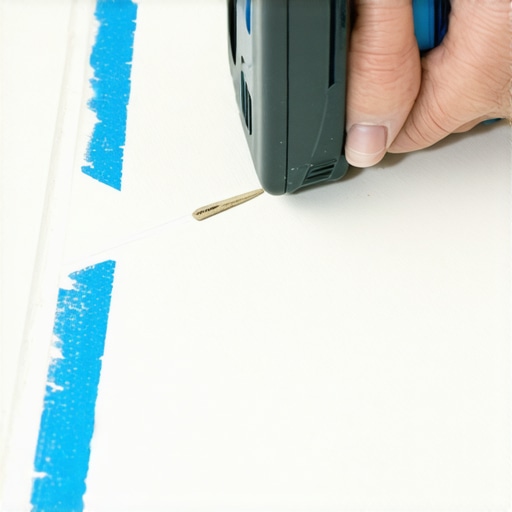
As we look to the future of home renovations, I predict that traditional cement-based grouts will eventually become obsolete for residential applications. Material science is moving rapidly toward self-healing, bio-synthetic elastomeric compounds that can stretch up to 50% of their original joint width without tearing. Furthermore, advanced underlayment systems are beginning to incorporate smart sensors that alert homeowners to subfloor deflection and moisture spikes before any cracking even occurs. Until those high-tech systems become mainstream, our best defense is meticulous manual preparation. If you want to prevent future headaches, I highly encourage you to try my rub-alcohol prep trick on your next joint repair—it is a simple, five-minute step that triples the adhesion strength of your flexible sealant. For those planning a larger overhaul, mastering the basics of step-by-step guide to flooring installation and leveling success is the ultimate way to guarantee your home’s foundation remains completely rock-solid.
3 Myths About Shifting Subfloors and Flexible Sealants That Held Me Back
When I first started tackling cracked floors, I fell for several industry misconceptions that cost me both time and money. First, I believed that highly flexible meant a product could bridge any structural gap regardless of how dirty the joint was. The truth is that flexibility is entirely useless without immaculate surface prep. Another massive myth is that adding liquid latex additives to standard cheap cement grout turns it into a magical rubber buffer. It does not; it only slightly improves water resistance and shear strength, but it will still crack under seasonal joist movement. Finally, I falsely assumed that all silicone sealants behave the same way under load. In reality, choosing a specialized, low-modulus formulation is the only way to ensure the material stretches and recovers along with your moving subfloor.
My Essential Toolkit for Defeating Cracked Grout
To stop your hard work from crumbling, you need to rely on the right specialized gear. First, I always keep a high-quality oscillating multi-tool with a diamond-grit segment blade in my bag; this tool safely grinds away old, failed materials without risking a massive porcelain tile chip. Second, I swear by a premium digital pinless moisture meter. Before applying any flexible sealants or pouring underlayment over wood, you must check for subfloor dampness to avoid trapped moisture destroying your adhesive bond. Finally, I highly recommend picking up a set of dedicated silicone profiling spatulas. These simple tools ensure you pack the flexible compound deep into the joint channel rather than merely smearing a thin layer across the surface.
Take Control of Your Shifting Floors
It is incredibly discouraging to watch your hard work turn to dust, but you do not have to live in a cycle of endless repairs. By ditching rigid cement in high-stress transition areas, prepping your channels down to bare tile, and using premium elastomeric compounds, you can easily outsmart structural settling. Do not let structural shifting intimidate you—with a methodical approach and the proper flexible materials, you can establish a beautiful, crack-free finish that moves naturally with your home. Have you ever struggled with a persistent grout line that keeps cracking year after year? Let me know in the comments below, and let’s troubleshoot your floor together!