
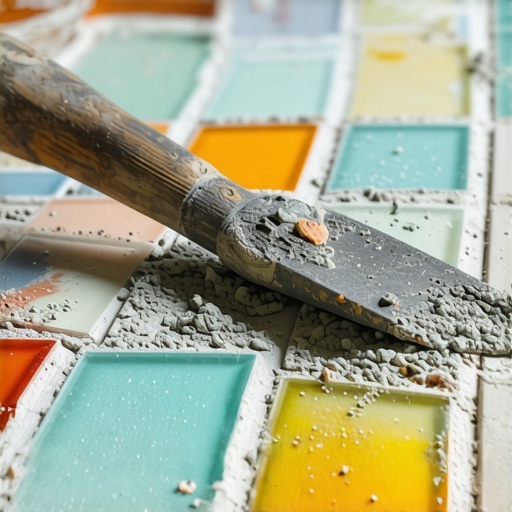
I was standing in my kitchen, squinting at a sheet of iridescent glass that cost more per square foot than my first car. I figured, “Hey, a trowel is a trowel, right?” Wrong. I used a notch size meant for heavy floor tiles, and within ten minutes, my beautiful mosaic looked like it had been attacked by gray sludge. It was a messy, heartbreaking realization that the “one size fits all” approach is a total myth in the tiling world. I spent four hours with a toothpick trying to scrape out the excess before it hardened, cursing my overconfidence. If you’ve been there—staring at a project that’s quickly going south—I want you to know you’re not alone. We’re going to solve this today so you can skip the dental-pick phase of DIY and get straight to the gorgeous results.
Stop Using Your Standard Floor Trowel for Glass Mosaics
The problem with glass is that it’s usually translucent and almost always thin. When you use a notch that’s too deep, the ridges of thinset are too tall. When you press the tile in, those ridges collapse and fill the grout lines completely. It’s a nightmare to clean and ruins the look of the tile. I learned the hard way that the trowel size error that leads to hollow sounding tiles or messy joints is usually the first domino to fall in a failed installation. For glass, we are looking for a very specific balance: enough grip to stay on the wall, but not so much that it overflows. We also need to remember that why recycled glass tile requires special white thinset is just as important as the tool you use to spread it. I’ve picked up several tile installation pointers that save time and money over the years, and the most vital one is this: match your tool to your material, not just your subfloor.
Is a 3/16-inch notch really strong enough for a heavy backsplash?
This is the most common fear I hear from folks. They think that a smaller notch means the tile won’t stick. But here’s the thing: with glass mosaic, less is almost always more. You want a 3/16″ x 1/4″ V-notch or a very small square notch. The Tile Council of North America emphasizes that you need 95% mortar coverage for glass to avoid visible shadows and ensure a permanent bond, but you achieve that by “back-buttering” or using a flat-side-of-the-trowel technique, not by using a giant notched tool. Have you ever had thinset squeeze out so badly you wanted to walk away from the whole project? I definitely have. Beyond the trowel, you might also want to check out the secret to cutting glass mosaic without chipping to make sure every piece fits perfectly. We are going to dive into the exact measurements you need for a flawless finish.
Make Your Subfloor Perfectly Flat First
Glass tile is like a high-end sports car; it shows every single bump in the road. If your wall or floor has even a 1/8-inch dip, the mesh backing on your mosaic will follow that curve, and your light will reflect off the glass at different angles, making the whole wall look wavy. Before you even open your bag of thinset, you need to know how to achieve flawless floor leveling before tile laying. If you are working on a wall, use a straight edge to find low spots and fill them with a feather-finish compound. I once tried to ‘fix’ a wavy wall by just adding more thinset behind the tile—it was a disaster. The tile slumped, and I ended up with a mess that took twice as long to fix. Using precise floor leveling techniques to achieve flawless surfaces isn’t just for large format tiles; it is the foundation for any glass project.
Knock Down Those Ridges to Avoid Ghosting
This is the part that most DIYers skip, and it is the biggest reason for glass tile failure. When you comb your thinset with a notched trowel, you create air channels. With ceramic tile, you usually press the tile in and those ridges disappear. With glass, if you do not ‘flatten’ those ridges with the smooth side of your trowel before setting the tile, you will see those lines through the glass forever. I call it the ‘pinstripe effect.’ I remember a backsplash job where the sun hit the tiles at 4 PM and revealed every single trowel mark I had left behind. It looked like a tiger-stripe pattern was trapped inside the glass. 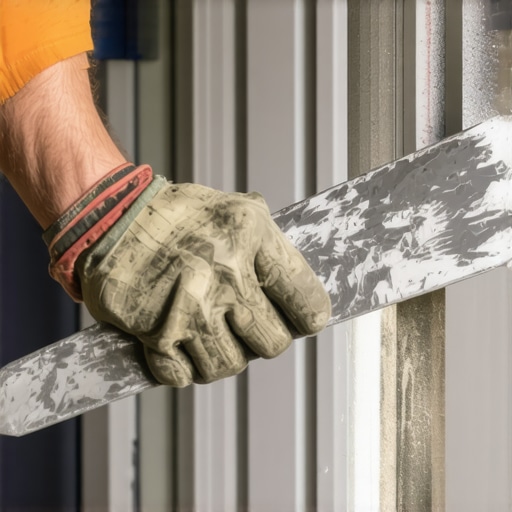 To avoid this, comb your thinset as usual to ensure even depth, then lightly drag the flat side of your trowel over the ridges to create a smooth, buttery bed. This ensures the 95% coverage needed without the air pockets that cause ‘shadows.’ These tile installation pointers that save time and money will keep you from having to tear out a project on day two.
The Back-Buttering Step You Can’t Skip
Because glass is translucent, any void behind the tile acts like a little mirror, reflecting light differently and creating dark spots. Even with a smooth bed of thinset on the wall, I always recommend back-buttering the mosaic sheets. Take a tiny bit of thinset on your flat trowel and ‘skim’ the back of the tile sheet, filling the spaces between the glass and the mesh. This acts as a secondary insurance policy against air bubbles. Avoiding flooring installation mistakes to avoid for lasting results means being obsessive about coverage.
Clean Your Grout Lines While the Thinset is Wet
If you wait until the next day to clean thinset out of your glass joints, you are going to have a hard time. Glass scratches easily if you use metal tools to scrape out dried mortar. Use the wet sponge move for professional grout lines to wipe away any squeeze-out while it is still creamy. If you do miss a spot, you will need to know the secret to getting dried thinset off your new tiles without ruining that expensive finish. Keep a bucket of clean water and a stiff nylon brush nearby. Trust me, five minutes of cleaning now saves five hours of manual scraping later.Most people assume that if they pour a bag of self-leveling compound on the floor, gravity will just handle the rest. It is a dangerous assumption that often leads to a surface that looks more like a topographical map than a professional substrate. In my years of fixing botched renovations, the biggest myth I encounter is the confusion between a level floor and a flat one. Everyone wants a level floor, but for a successful tile or hardwood install, flatness is actually your king. You can have a floor that slopes slightly across a room and still have a perfect installation, but if you have a dip or a hump, your luxury vinyl will click-clack like a tap dancer until the joints eventually snap. I always recommend mastering floor leveling pro secrets for perfect installations before you even think about opening a box of expensive tile.
Can you really trust a self-leveling compound to do all the work?
The short answer is no. This is the “Oops” factor that catches even experienced contractors who are in a hurry. If you skip the concrete etching step you shouldnt skip before leveling, the compound won’t bond, and it will eventually delaminate from the slab. But the real nuance that professionals know—and beginners ignore—is the mixing speed. I once used a high-speed mud mixer because I wanted to get the job done before lunch, and I ended up with a floor full of tiny pinholes. This happens because the mixing paddle speed that ruins your leveling compound creates a vortex that sucks in air. When that air tries to escape the hardening pour, it leaves craters that ruin the integrity of the surface. If you see this happening, it is exactly why self leveling compounds bubbled over your subfloor and compromised your bond. 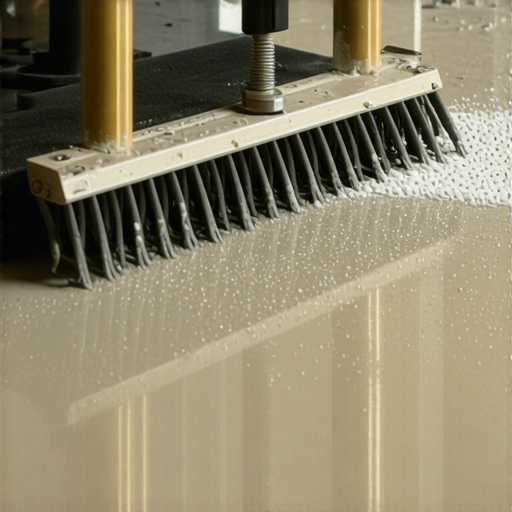 According to the Tile Council of North America (TCNA) Handbook, surfaces to receive large format tile must be flat within 1/8 inch in 10 feet. To achieve this level of precision, you need more than just a bucket; you need the spiky roller secret for a mirror smooth pour to release those trapped air bubbles and help the material flow. Another advanced move is using the chalk dust secret for finding low spots in subfloors before you even start mixing. This ensures you know exactly where the compound needs to go instead of guessing. I have seen beautiful projects ruined because someone thought a 1/4-inch dip would just disappear under the thinset. It won’t. It will lead to the trowel size error that leads to hollow sounding tiles as you try to bridge the gap with extra mortar. The trap most people fall into is thinking that expensive underlayment fixes a bad subfloor. Whether you are revamping your home with expert flooring installation tips or focusing on flooring installation fundamentals leveling for a seamless look, the prep work is 90% of the battle. Have you ever poured a leveler and had it turn into a bubbly, uneven mess? Let me know in the comments, and we can troubleshoot what went wrong with your mix!
I’ve realized over the years that the difference between a floor that lasts five years and one that lasts fifty isn’t just the quality of the tile; it’s the tools you keep in your kit. If you’re serious about this, you need to stop guessing and start measuring. The most underrated tool I own is my moisture meter. I’ve seen too many beautiful planks warp because the installer didn’t realize the slab was still ‘breathing’ moisture. Before you lay a single board, you have to learn how to use a moisture meter to prevent floor failure. According to the National Wood Flooring Association (NWFA) Technical Manual, most wood species should be within 2% to 4% moisture content of the subfloor before installation even begins. If you ignore that, you’re just building a ticking time bomb.
Your Layout is the Secret Sauce
Once your subfloor is prepped and dry, the next battle is the layout. I used to rely on old-school chalk lines, but they’re messy and they wipe away too easily. Now, I won’t start a project without a self-leveling 360-degree laser. It’s the only way to ensure your lines are crisp from the front door all the way to the back wall. You can master the laser level move for perfectly straight hallways to avoid that dreaded ‘runaway’ look where your tiles start to slant halfway through the house. It’s about creating a grid that works with the room, not against it. 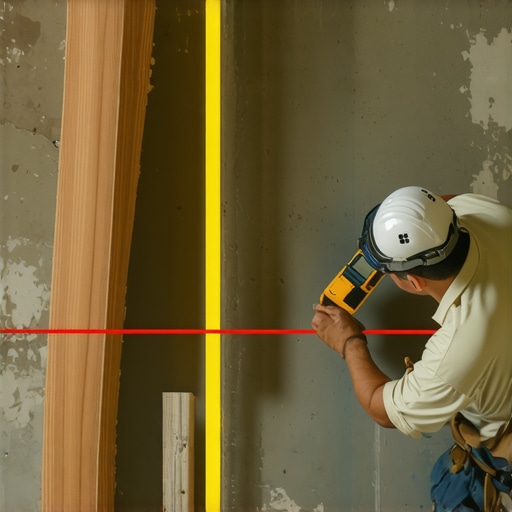
How do I maintain my high-end floors over time?
Maintenance is where most people drop the ball. They spend thousands on materials and then ruin the finish with a five-dollar bottle of the wrong cleaner. If you want hardwood floor care secrets to longevity and shine, the first rule is to throw away the harsh chemicals. You should stop using vinegar on your hardwood floors immediately because the acid eats through the polyurethane faster than you’d believe. The same goes for your stone; you must stop using bleach on your natural stone floors or you’ll end up with permanent etching. Stick to pH-neutral cleaners specifically designed for your surface. I predict that within the next five years, we’ll see ‘smart’ subfloors with integrated Bluetooth sensors that alert your phone if there’s a leak under your kitchen tiles before it ever reaches the hardwood. Until then, we have to rely on good old-fashioned prep and the right cleaning habits.
I want you to try one thing on your next job: use the pencil mark secret for perfectly centered tile layouts. It sounds small, but it’s the difference between a pro finish and something that looks ‘off’ every time you walk into the room. It’s these tiny, precise moves that separate the DIYers from the masters.
The Hardest Lesson I Learned About Subfloor Prep
I used to think that a little bit of dust on the concrete would not hurt the bond of my leveler. I was wrong. I spent an entire weekend chipping up a failed pour because I did not take five minutes to vacuum properly. Now, I advocate for the ultimate guide to floor leveling for a perfect finish which starts with a surface so clean you could eat off it. I also learned that you cannot just eyeball flatness; even a tiny 1/16-inch hump will cause your hardwood to groan every time you walk across the room. Trusting your level, not your eyes, is the hallmark of a true pro.
The Toolkit I Trust for Professional Results
If you are serious about your next project, you need a few non-negotiables. First, a high-quality moisture meter is your best friend to avoid learning how to use a moisture meter to prevent floor failure. I personally trust the pinless versions that do not damage the wood. Second, never underestimate the power of a spiky roller—it is the difference between a floor that looks like the moon’s surface and one that is glass-smooth. Finally, I always keep a copy of the latest TCNA guidelines handy. It is the best way to stay updated on mastering floor leveling pro secrets for perfect installations without having to learn the hard way through a failed inspection.
#IMAGE_PLACEHOLDER_E#
Your Floors Are the Foundation of Your Home
Do not be intimidated by the technical specs or the drying times. Every beautiful home you see started with a dusty subfloor and a person with a plan. By focusing on the prep and respecting the materials—whether it is delicate glass or rugged oak—you are building something that will last for generations. Proper hardwood floor care secrets to longevity and shine start the moment the first plank is laid. You have got the knowledge now; it is time to get to work and make your vision a reality. Have you ever found a surprise under your old flooring that completely changed your plans? Let me know in the comments below!