I’ll never forget the moment I stepped into my living room and felt that unsettling creak with every step. My beautiful hardwood floors, installed just a few years prior, were starting to sag and dip, threatening to ruin the entire aesthetic I worked hard to achieve. That lightbulb moment made me realize: I needed to tackle my subfloor issues before it’s too late, especially with the 2026 deadline looming. If you’ve experienced a similar sinking feeling—or rather, the literal sinking of your floors—then you’re probably asking yourself, “Why is this happening now, and what can I do about it?”
Why Addressing Subfloor Challenges Is Crucial Right Now
The reality is, a sinking or uneven floor isn’t just an aesthetic concern; it can compromise the integrity of your entire home. As the years progress, subfloor deterioration becomes inevitable if left unchecked, especially in climates with fluctuating humidity levels. Ignoring these issues can lead to tile cracks, uneven hardwoods, and even structural instability. The good news? I’ve found that using specific plywood solutions can make a real difference in reversing or preventing these problems.
Is Floor Sinking Really That Big of a Deal?
Early on, I made the mistake of dismissing minor dips, thinking they would fix themselves or only affect the look. Turns out, that was a costly oversight. The structural shifts continued, and my initial quick fixes only delayed the inevitable. According to industry professionals, addressing subfloor imperfections early can save you significant time and money—up to 30% less compared to major repairs later. You can learn more about precise techniques for-floor leveling to avoid costly mistakes by checking out this guide.
Now, I want to share the simple yet effective plywood fixes that finally stabilized my floors, ensuring my hardwood remains in pristine condition for years to come. Ready to learn how to put an end to your sinking floors? Let’s dive into the strategies that made all the difference for me—and could work for you too.
Start by Removing the Existing Flooring
Before you can level your subfloor with plywood, you need to clear the area entirely. Carefully lift up existing hardwood or tile, making sure to protect your space from debris. When I did this in my own home, I used a pry bar to gently remove the flooring, which revealed the uneven substructure underneath. This step prevents future issues and gives you a clean workspace.
Assess and Identify the Uneven Spots
Use a long level or a straightedge to scan the subfloor for dips, humps, or cracks. As I progressed, I marked areas with chalk where the dips were over ¼ inch—these are critical spots that require correction. The goal is to find the worst areas first, much like detecting potholes before repairing a road.
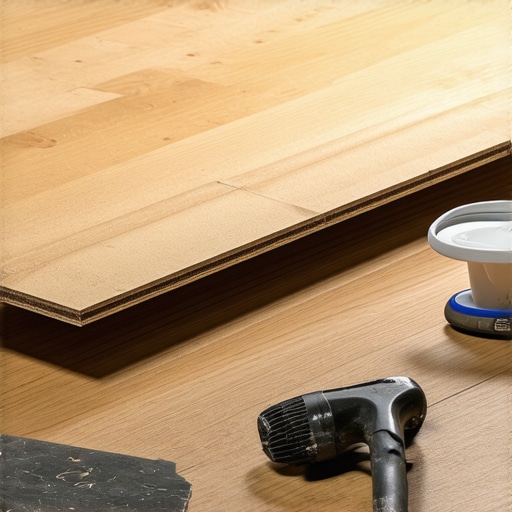
Prepare Your Plywood and Gather Tools
Choose high-quality, exterior-grade plywood sheets—3/4 inch thickness provides durability. Cut sheets into manageable sections that fit your space. Gather screws, a drill, adhesive, and a chalk line. Planning ahead saves you from multiple trips to the hardware store, much like assembling a toolbox before tackling a DIY project.
Apply a Suitable Leveling Compound or Adhesive
For minor dips, a self-leveling underlayment can fill uneven spots. In my experience, a rapid-dry thinset worked better on larger gaps—apply a layer over the subfloor using a trowel, ensuring it levels out. This creates a flat surface for the plywood, like pouring a fresh concrete slab, giving your substructure a sturdy base.
Lay and Secure the Plywood
Start from one corner, placing the plywood sheets onto the leveled subfloor. Secure each sheet with screws, spacing them every 8 inches along joists and 12 inches across the surface. Making sure the plywood is tight and flush prevents future squeaks or movement, akin to tightening bolts in a machine for smooth operation.
Sand and Finish the Surface
Once installed, sand any high spots or rough edges. This step is crucial, especially if you’re planning hardwood or tile, to ensure a smooth finish. I used a hand sander to feather out uneven edges, minimizing lippage or tile cracks down the line. Check your work with a level to verify flatness—precision here pays off in perfect results.
Inspect and Reinforce the Repaired Floor
Finally, walk across your newly leveled surface, pressing gently to test stability. If needed, add more screws or small shims at vulnerable points. Reinforcing with additional screws or underlayment panels can prevent future sagging, securing your investment long-term. For more detailed techniques, visit this comprehensive guide for seamless floor leveling.
 Many homeowners and even some contractors operate under misconceptions when it comes to floor leveling and flooring installation, particularly with hardwood floors. One widespread myth is that minor unevenness isn’t worth fixing, but in reality, small dips can rapidly escalate into costly structural issues if overlooked. It’s a common mistake to rely solely on self-leveling compounds without proper subfloor assessment, which might lead to future cracks or settlement problems. Advanced techniques such as laser-guided leveling are often underestimated but are crucial for achieving a precise surface before laying flooring, as discussed in expert guides like this resource.
Another misconception is that hardwood finishes can hide subfloor imperfections, but sanding or finishing cannot compensate for significant unevenness; this often results in lippage, gaps, or even buckling over time. Many assume that installation tolerates minor deviations, yet the industry standards emphasize flatness within a quarter-inch over ten feet to ensure durability. Moreover, there’s a mistaken belief that floor levelers are permanent solutions; in fact, they need proper surface preparation and periodic inspection to maintain levelness, especially in high-traffic areas. For a deeper understanding of these nuances, review comprehensive leveling strategies.
For advanced installers, mastering the correct screw patterns and reinforcement techniques prevents future sagging or squeaks, which are often ignored initially. Using inappropriate adhesives or skipping moisture testing can trap problems beneath the surface, leading to delamination or mold growth. Experts emphasize that meticulous subfloor inspection, accurate measurement tools, and adherence to manufacturer instructions are non-negotiable for lasting results. Additionally, some believe that hiring unlicensed labor saves money, but in the long run, poor craftsmanship incurs higher costs and safety risks. So, next time you plan a flooring project, challenge these myths and ensure your approach aligns with proven industry practices. Remember, investing in proper preparation and expert techniques pays off with flawless, durable floors. Have you ever fallen into this trap? Let me know in the comments.
Maintaining flawless floors over the years requires more than just initial installation skills; it demands the right tools and consistent upkeep. As someone who’s dedicated years to perfecting hardwood and tile installations, I can tell you that investing in specific equipment has transformed my workflow and extended the lifespan of my floors.
Precision Laser Level for Accurate Alignment
First and foremost, a high-quality laser level is essential. I personally rely on the DeWalt DW089LG because it offers unparalleled accuracy over large areas, allowing me to check flatness within fractions of an inch. This device ensures that every tile or plank is installed perfectly, reducing future issues like lippage or uneven wear, which can be costly to fix. Moving forward, I predict laser technology will become even more integrated with laser-guided leveling systems, making precision more accessible and affordable.
Moisture Meter to Protect Your Investment
Humidity fluctuations can wreak havoc on flooring materials. I use the AquaCheck Moisture Meter to monitor subfloor and hardwood moisture levels periodically. This proactive check helps me prevent gaps, buckling, or peeling. Regular moisture testing, especially in climates with changing seasons, is a wise practice for longevity. For best results, combine this with ongoing visual inspections—something I focus on diligently. Learn more about testing subfloor porosity and moisture levels at this resource.
Power Sanders for Fast Refinishing
Hardwood refinishing and maintenance become more manageable with a good floor sander. My go-to choice is the Bona UK Edger Sander, valued for its maneuverability and dust collection capabilities. This tool accelerates the process, minimizes dust, and results in a smoother finish—crucial for preparing floors for sealing or recoating. As flooring technology advances, dustless sanding systems will dominate, helping us maintain healthier indoor environments and achieve professional-grade results.
Sealant Applicators and Floor Protectors
Applying sealants and finishes evenly demands precision, which is why I swear by the IVY Classic Floor Sealer Gun. It provides controlled application, reducing waste and ensuring consistent coverage. Furthermore, investing in high-quality furniture pads and protective mats prolongs your floors’ appearance, especially in high-traffic areas—saving you significant repair costs down the line.
For ongoing maintenance, I recommend setting a regular inspection schedule and keeping these tools handy to address minor issues early. This approach not only preserves the aesthetic appeal but also ensures your floors stand the test of time. By integrating advanced tools like laser levels and moisture meters, you’re equipping yourself to tackle future challenges head-on. Ready to elevate your flooring game? Try implementing a periodic moisture check combined with laser leveling to catch potential problems early. And for expert techniques on ensuring perfect flatness during installation, don’t forget to visit this guide.
What I Wish I Knew Before Tackling Floor Challenges
- Don’t Rely on Shortcuts: Early in my DIY journey, I underestimated the importance of thorough subfloor assessment. Skipping detailed inspections led to costly fixes later, teaching me that patience and precision save money and time.
- Tools Make the Difference: Investing in a laser level and moisture meter transformed my approach. These tools aren’t just for professionals—they empower homeowners to achieve professional results and avoid common mistakes.
- Address Small Issues Immediately: Minor dips or squeaks? Don’t ignore them. They’re often signs of bigger problems brewing beneath the surface. Early intervention prevents long-term damage and preserves the beauty of your floors.
- Understanding Material Compatibility: Not all plywood or adhesives are equal. Choosing the right materials based on your specific subfloor conditions ensures durability and a smooth finish.
- Learn from Experts and Trusted Resources: Guided by seasoned professionals and comprehensive guides, I avoided pitfalls that many fall into. Continuous learning is key to mastering floor leveling and installation.
Tools and Resources That Guided My Journey
- Precise Floor Leveling Techniques Guide: An essential resource for understanding advanced leveling methods, ensuring a flawless surface.
- Hardwood Refinishing Tips for 2025: Offers insights into restoring and maintaining hardwood floors after leveling.
- Subfloor Moisture Testing Guide: Critical for preventing future issues caused by trapped moisture, especially in variable climates.
- Design Inspiration for Tile Enhancements: Elevates the aesthetic of your renovated floors, making your space truly special.
Your Turn to Transform Your Floors
Achieving a perfect, durable floor isn’t just about tools and techniques—it’s about confidence and willingness to learn. With dedication and the right resources, you can overcome any subfloor challenge and create a foundation that lasts for decades. Don’t let doubts hold you back; every successful project begins with taking that first step. Ready to start your flooring journey today? Remember, your dream flawless floor is within reach—just a click away from expert advice and top supplies. How do you plan to approach your next floor leveling project? Share your thoughts below and let’s build beautiful spaces together!
,