The moment I stepped onto my newly installed hardwood floor, I knew something was off—there was a noticeable bounce and uneven patchwork that made me question if I had missed a crucial step in my prep work. That lightbulb moment taught me a hard lesson: understanding subfloor porosity isn’t just tech jargon—it’s the secret to a flawless finish. If you’ve ever battled uneven tiles or squeaky hardwoods, you know how frustrating it can be. Today, I’ll share how testing your subfloor’s porosity can save your project, prevent costly mistakes, and give you that professional look you’re after.
Why Testing Subfloor Porosity is a Game Changer
Imagine spending days, maybe even weeks, on a flooring project only to find it all gone sideways because the subfloor wasn’t properly prepared. The real culprit often lies beneath the surface—literally. Subfloor porosity, or how absorbent the material is, directly impacts how adhesives and leveling compounds bond. If the subfloor is too porous, it’ll suck up moisture, causing adhesives to dry prematurely or not cure properly at all. Conversely, a non-porous surface might prevent adhesives from sticking robustly, leading to shifting or even future cracks.
From my own experience, neglecting to test porosity early on led to a stubborn issue: tiles that cracked just a few months after installation. That mistake prompted me to dig deeper—quite literally—and learn the importance of proper moisture testing. It’s a step that often gets overlooked, yet it’s essential for long-lasting results. According to experts, improper preparation could even double or triple your costs if problems arise later. Thankfully, with a few simple tests, you can avoid this trap entirely.
Ready to Stop Guessing?
Have you faced the disappointment of a flooring failure that seemed to come out of nowhere? The good news is, with the right testing techniques, you can identify potential issues beforehand. Not only does this save money and time, but it also gives you peace of mind knowing you’re building on a solid foundation. The next sections will walk you through proven methods to assess your subfloor’s porosity, so you can tackle your 2026 flooring projects with confidence.
Assess Moisture Absorption with a Simple Test
Start by selecting a small section of your subfloor, preferably in a hidden corner, to perform a moisture absorption test. Pour a few drops of water onto the surface and observe how quickly it soaks in. If the water disappears within five minutes, your subfloor is highly porous. This rapid absorption indicates that adhesives and leveling compounds might dry out prematurely, leading to an uneven finish or future adhesion issues. Remember, testing early helps prevent costly mistakes later.
Use Plastics or Sealants to Detect Porosity
Apply a Plastic Sheet
Place a clean, 2-foot square plastic sheet, such as polyethylene, directly onto the subfloor, sealing the edges with painter’s tape. Leave it undisturbed for 24 hours. After that period, peel back one corner to check for condensation or moisture underneath. Presence of moisture suggests high porosity, meaning your subfloor is likely to absorb adhesives too quickly, which can compromise bond strength if not properly prepared.
Compare with a Drying Test
Alternatively, spray a light mist of water over the surface and time how long it takes to evaporate. Faster evaporation signifies high porosity. In my own experience, applying this test in a basement turned out revealing—my subfloor absorbed water within minutes, prompting me to seal it thoroughly with a primer designed for porous substrates. This step improved adhesion dramatically, preventing tiles from cracking down the line. For more tips on tile installation, visit this detailed guide.
Leverage a Moisture Meter for Precision
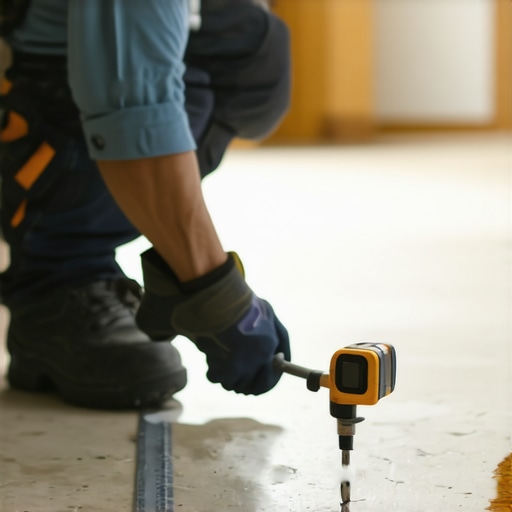
For an accurate, quantifiable assessment, use a handheld moisture meter—an essential tool for modern flooring projects. Simply insert the probes into the subfloor at various spots; readings above 4% moisture content typically indicate high porosity that needs addressing. This method offers precise data, enabling you to tailor your preparation—like applying a suitable primer or leveling compound—to match your subfloor’s characteristics. With this approach, you minimize the risk of uneven surfaces or future damages, ensuring a smooth, durable finish. To understand how to level floors effectively, consult this expert guide.
Remember the Micro-Story of My Mistake
Once, I neglected to perform a porosity test before installing hardwood in a basement. The result was a cracked floor within months because moisture trapped underneath caused expansion and contraction. After discovering the issue, I invested in a moisture meter and sealed the subfloor with a high-quality primer. That experience taught me the critical importance of testing porosity—saving me from repeating costly repairs. Incorporating these steps into your routine ensures your flooring project stands the test of time, avoiding the pitfalls I encountered.
Even seasoned DIYers often buy into misconceptions about flooring installation, especially with tiles and hardwoods, which can lead to costly mistakes. One popular myth is that all subfloors require the same preparation, but in reality, materials like concrete and plywood respond differently to moisture and leveling efforts. Misjudging these nuances frequently results in cracked tiles or squeaky floors down the line. Another common mistake is assuming that a perfectly level surface isn’t necessary; however, as emphasized in professional guides, detailed leveling ensures longevity and aesthetic appeal.
A misconception that can cause serious issues is rushing the curing process of adhesives or underestimating the importance of acclimation time for hardwoods. This shortcuts the aging process that permits the material to stabilize, leading to buckling or gaps later on. Advanced installers know that factors like subfloor porosity and environmental conditions significantly influence these outcomes. For example, a simple moisture test can reveal if sealing is needed, preventing future curling or cupping.
Furthermore, many believe that high-end materials inherently resist installation errors, but in reality, poorly prepared surfaces negate these advantages, turning premium flooring into a maintenance nightmare. This underscores the importance of meticulous preparation, including moisture barriers and proper leveling, which experts highlight in hardwood installation tips.
Are you aware of how small missteps early on can compound into major issues later? For instance, installing tile over a slightly uneven slab without sufficient leveling can cause lippage—where tiles are uneven at the edges—prompting an amateur to redo the entire job. This emphasizes the value of understanding every nuance, from subfloor preparation to moisture management. For more details on avoiding such pitfalls, check out this guide.
Have you ever fallen into this trap? Let me know in the comments. Remember, mastery in flooring installation comes from attention to detail and understanding the hidden complexities that many overlook. Don’t let myths undermine your project’s success; instead, equip yourself with the expert knowledge that guarantees durable, beautiful results.
Keep Your Floors Performing with the Right Tools
Maintaining hardwood floors and tiles over time requires precision and proper equipment. I personally rely on a high-quality robotic vacuum cleaner like the iRobot Roomba i7+ to keep surfaces free of debris, which helps prevent scratches and wear. Regular cleaning is critical, but deep maintenance calls for specific tools such as a moisture meter, which I use to monitor the subfloor’s condition before applying sealants or adhesives. Using a reliable moisture meter, like the Tramex Moisture Encounter, provides accurate readings that guide my decision-making, ensuring I don’t neglect hidden moisture issues that could compromise long-term durability.
Another essential tool in my arsenal is a reciprocating saw fitted with the right blades for hardwood refinishing. This device allows me to remove gouges or damaged sections precisely, preparing the surface for seamless repairs. For leveling floors, I recommend a self-leveling compound applicator with a gauge rake—this streamlines the process and guarantees even coverage, which is vital for flawless installation. I’ve found that investing in a quality trowel and a sanding block also makes a significant difference in the finishing process, especially when restoring or smoothing out uneven surfaces.
Looking into the future, advancements in smart home technology might bring automated floor health monitoring, with sensors that alert homeowners to deteriorating conditions before visible signs appear. Companies are exploring IoT-enabled flooring systems that can track wear, moisture, and temperature over time, providing predictive maintenance alerts. Embracing these innovations will empower homeowners and professionals alike to keep floors in top shape with less guesswork, saving money and extending the lifespan of your investments.
How do I maintain my flooring over time?
Routine maintenance should include regular cleaning with vacuuming and damp mopping—using pH-neutral cleansers recommended in hardwood floor care tips. Periodic inspections with a moisture meter can catch hidden issues early, preventing costly repairs down the line. Applying protective pads to furniture, managing indoor humidity levels, and promptly addressing spills are simple habits that significantly extend your floor’s life. For more advanced techniques, consider professional refinishing every few years, especially if your floors experience heavy traffic or environmental stresses.
To ensure your floors stay beautiful and functional, I encourage trying out a professional-grade leveling compound combined with precision tools like a gauge rake. This combination makes a visible difference and guarantees a durable, flat surface that resists cracking or buckling over time. Investing in these tools and habits now will pay dividends, helping you avoid common pitfalls and keep your floors stunning for years to come.
My Biggest Wake-Up Call on the Subfloor Journey
One of my toughest lessons was realizing that skipping detailed subfloor testing almost cost me my hardwood project. That moment made me appreciate the importance of thorough preparation and how hidden issues can ruin even the most beautiful finishes. It’s a reminder that the devil is truly in the details—and that understanding subfloor behavior can be the difference between success and costly mistakes.
The Hidden Pitfalls I Almost Fell Into
Early in my DIY career, I believed that a visual inspection was enough. Turns out, superficial checks don’t reveal the moisture or porosity problems lurking beneath. My own experience taught me to never underestimate the power of simple tests like moisture absorption and plastic sheet checks. Now, I always dedicate time to these steps, knowing they save me from future headaches and help achieve a longer-lasting, professional look.
Why Relying on Tools Transformed My Approach
Using a moisture meter revolutionized my understanding of subfloor conditions. It provided concrete data that guided my decisions—whether sealing porous surfaces or choosing the right leveling products. The confidence that comes with precise information is invaluable. If you’re serious about a durable flooring installation, investing in reliable tools like a moisture meter is a game-changer—check out this guide for expert advice.
The Unseen Impact of Proper Prep on Long-Term Beauty
Once I started testing porosity and moisture levels rigorously, I noticed a dramatic reduction in issues like squeaks, cracks, or buckling. It became clear that a solid foundation doesn’t just improve appearance—it extends the lifespan of your floors. Incorporating these insights into your workflow means fewer repairs and happier results down the line, transforming your space from good to exceptional.
Remarkable Lessons You Can Only Learn Through Experience
- Don’t assume all subfloors are alike: Materials like concrete and plywood react differently, so tailored approaches are critical.
- Test before you invest in finishes: A quick moisture absorption test can save hours of redo work and unnecessary expenses.
- The value of patience and precision: Rushing through prep may seem faster, but it invites frustration and failure. Taking your time pays off.
- Beyond tools, trust your intuition: Feeling confident isn’t just about data—regularly inspecting and cross-checking ensures nothing slips through the cracks.
A Few Resources That Elevated My Craft
- The ultimate guide to floor leveling: Broken down into manageable steps, this resource helped me perfect my leveling technique.
- Hardwood floor care secrets: Tips on maintaining floor health and longevity, ensuring my craftsmanship stood the test of time.
- Refinishing like a pro: Advanced tricks that turned my DIY floors into showstoppers.
- Leveling perfection strategies: Upgraded my skills for achieving flawlessly flat surfaces, every time.
Embrace the Challenge and Elevate Your Space
Now that you understand the nuances of subfloor testing and preparation, I encourage you to take that first step with confidence. Mastering these behind-the-scenes skills will not only save you money and time but also grant you pride in your craftsmanship. Think of each project as a chance to learn and improve—your floors will thank you for it. So, are you ready to turn your flooring dreams into reality with the power of proper prep? Let’s see your progress and stories below!
Have you ever struggled with assessing your subfloor before installation? Share your experiences or ask questions—I love hearing how others are mastering the art of flooring!
I completely agree with the importance of testing subfloor porosity before starting a flooring project. I had a similar experience where I skipped this step and ended up with uneven hardwoods that squeaked over time. It’s clear that a little extra effort at the beginning can save a lot of hassle later on. I’ve found that using a simple moisture meter gives me peace of mind, especially in areas prone to moisture issues like basements or ground-level floors.
For those tackling large projects, do you have any tips on efficiently testing multiple areas of a large subfloor? I’d love to hear how others organize their testing process to save time and ensure consistency across the whole space.
Reading about the impact of subfloor porosity really resonated with me. I once skipped the moisture test on a DIY tile project, thinking a quick visual inspection was enough, only to have tiles crack and loosen over just a few months. That was a harsh lesson that testing early can save a ton of trouble later. I started investing in a reliable moisture meter afterward, which has been a game changer. It’s also helped me pinpoint areas that need sealing or special prep, especially in older homes where subfloor conditions can vary greatly. What’s everyone’s go-to method for balancing quick assessments with thoroughness in larger areas? Do you find certain tests more reliable or time-efficient than others? Happy to share what’s worked for me, but I’d love to hear different strategies or tools others trust for faster, yet accurate, evaluations.