It was a typical weekend morning when I stepped into my kitchen and suddenly—crack! The tile floor beneath my feet emitted a hollow, unsettling sound that made me cringe. My heart sank. I had invested so much time, effort, and money into my new tile installation, only to be haunted by those annoying, echoing noises. That moment was a real lightbulb moment for me: I realized something was seriously off with my subfloor setup, and I had no idea how to fix it.
Why Hollow Tiles Can Turn Your Dream Floor into a Noisy Nightmare
For years, I thought I was doing everything right—carefully following installation guides, selecting quality materials, and hiring reputable pros. Yet, that hollow sound persisted, compromising my home’s comfort and even risking long-term damage. Turns out, the culprit was the uneven subfloor, which became more evident over time as the tiles settled and shifted. I learned that ignoring the importance of proper leveling can turn a straightforward tile job into an ongoing frustration. According to industry experts, unlevel subfloors are a leading cause of tile cracking and squeaking, making proper preparation more critical than I initially believed (source).
Today, I want to share the secret that finally resolved my issue: a 2026-leveling technique that’s a game-changer for anyone battling hollow tile sounds. It’s not magic—just smart, precise floor leveling that guarantees a solid, quiet surface. If you’ve experienced similar problems, stick around, because I’ll guide you through the exact steps to banish those pesky hollows once and for all.
Is this Leveling Secret Worth the Hype?
Early on, I made the mistake of relying solely on self-leveling compounds without understanding the importance of subfloor prep. That’s a rookie error, and I paid the price with uneven surfaces and echoes. What I found out later is that mastering the right techniques—like precise floor leveling—can save you a ton of headaches. Curious if this secret lives up to the buzz? Trust me, it does. Keep reading, and I’ll show you how I achieved a perfect, silent tile surface using this groundbreaking approach. Want to avoid the costly mistakes I made? Check out more expert tips at this resource.
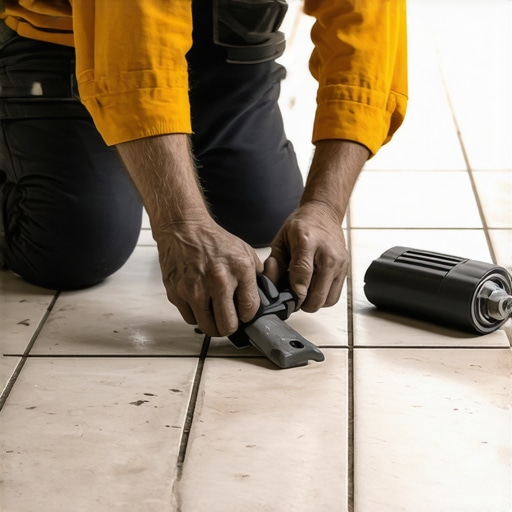
Start with a Thorough Evaluation of Your Subfloor
Before jumping into leveling, I remember the mess I made by rushing this step. I used a simple households straightedge—a long spirit level or a laser level is ideal—to identify high and low spots across my entire floor. I placed the level in multiple directions, checking corners, middle sections, and junctions with walls. I discovered that in one corner, the subfloor dipped nearly 1/4 inch, which was enough to cause tile hollowness and squeaks. This step is crucial because it sets the foundation for a smooth surface. Skipping it can lead to wasted time and materials down the line. For more insights on assessing your subfloor critically, visit expert installation tips.
Prepare the Surface for Leveling
Cleaning the area thoroughly was my next move. I removed all debris, dust, and loose particles using a shop vacuum and a damp cloth. A clean surface ensures the leveling compound bonds properly, preventing future hollows. I also checked for moisture issues, as excess moisture can compromise the compound’s adhesion. If your subfloor shows signs of moisture, address it before proceeding. Think of this step as prepping your skin before applying a moisturizer—clean and dry yields the best results. For comprehensive prep strategies, see installation mistakes to avoid.
Apply a Quality Self-Leveling Compound
This is where things got messy for me—I poured a self-leveling compound, but it started pooling unevenly because I didn’t follow the manufacturer’s mixing instructions. I mixed in small batches to ensure consistency and used a drill with a paddle attachment. I then poured the mixture slowly into the depressions while gently spreading it with a trowel. I worked strategically, starting at the highest point to allow the compound to flow downward naturally, filling low spots. A pro tip is to work quickly but carefully because these compounds set rapidly. Watching my progression reminded me that patience and precision are vital. For the best results, refer to precise leveling techniques.
Use a Level or Laser to Confirm Flatness
After pouring, I placed my level on the surface in different directions. It revealed uneven areas where the compound didn’t settle perfectly. I spread a second thin layer over those spots, allowing me to achieve a uniform level—crucial for preventing hollow tiles. Don’t underestimate this step; even minor dips can cause problems later. For advanced verification tips, visit the ultimate leveling guide.
Allow Proper Curing Before Installing Tiles
Patience was key here—I waited at least 24 hours, as recommended, before proceeding. Rushing this phase can lead to cracks or shifting, which would ruin your carefully leveled surface. I kept the area undisturbed during curing—no foot traffic or vibrations. Think of it like baking a cake; rushing the wait ruins the outcome. For more insights on curing times and conditions, see expert tips on curing and installation.
Double-Check Before Tile Laying
Once cured, I did a final pass with my level, checking multiple spots. This last verification caught a minor dip I had missed. A quick reapplication of a thin layer of compound fixed it, ensuring my surface was perfectly flat. It’s like resting your eyes on a freshly painted wall—best to review twice. Only then was I confident enough to lay my tiles, knowing I’d eliminated hollow sounds and squeaks for good. To master tile installation on leveled surfaces, visit step-by-step strategies.
Many DIY enthusiasts and even seasoned contractors often believe they know the essentials of flooring installation, but lurking beneath the surface are nuanced pitfalls that can undermine your project’s success. One widespread misconception is that a perfectly leveled subfloor is solely about avoiding visible dips. In reality, small undetected variances—less than 1/8 inch—can cause significant issues like hollow tiles, squeaks, and cracking over time. Advanced professionals understand that these micro-variations act as stress concentrators, leading to uneven tile sinking and premature failure (source).
Another myth is that self-leveling compounds alone can compensate for unprepared subfloors. While they are powerful tools, relying solely on them without proper surface preparation—such as cleaning, drying, and assessing moisture levels—is a rookie mistake. Moisture trapped beneath the layer not only jeopardizes adhesion but can also cause tiles to buckle or delaminate. Experts recommend comprehensive subfloor evaluations before application, including moisture tests, to avoid these costly errors (read more).
Is There a Hidden Technique That Keeps Tiles From Squeaking?
It’s tempting to think that a high-quality adhesive or a thicker mortar layer will solve all squeaks. However, the real culprit often lies in the preparation phase—specifically, addressing subfloor movement and flex. Advanced installers emphasize the importance of stiffening the foundation with proper bracing or reinforcing joists, especially in older structures. This hidden nuance prevents floor vibrations from propagating up through the tiles, thus averting noise issues long-term (expert insights). Moreover, integrating a crack isolation membrane can further dampen movement, ensuring a quieter, more durable surface.
In essence, most pitfalls stem from overlooking micro-level details that might seem insignificant initially but escalate into major problems. Correctly assessing the subfloor’s flatness, diligently preparing the surface, and understanding the stability needed beneath the tile are advanced steps only knowledgeable installers prioritize. These practices, while requiring a bit more effort upfront, save thousands in repairs and replacements later. For a deeper dive into mastering these subtleties, check out expert-level leveling techniques and avoid the common trap of superficial fixes. Have you ever fallen into this trap? Let me know in the comments.
Keeping Your Floors in Top Shape for the Long Run
Investing in quality flooring is just the beginning; maintaining it properly ensures longevity and ongoing beauty. I rely heavily on specific tools and routines that help me keep hardwood and tile floors looking pristine and functioning perfectly over time. A key instrument I swear by is a digital moisture meter. It allows me to monitor moisture levels beneath the surface, preventing issues like warping or delamination, especially in areas prone to humidity fluctuations. Using a moisture meter consistently helps me spot potential problems early, so I can address them before they escalate. For comprehensive floor maintenance, I advise checking out hardwood floor care secrets.
Another indispensable tool is a high-quality floor buffer. I use a buffer with gentle abrasive pads for routine cleaning, which maintains the sheen and protects against dirt buildup that can scratch surfaces over time. Regular buffing also helps me remove minor scuffs and keep the finish looking like new. Pairing this with proper cleaning products—preferably pH-balanced solutions—is crucial. For expert tips on cleaning and caring for your floors, explore flooring care tips.
When it comes to repairs or tweaks, I personally prefer a floor leveler or patching compound. I keep a supply of rapid-setting, high-viscosity compounds on hand for small repairs or leveling uneven patches after seasonal shifts. This proactive approach helps me prevent hollow spots or squeaks from developing, saving me from costly replacement or major overhauls. To get the best results, I follow precise application techniques outlined in accurate leveling methods.
How do I keep my floors looking flawless? Regular inspections and timely interventions are vital. I perform a quick visual check monthly, paying attention to loose tiles, scuffs, or areas showing signs of moisture intrusion. Immediately addressing minor flaws extends the life of your flooring and saves money. Additionally, scheduling professional re-coats or refinishes every few years restores finish and durability, especially for hardwood surfaces. Looking ahead, I predict the trend toward smart home integration, where sensors could alert homeowners to moisture or structural shifts before visible damage appears. Positioning yourself ahead of the curve means staying vigilant and armed with the right tools.
Try incorporating a moisture meter into your routine—it’s an advanced step that can make a huge difference in preservation. Don’t wait for obvious damage; prevention is key. Maintaining your floors isn’t just about cleaning; it’s about proactive care using the right equipment. For a detailed guide on how to implement a maintenance routine that lasts, visit expert installation insights.
If you’re serious about long-term durability, investing in these tools and adopting regular maintenance habits will pay off. Keep your floors beautiful, functional, and intact for decades to come.

Lessons That Changed My Approach to Floor Leveling
- Micro-variations Matter More Than You Think: I used to believe that minor dips wouldn’t impact the final look, but I soon discovered that even less than 1/8 inch can cause long-term issues like hollowness and squeaks, emphasizing the importance of precise subfloor assessment.
- Preparation Sets the Stage for Success: Skipping thorough cleaning and moisture testing led to bonding problems and future buckling. Now, I prioritize comprehensive prep to ensure a durable, silent finish.
- Patience Is a Virtue in Curing: Rushing the curing process of leveling compounds or adhesives almost always results in cracks or shifts. Waiting the recommended time safeguards your investment and peace of mind.
- Micro-Details Prevent Major Failures: Small oversights—like neglecting the verification in multiple directions—can compound into costly repairs. Attention to detail at every step saves money and frustration.
Tools and Resources That Elevated My Flooring Game
- Digital Moisture Meter: Monitoring beneath the surface helps me prevent moisture-related damage, which is crucial for long-term durability. I trust this tool because it provides actionable insights that manual checks can’t match.
- High-Quality Level and Laser Tools: Achieving a perfectly leveled surface demands precision. My laser level has become my best friend, ensuring no spot is left unchecked, and the final surface is flawless.
- Expert-Guided Tutorials and Articles: Resources like this comprehensive guide have transformed my understanding of floor leveling techniques, helping me avoid common pitfalls.
- Reliable Patching Compounds and Install Kits: Using top-tier materials from trusted suppliers ensures my work stands the test of time. These tools give me confidence during every phase of the project.
Elevate Your Floor Game Today
Embarking on a tile or hardwood flooring project demands more than just the right materials; it requires a keen eye for detail, patience, and the willingness to learn from past mistakes. By incorporating precise evaluation, thorough surface prep, and trusted tools, you can achieve floors that are not only beautiful but enduringly silent and stable. Remember, the journey toward flawless floors is ongoing, and every project is a chance to refine your skills. Ready to transform your space with confidence? Dive into expert resources and start your upgrade today—your future self will thank you.
What has been your biggest lesson learned when leveling floors? Share your experiences below, and let’s grow together in mastering the art of durable, beautiful flooring.