I remember the day I finally realized my hardwood floors weren’t just old—they were active participants in my daily life, emitting squeaks that echoed every time I walked. At first, I thought it was just a quirky noise, but soon, those high-pitched squeals became the soundtrack of my mornings and evenings. It was as if my floors had developed a mind of their own, and not in a good way. That lightbulb moment made me dive deep into the world of flooring repairs.
Why Squeaky Floors Can Ruin Your Home Experience
Squeaky hardwood floors aren’t merely a minor annoyance; they can indicate underlying issues like loose boards, uneven subfloors, or inadequate installation. These problems can escalate, leading to more costly repairs down the line. Plus, the noise can be disruptive—not just to you, but to anyone nearby. As a homeowner, I learned that addressing these squeaks early can preserve your home’s value and ensure your living environment remains peaceful.
According to flooring experts, unresolved squeaks might also signal structural weaknesses that could compromise safety and durability. Early intervention has proven to save homeowners thousands, maintaining both comfort and property value. If you’ve faced similar frustrations, you’re not alone, and more importantly, there’s a way to fix it.
Is Fixing Squeaky Hardwood Floors Actually Worth the Hype?
Admittedly, I was skeptical at first. I worried that attempting DIY fixes might do more harm than good, especially with my limited handyman skills. I’ve seen many make early mistakes, like ignoring loose nails or applying adhesives haphazardly, which only worsened the problem. But after experimenting with proven strategies and consulting experts, I discovered that many fixes are straightforward and cost-effective.
Throughout my journey, I encountered the common pitfalls that can sabotage your efforts, such as using inappropriate materials or neglecting floor preparations. To avoid these, I recommend checking out resources like [expert hardwood floor installation tips](https://tiletrendshop.com/hardwood-flooring-facts-tips-2025) to ensure you’re on the right track. Now, with a few targeted techniques, I’ve managed to silence those bothersome squeaks, restoring tranquility to my home.
Ready to learn how you can do the same? Let’s explore the top methods to fix your squeaky floors once and for all, starting with understanding what causes the noise and which fixes are truly effective.
Identify the Source of the Squeak
Start by pinpointing where the squeak occurs. Walk slowly across the floor, listening carefully to identify the most problematic spots. This process is akin to detective work; I used a piece of furniture to gently lift sections and observe movements, which revealed loose nails or boards that needed reinforcement. For a more precise check, try to locate if the squeak appears when you step in specific areas—this focus saves time and prevents unnecessary work on unaffected sections.
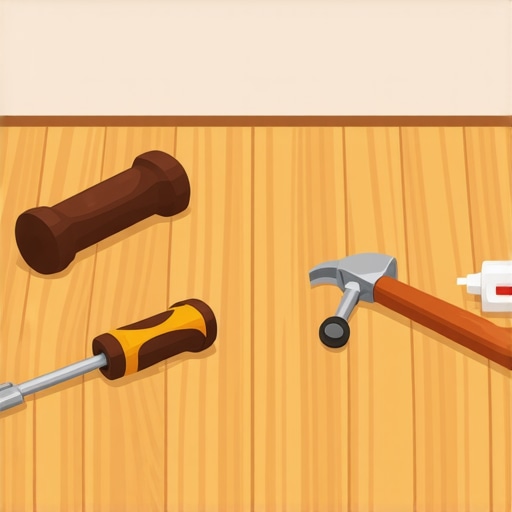
Prepare Tools and Materials
Gather your toolkit: a hammer, wood screws or nails, a power drill, silicone spray, or powdered graphite. You might also need a pry bar or putty knife. Having everything ready beforehand streamlines the process and prevents interruptions. Remember, using quality materials, like stainless steel screws, can enhance durability. For detailed guidance on choosing materials, visit expert hardwood floor installation strategies.
Secure Loose Boards or Nails
Loose boards are often the primary cause of squeaks. To fix these, drill pilot holes slightly smaller than your screw size at the board’s edges to prevent splitting. Insert the screw and tighten until the board is firmly secured. This method is like tightening a loose screw on furniture; it restores stability without damaging the floor. I once had to repeat this step multiple times on a stubborn knot, but patience resulted in a significant noise reduction. Be cautious not to overtighten, as that can cause the wood to crack.
Use Adhesives for Persistent Squeaks
When screws aren’t enough, applying a high-quality wood adhesive can bond loose sections. Inject the glue under the failing plank using a syringe or a small nozzle. Press the board down firmly with a clamp or heavy object until the adhesive sets—typically 24 hours. Remember, proper surface preparation like cleaning dust and debris ensures better adhesion. This step is similar to gluing two puzzle pieces; the key is thorough contact and curing time.
Address Subfloor Issues
If squeaks persist after fixing the surface, the problem might lie beneath your floors. Examine accessible areas for unevenness or gaps. Use a straightedge or string to check flatness; any dips or rises could be causing movement. To level out these spots, employ a self-leveling compound—think of it as filling in potholes on a road before repaving. Prior to application, read the ultimate guide to floor leveling for best results. Applying the compound requires careful mixing and spread evenly with a trowel, then allowing proper curing time.
Prevent Future Squeaks
Once you’ve silenced the squeaks, take preventative measures. Place furniture pads under legs to reduce direct pressure. Keep humidity levels stable to prevent wood expansion and contraction. Regularly inspect for loose boards, especially in high-traffic zones, and address issues promptly. By maintaining your floors proactively, you keep them quiet and extend their lifespan. For ongoing care tips, visit hardwood floor care secrets.
Many homeowners underestimate the complexities involved in hardwood floor and tile installations, often relying on popular myths that can lead to costly mistakes. Contrary to the widespread belief that choosing high-end materials guarantees durability, it’s the meticulous preparation and understanding of the materials’ nuances that make the difference. For instance, the myth that subfloor leveling isn’t crucial for tile installation can result in uneven surfaces, leading to cracking or lippage over time. Experts emphasize that proper subfloor assessment and leveling are critical steps that are frequently overlooked, which can compromise the entire project. A common mistake I’ve seen is neglecting moisture content in hardwoods, assuming that temperature control during installation suffices—yet, uncontrolled moisture leads to buckling and gaps, a problem that becomes evident only after months of flooring wear. This is why skilled installers use moisture meters and acclimate wood properly before laying, aligning with advice in professional guides like the ultimate guide to floor leveling. Additionally, many believe that the style of tile isn’t influential to longevity; however, choosing the right tensile strength and suitable grouting can drastically extend a tiled floor’s lifespan. Advanced installers pay close attention to substrate compatibility and precise spacing, avoiding the common pitfall of improper grout sealing, which can trap moisture and cause deterioration. When selecting between hardwood and tile, consider how certain technicalities, like expansion joints and edge treatments, are often misjudged as optional rather than essential. These nuances underlie much of the DIY frustration and do-it-right-then-forget-it durability.
How can a homeowner evaluate the real quality of a flooring installation beyond surface appearance?
Maintaining your hardwood, tile, and leveled floors is an ongoing process that requires the right tools and a strategic approach. Investing in high-quality equipment not only simplifies repairs but also prolongs the lifespan of your flooring. One tool I highly recommend is a digital moisture meter, such as the pin-type Delmhorst Model BD-2100, which provides precise readings of moisture content in wood and subfloors. This helps prevent issues like buckling or warping, especially when dealing with hardwood installations or refinishing projects. Regularly monitoring moisture levels ensures your floors adapt well to environmental changes, reducing the risk of long-term damage. A dependable floor scraper and sander are invaluable when refinishing hardwood surfaces; for example, the Festool PLANEX LHS 225 is lightweight, ergonomic, and offers excellent dust collection — making it easier to achieve smooth, even results without inhaling dust particles. When it’s time to level uneven subfloors prior to tile installation, I use a self-leveling underlayment like Ardex K 15. Its quick-setting properties and superior flow ensure a flawless surface, translating to better tile adhesion and reduced cracking down the line. Looking ahead, advancements in laser-guided leveling systems are likely to become more affordable and precise, making DIY leveling easier for homeowners. They promise to eliminate the guesswork involved in subfloor preparation and offer a professionally finished look. How do I keep my floors looking their best over time? The key lies in routine inspections, prompt repairs, and using tools designed for specific tasks. For example, regularly inspecting grout lines for cracks using a flashlight and a plastic putty knife allows early detection of potential problems. When homeowners take small, consistent maintenance steps—like cleaning with pH-neutral solutions and applying protective finishes—they reinforce the durability of their flooring. For tile installations, specialized tools such as a 100-pound tile spacer set and a rubber mallet ensure precise spacing and secure placement. These tools help maintain uniform grout lines and prevent lippage that could lead to cracking. Remember, starting with the right equipment makes all the difference; it turns complex tasks into manageable projects and guarantees long-lasting results. Want to elevate your flooring maintenance game? Try incorporating laser-guided leveling devices during your next subfloor preparation. They are featured prominently in professional settings and are becoming more accessible for DIY enthusiasts, ensuring your surface is perfectly flat before laying tile or hardwood. For more detailed insights on subfloor preparation and installation techniques, visit the comprehensive guide on floor leveling strategies. Maintaining your floors isn’t just about fixing problems; it involves proactive management with the right tools to prevent issues before they arise. Regular inspections combined with these specialized devices will save you time, money, and stress in the long run.
The Hardest Lesson I Learned About Hardwood Floors, Floor Leveling, and Tile
One of the most impactful lessons I encountered was realizing that rushing the subfloor preparation almost always leads to squeaks, cracks, or worst of all, costly replacements. Proper leveling isn’t just a step; it’s the foundation of a flawless finish. I once skipped this crucial phase, and months later, my tiles started to pop. Now, I see that attention to detail upfront prevents headaches down the road.
Three Myths About Flooring That Held Me Back
I used to believe that expensive materials would automatically guarantee durability. Wrong. It’s the installation process, especially subfloor prep and leveling, that truly counts. Another myth was that moisture barriers are optional—until I faced warping and buckling. By dispelling these misconceptions, I learned to prioritize expert-guided techniques for lasting results.
What Experts Won’t Tell You About Achieving a Perfect Finish
Many overlook the importance of equipping themselves with the right tools—like a reliable laser level or a moisture meter. These aren’t just gadgets; they’re crucial for precision. Investing in quality equipment and learning to use it transforms a good project into a professional-looking masterpiece. For trusted recommendations, I rely on resources like the ultimate guide to floor leveling.
Curated Gems That Changed My Approach
Tools like the Festool PLANEX drywall sander make refinishing hardwoods easier and safer, thanks to efficient dust collection. A durable self-leveling compound such as Ardex K 15 has saved me from uneven floors and cracked tiles. Lastly, a quality moisture meter has been my secret weapon against hidden issues that could sabotage long-term durability. These tools aren’t just investments—they’re allies in your flooring journey. To explore more, visit expert installation strategies.
Seize the Moment to Elevate Your Floors
Now that you’ve learned what goes into a durable, beautiful hardwood or tile floor, it’s your turn to take action. Embrace quality tools, heed expert tips, and don’t shy away from doing it right the first time. Remember, your flooring sets the tone of your home—make it stand out in strength and style. For ongoing insights, stay connected and continue enhancing your skills with trusted resources like home design tips.
Have you ever faced a challenge with subfloor prep or leveling? Share your experiences below—we’d love to hear your story and help out.