
I was standing in my basement three years ago, staring at a concrete floor that looked more like a skateboard ramp than a laundry room. My goal was simple: install beautiful new porcelain tile to spruce things up. But there was this floor drain right in the middle, and the slab sloped toward it aggressively from every single corner. In my naive excitement, I figured I’d just dump five bags of self-leveling underlayment and let physics do the work. Ten minutes later, I was frantically shoving old socks into the drain pipe because the ‘self-leveler’ was doing exactly what it was designed to do—finding the lowest point and trying to escape into the city sewer system. It was a messy, expensive disaster that cost me an entire weekend of chipping away hardened cement. But that failure taught me the ultimate trick for handling these tricky slopes.
The Great Conflict Between Flat Floors and Working Drains
We often think ‘level’ and ‘flat’ mean the same thing, but when you’re dealing with a utility room, they are often bitter enemies. If you make the floor perfectly level, your floor drain becomes a decorative circle that doesn’t actually catch water. If you leave the slope as-is, your large-format tiles will have more lippage than a bad Botox job. The trick isn’t to make the whole room level; it’s to create a flat plane that respects the existing pitch. I spent years figuring out how to level a floor that has a 2-inch drop without turning the room into a swimming pool. The goal is to provide a smooth surface for your flooring material while ensuring water still finds its way home.
Can you really get a professional finish without a jackhammer?
I get it. You’re looking at that wonky concrete and thinking there’s no way tile or LVP will ever sit right on it without eventually cracking or bouncing. You might be worried that messing with the slope will cause water to pool under your new flooring, leading to mold or structural damage. According to the Tile Council of North America (TCNA) Handbook, subfloor flatness is critical for tile longevity, generally requiring no more than 1/8-inch variation in 10 feet for large tiles. But how do you hit that spec when the floor is designed to be crooked? The secret lies in ‘zoned leveling’ rather than just ‘pouring and praying.’ You have to control the material instead of letting it control you. Have you ever tried to pour leveler only to watch it run away from you? It is a helpless feeling, isn’t it?
The Secret Sauce of Zoned Leveling
One of the biggest flooring installation mistakes to avoid is treating the entire room as one big bucket. My breakthrough happened when I realized I could use foam weatherstripping to create a perimeter around the drain itself. By knowing how to dam a doorway or a drain properly, you can level the outer edges of the room while keeping the area near the drain clear for a manual mortar bed slope later. It’s about finding that sweet spot where the flat surface of your main floor meets the functional slope of the drain. Before you even touch a bag of mix, you need to understand the secret to mixing the perfect bucket—if it’s too thin, it’s a liquid that will find every crack; if it’s too thick, it won’t smooth out. Neither helps you achieve that professional finish.
Don’t Pour Anything Until You Seal the Leaks
Concrete is porous, and self-leveler is essentially expensive, heavy water. I remember my second attempt at this where I was so focused on the drain that I forgot about the expansion gaps at the wall. The leveler just vanished into the abyss under the drywall, leaving me with half a floor and a very expensive mess in the wall cavity. To avoid this, you must use a high-quality primer. If you skip the prep work, you will eventually wonder why your self-leveler is pulling away from the concrete as it dries. Once the primer is tacky, take the time to caulk every single crack or gap where the floor meets the wall.
Build a Dam That Actually Holds
Use foam sills or even hot glue and weatherstripping to create a tight ring around the floor drain. This ring should be about 1/2 inch higher than your planned pour. This creates a no-go zone where the liquid cannot enter. You want the leveler to stop right at that foam barrier. This is a specialized variation of how to dam a doorway. Once the leveler cures, you will remove the foam and fill that empty space with a manual mortar bed to maintain the functional slope.
Control the Flow with Zoned Pours
Instead of dumping five buckets at once and hoping for a miracle, you need to work in sections. Start at the highest corner of the room. You can find these high points by using a laser level or by learning how to check for high spots with a 10-foot straightedge. Pour the material toward the drain dam but stop about 6 to 8 inches short of the barrier. Using a gauge rake or a spiked roller helps the material settle and release air bubbles that cause pitting.
The Science of the Perfect Mix
Temperature and water ratio are your best friends or your absolute worst enemies. If the room is too hot, you will quickly find out why your leveler is setting up before you can finish spreading it. Use ice-cold water if you are working in a warm basement or utility room. I once used lukewarm water from a garden hose in the middle of July; I got about three feet into the room before the bucket turned into a solid block of grey cheese that I had to throw away. Always follow the secret to mixing the perfect bucket to ensure the flow is consistent enough to reach the low spots without separating.
Managing the Transition for Tile
Once the leveler is rock hard, you will have a flat shelf around the perimeter of the room and a circular well around the drain. This is where you switch from liquid leveler to a manual mortar. Use a modified thinset or a sand-mix mortar to hand-tool the final slope from the edge of your new, level floor down to the drain. This ensures that your tile installation pointers that save time and money actually work, as you won’t be fighting massive gaps under your tiles. By learning how to back-butter large format tiles the right way, you can easily compensate for the slight transition between the perfectly flat shelf and the necessary slope of the drain area.Everyone tells you to just follow the bag, but the bag doesn’t live in your basement. In my experience, the manufacturer’s water-to-powder ratio is often a ‘suggestion’ that fails to account for humidity or the thirstiness of old concrete. If you stick strictly to the minimum water, the mix won’t break its surface tension, leaving you with ridges instead of a glass-smooth finish. On the flip side, adding too much water causes the aggregate to sink, leading to a brittle surface that will eventually crack under your elegant hardwood floors. It is a delicate chemistry experiment, not just a bucket of mud.
Stop Treating Your Subfloor Like a Suggestion
One of the most insidious traps is ‘outgassing.’ You think you have primed the floor, but if that primer did not create a literal airtight seal, the concrete will ‘burp’ as the leveler cures. This creates tiny volcanoes in your floor. If you have ever seen these craters, you know why your floor leveler pitted during the drying process. Professionals often double-prime or use a specialized epoxy moisture barrier to prevent this, especially on older slabs. According to the ASTM F710 standard, concrete must be properly prepared and tested for moisture because even the best leveler will not stick to a damp or ‘dirty’ slab.
Why Your Leveler Often Looks Like a Moon Landscape
The appearance of pinholes is not just a cosmetic issue; it is a sign of structural weakness. When those air bubbles reach the surface, they leave behind voids that can collapse under the weight of heavy furniture. This is why precise floor leveling techniques require more than just a bucket; they require a spiked roller to manually release that trapped air. It is about taking control of the material rather than letting it settle on its own terms.
Does Your Concrete Pass the ASTM F710 Moisture Challenge?
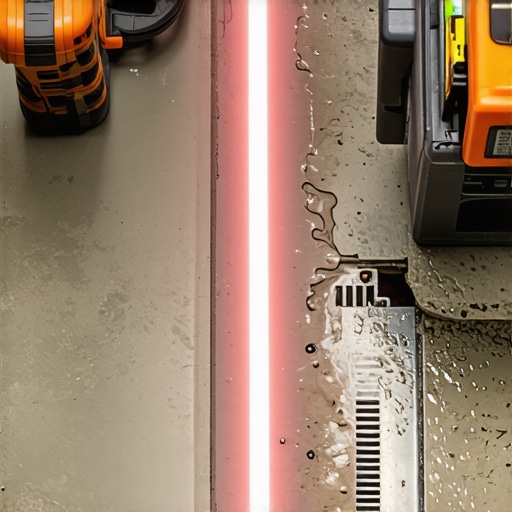
A common mistake is assuming that just because a floor is old, it is dry. Moisture vapor transmission can blow the leveler right off the floor weeks after you have finished. Always learn how to use a moisture meter before installing wood floors or tile over a freshly leveled area. If the slab is pushing out more than 3 lbs of moisture per 1,000 square feet, your leveler is basically a ticking time bomb. This is one of those flooring installation mistakes to avoid if you want your floor to last decades instead of months. Lastly, the industry loves to sell ‘self-leveling’ as a fix for everything, but it often hides structural flaws. If your joists are bouncing, the leveler will just crack. You need to distinguish between a surface that is just wonky and a subfloor that is failing. Have you ever fallen into this trap? Let me know in the comments.After years of wrestling with crooked slabs, I’ve realized that the ‘eye-balling it’ phase of my DIY career was a total sham. To really nail the long-term results, you need a specialized toolkit. I don’t just mean a bucket and a mixer. I’m talking about a surface laser. I personally use a dedicated surface laser because it projects two lines that only converge when the surface is flat. It is far more accurate than just dragging a 10-foot straightedge around. If you’re serious about how to achieve flawless floor leveling before tile laying, this is how you stop guessing and start measuring. Another essential is a high-torque mixer. Using a standard cordless drill for self-leveler is a recipe for a burnt-out motor and a lumpy mix. You need consistent power to avoid the reason your leveler is setting up too fast, which is often just poor mixing speed.
How do I keep a leveled floor from failing years later?
The real work starts after the tile is set. Maintenance is where most people drop the ball. For instance, if you’ve installed elegant hardwood floors, you must control the indoor climate. The National Wood Flooring Association (NWFA) Technical Publication No. C200 recommends maintaining a relative humidity between 30% and 50% to prevent the subfloor and the finish from moving at different rates. If you skip this, you’ll eventually wonder why your hardwood floor is crowning even if the leveling was perfect. Also, please, for the love of your grout, stop using steam mops. They force pressurized moisture into the tiny pores of your leveler and thinset, causing internal degradation. It’s one of those flooring installation mistakes to avoid that people make every single week in the name of cleanliness.Looking ahead, I suspect we’re moving toward LiDAR-based floor mapping as a standard DIY practice. Imagine using your smartphone to create a 3D heat map of your slab that calculates exactly how many bags of leveler you need to buy. Until that’s common, stick to the basics of precise floor leveling techniques. My challenge to you for your next project is this: buy a moisture meter. Knowing the exact hydration of your slab before you pour is the difference between a floor that lasts decades and one that peels up like a bad sticker. If you run into a weird layout that doesn’t make sense, feel free to contact us for advice.
Hard Lessons I Learned While Wrestling with Sloped Slabs
After three years of trial and error, the biggest lightbulb moment I had was realizing that self-leveler is not actually ‘smart’—it is just heavy and obedient to gravity. If you do not give it a boundary, it will find your sewer line every single time. I also learned that you should never trust a floor drain to be clear; always run a gallon of water through it before you start your pour. If it is sluggish now, it will be a nightmare once the floor is finished. Another critical realization: the transition zone between your flat pour and the manual slope toward the drain is where 90% of DIY projects look amateur. Taking an extra hour to hand-tool that transition with a manual mortar bed makes all the difference when you are achieving flawless floor leveling before tile laying. Finally, remember that the primer is not just a ‘suggestion.’ It is the glue that keeps your hard work from turning into a series of hollow, clicking tiles six months down the road.
The Specialized Kit That Saves My Subfloors
You can get by with a bucket and a trowel for small patches, but for a room with a drain, you need better gear. I never start a project without a dedicated surface laser. Unlike a standard bubble level, a laser reveals exactly where the liquid will stop and where your manual slope needs to begin. For mixing, I have retired my old cordless drills in favor of a high-torque, corded paddle mixer. This is essential for mastering floor leveling pro secrets because it prevents air entrainment and ensures a glass-smooth flow. I also keep a stash of 1/2-inch foam weatherstripping; it is the most reliable material for creating a water-tight dam around odd-shaped drains. These tools turn a high-stress ‘pour and pray’ session into a controlled, predictable process.
Your Path to a Seamless Surface
Do not let a wonky concrete slab or a steep utility slope intimidate you. The fear of making a mistake is often the only thing standing between you and a professional-grade finish. Once you have managed the heavy lifting of flooring installation and leveling success, the rest of the project—whether it is laying tile or luxury vinyl—will feel like a breeze. Just remember to protect your investment. If you eventually decide on wood, keep those hardwood floor care secrets in mind to ensure your perfectly flat subfloor stays protected from moisture and grit. You have the knowledge and the strategy now; it is time to grab the mixer and get to work. Have you ever had a self-leveler ‘disaster’ where the mix ended up somewhere it shouldn’t have? Let me know in the comments below.