
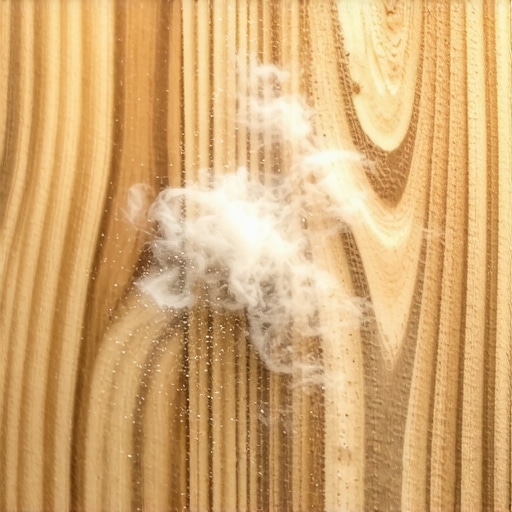
I stood there with a palm sander in one hand and a cup of lukewarm coffee in the other, staring at the 1920s heart pine in my hallway. I thought I was being smart. I thought a light touch with a vibratory sander would save me the back-breaking labor of a drum sander. I was wrong. By the time I finished the first four square feet, the wood looked less like a floor and more like a topographic map of the moon. Pitting, swirling, and deep ‘pigtails’ were everywhere. I’d fallen into the classic trap of treating old-growth pine like it was a modern laminate, and it cost me three days of extra work to fix it. Today, I’m going to show you exactly why that little machine in your garage is the secret enemy of your historic wood and how to avoid the heart-wrenching damage I caused.
Your sander might be eating your floor right now
If you’ve ever wondered why your DIY refinishing project looks ‘off’ under a clear coat, it’s likely because of how vibratory sanders interact with the unique cellular structure of aged pine. Unlike hardwoods like oak, old pine has a dramatic difference in density between the soft earlywood and the harder latewood (the dark lines in the grain). A vibratory or orbital sander tends to bounce off the hard rings and dig deep into the soft sections between them. This creates a wavy, ‘dished-out’ surface that you won’t even notice until the light hits it at an angle. I made the mistake of thinking mastering hardwood floor refinishing just meant removing the old finish. I didn’t realize I was literally sculpting the wood into an uneven mess. According to the National Wood Flooring Association, certain softwoods can be so sensitive that even the weight of the machine can cause ‘dishing’ if it’s not moved at a perfectly constant speed.
Is a standard orbital sander actually worth the risk?
The short answer is: rarely for the main event. It’s tempting because it feels safer than a massive drum sander, but for old pine, it’s often a recipe for frustration. You’ll find yourself fixing a floor sanded against the grain or trying to buff out swirls for hours. I’ve seen countless homeowners—including my younger self—try to skip the heavy machinery only to end up with a floor that feels ‘fuzzy’ or looks splotchy. If you want that glass-like finish, you need to understand hardwood floor care secrets and why leveling the field is more about finesse than just vibration. Have you ever started a ‘quick’ sanding job only to realize you’ve made things ten times worse? Let me know, and we can swap war stories before I show you the right way to prep these delicate boards.
Grab the heavy artillery for a flat finish
To stop the ‘dishing’ effect I mentioned earlier, you have to move away from handheld tools and embrace the weight of a drum sander. Think of it like this: a small orbital sander is a sponge—it follows every dip and curve of the wood. A drum sander is a plane—it cuts off the peaks of the boards to match the valleys. When I first attempted the guest bedroom, I was terrified the drum would eat through to the joists. But once you realize that the weight of the machine is your friend, everything changes. You aren’t pushing it; you’re merely guiding its path along the grain. Using the right equipment is the first step in mastering hardwood floor refinishing expert tips for 2025.
Keep your pace steady as a heartbeat
While you use the drum sander, your feet need to move with the consistency of a metronome. If you pause, even for a heartbeat, that rotating drum will bite into the soft pine earlywood. I once sneezed while crossing the threshold of my kitchen. That one-second hesitation left a crescent-moon-shaped gouge that required me to sand the entire floor down another 1/16th of an inch just to blend it out. If you do mess up and create a divot or a cross-grain mark, you’ll need to know how to fix a wood floor that was sanded against the grain before you ever think about applying a finish.
Level the playing field before you finish
You also need to focus on the ultimate guide to floor leveling for a perfect finish. Old houses settle, and pine boards often cup (edges higher than the center) or crown (center higher than the edges) over a century. If you don’t flatten the surface by sanding at a slight 7 to 15-degree angle on your first pass, your sander will only highlight the waves. This is especially critical when you are trying to how to match new hardwood to a century-old subfloor. A height difference of even a fraction of an inch will catch the edge of your sandpaper, causing it to tear and leaving unsightly marks on your historic timber.
Respect the grit ladder to avoid visible scratches
Most DIYers want to jump from a coarse 36-grit—which is the ‘chainsaw’ of sandpaper—straight to a smooth 100-grit to save time. On heart pine, that is a fatal error. The deep valleys left by the 36-grit won’t be touched by the 100-grit; they’ll just be polished inside. You must hit every note: 36, 50, 80, and finally 100. I once skipped the 50-grit on a 10×10 area and spent the next three hours hand-scraping scratches that the buffer couldn’t reach. It felt like trying to smooth out a gravel road with a silk ribbon. Take your time, follow the sequence, and the wood will reward you with a glow that modern lumber just can’t replicate.
Everyone tells you that self-leveling compound is the ‘magic eraser’ for old, wonky floors. They say you just dump the bucket and walk away. In my experience, that is a marketing lie that leads to an expensive, lumpy mess. Most people don’t realize these products are actually ‘self-smoothing,’ not ‘self-leveling.’ If you don’t physically move the material to the low spots and respect the surface tension, gravity will not save you before the product sets. This becomes a nightmare if you don’t know why your self-leveler is drying faster than you can pour it. I’ve seen pros lose entire batches because they underestimated the thirst of an old subfloor.
Stop whipping your compound into a froth
Here is the ‘oops’ factor that ruins more high-end installs than almost anything else: the mixing speed. You grab your most powerful corded drill and a paddle, and you whip that compound like you’re making a meringue. You think more speed equals a smoother mix, but it’s actually the opposite. High-speed mixing shears the polymers and introduces thousands of micro-bubbles into the slurry. When those bubbles rise to the surface as the floor dries, they leave behind tiny ‘pinholes’ that weaken the entire structure. This is exactly the mixing paddle-speed that ruins your leveling compound. You want a slow, methodical churn—not a vortex.
#IMAGE_PLACE_HOLDER_C#
Why does your leveler crack even when you follow the bag instructions?
The most sophisticated mistake I see involves ignoring ‘deflection’—the amount a floor bends under weight. If you are pouring over a 100-year-old wood subfloor, that wood is going to move. Standard leveler is brittle like glass. According to the Tile Council of North America (TCNA) Handbook, a substrate must meet specific stiffness standards (often L/360) to prevent failure. If your joists are too bouncy, the most expensive compound in the world will eventually snap. This is a critical nuance in mastering floor leveling pro secrets for perfect installations. You might need to add a layer of exterior-grade plywood or specialized lath to give the compound something to hold onto, otherwise, you’ll be left wondering why your self-leveler didn’t bond to the wood subfloor after it starts crunching under your feet.
The physics of the pour matters more than the product
To get that mirror-like surface you see in magazines, you need to use the spiky roller secret for a mirror-smooth pour. This tool isn’t just for show; it breaks the surface tension and helps the material knit together at the seams of each pour. When I was refinishing my hallway, I skipped this step and ended up with visible ‘ridges’ where one bucket met the next. Learning how to achieve flawless floor leveling before tile laying is about managing the timing and the physics of the liquid, not just the chemistry. Have you ever fallen into the trap of thinking the product would do all the work for you? Let me know in the comments, and we can troubleshoot your next project together.
I’ve spent thousands of dollars on tools I only used once, but if there is one piece of kit that saved my 1920s pine, it’s a high-quality pinless moisture meter. I personally swear by the Lignomat Scanner D because you can’t manage what you can’t measure. Before I even think about a finish, I need to know the moisture content of the wood. Knowing how to use a moisture meter before you lay wood floors is the difference between a floor that stays flat and one that turns into a roller coaster by next summer. When it comes to the leveler, I don’t just use a standard bucket anymore. I use a dedicated mixing station with a Hippo mixer. It sounds like overkill until you realize that a perfectly consistent pour is the only way to avoid why your self-leveler developed spiderweb-cracks overnight. The National Wood Flooring Association (NWFA) Technical Manual emphasizes that substrate moisture must be within 2-4% of the flooring moisture for plank installs. If you skip this data point, you’re just guessing with your investment. 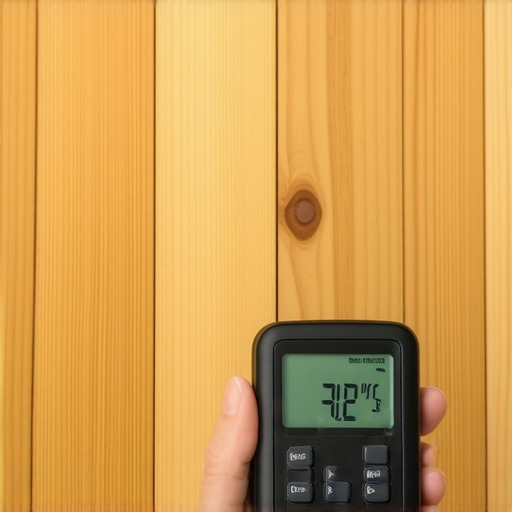
How do I keep my new floor from failing in five years?
Maintenance isn’t just about sweeping; it’s about climate control. Wood is a breathing organism, and if your house swings from 20% humidity in the winter to 80% in the summer, your floor will literally tear itself apart. I’ve learned that hardwood floor care secrets always involve a whole-house humidification system. If you see gaps appearing, don’t reach for the wood filler—reach for the thermostat. You also need to watch out for flooring installation mistakes to avoid for lasting results, like using abrasive steam mops that can delaminate modern finishes or force moisture into old grain.
The future of the flat floor
Looking ahead, I predict we are going to see a massive shift toward carbon-fiber-reinforced self-leveling compounds as the industry standard. We’re already seeing brands experiment with high-tensile fibers that allow the compound to flex with the house rather than snap under tension. This will be a game-changer for historic renovations where joist movement is a fact of life. My advice? Don’t settle for the cheapest bag at the big-box store. Invest in a fiber-reinforced product for your next project. It’s the best insurance policy you can buy. Grab a moisture meter today and check three different spots in your room; you might be surprised by what the wood is trying to tell you.
Lessons That Saved My Hallway
Looking back at my first attempt to refinish that 1920s heart pine, I realize I treated the wood like a patient on an operating table rather than a living, breathing piece of history. One of the biggest shifts in my mindset was realizing that old wood doesn’t just need cleaning; it needs respect for its anatomy. Always trust the grit sequence. Skipping even one step to save twenty minutes will cost you hours of hand-scraping later. I also learned that the sound of the machine is your best guide; when a drum sander hits a soft spot, the pitch changes. If you aren’t listening, you’re just guessing. Most importantly, remember that mastering hardwood floor refinishing expert tips for 2025 is as much about patience as it is about the equipment. If you feel frustrated, step away for a coffee; the wood will still be there when your heart rate slows down.
A Pro Survival Kit
You don’t need a warehouse full of tools, but you do need the right ones for a high-value result. My personal toolkit always starts with a Lignomat pinless moisture meter. It is the only way to ensure you are ready for the finish. For leveling, I never pour without a Hippo mixing station anymore. It ensures a lump-free slurry that prevents why your self-leveler developed spiderweb-cracks overnight. I also highly recommend keeping a set of Japanese pull saws for those tricky doorway notches and a high-quality spiky roller to eliminate air bubbles. These aren’t just luxuries; they are the difference between a DIY look and a showroom finish.
Your Foundation for the Next Century
Refinishing or leveling a floor is more than just a home improvement task; it is a way to preserve the soul of your house. When you take the time to do it right, you aren’t just fixing a surface; you are creating a stage for your life to happen on. Don’t be intimidated by the heavy machinery or the chemistry of the compounds. By following the ultimate guide to floor leveling for a perfect finish, you are setting yourself up for a result that will outlast your tenure in the home. Use how to use a moisture meter before you lay wood floors as your final check, then step back and admire the glow of a job well done. Once you’re finished, make sure to implement hardwood floor care secrets to keep that luster alive for decades to come. Your home is worth the extra effort. Have you ever struggled with getting a perfectly flat surface on a floor that had a significant dip? Let me know your experience in the comments below!