
I remember walking into my sunroom last summer, expecting to feel that smooth, modern LVP underfoot. Instead, I tripped. Not a full face-plant, but enough to make me spill half my coffee. My brand-new luxury vinyl planks were peaking—lifting right at the short ends like a series of tiny, plastic mountains. It looked like a DIY disaster. I was devastated because I had spent a week’s worth of evenings clicking those planks together, only to have them revolt against me within a month. It felt like my house was actively trying to reject its new wardrobe.
Stop Tripping Over Those Annoying Peaked Joints
The hard truth is that peaking isn’t just an eyesore; it is a signal that your floor is under extreme stress. When I first started messing around with home renovations, I made the classic mistake of thinking I could skip the boring prep work. I didn’t realize that flooring installation mistakes often hide under the surface until it’s too late. If those short joints are pushing against each other, they have nowhere to go but up. Today, we are going to dive into why this happens and exactly how to stop your floor from acting like a tectonic plate. Have you ever noticed your planks lifting specifically near a sunny window or a heavy piece of furniture? Tell me about your flooring frustrations in the comments below.
Is Luxury Vinyl Just Cheap Junk That Won’t Last?
I hear this all the time from neighbors who see their floors failing. People get skeptical and assume LVP is just glorified stickers. But the reality is that luxury vinyl is a highly engineered material that follows the laws of physics. According to the Resilient Floor Covering Institute (RFCI), most vinyl flooring products are designed to be dimensionally stable only within a specific temperature range, usually between 55°F and 85°F. When your room gets too hot or too cold, the material expands and contracts. If you didn’t follow the expansion gap rule, those planks are going to crush into each other. I once installed a floor tight against the baseboards because I thought it looked cleaner. Within two weeks, every short joint in the hallway looked like a miniature A-frame tent.
Why Your Subfloor is Your Floor’s Worst Enemy
Peaking often happens at the short joints because that is the weakest point of the locking mechanism. If your subfloor isn’t perfectly flat, the tongue and groove are constantly being pulled apart or pushed together as you walk over them. I learned the hard way that why your LVP floor is showing telegraphing from the subfloor is often the same reason it starts to peak. Small humps in the plywood or concrete push the joints up, creating that peaked look. If you are dealing with this right now, don’t panic. We are going to look at how to relieve that pressure and get your floor back to being the flat, beautiful surface you paid for.
Cut Back the Pressure Before Your Planks Snap
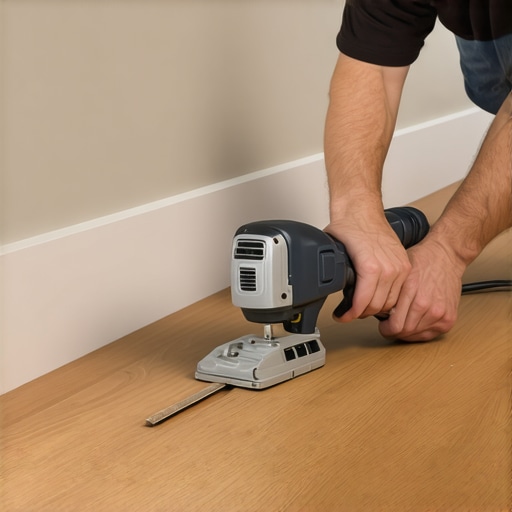
Think of your LVP floor like a deck of cards shoved into a box that’s just a hair too small. Eventually, the cards have to bow. To fix peaking, you first have to identify where the floor is “choking.” I spent three hours once chasing a peak in my hallway, only to realize the floor was wedged tight against a door casing three feet away. The first thing you need to do is pull up your baseboards or quarter-round molding. If you see the vinyl touching the wall anywhere, that’s your culprit. You need at least a 1/4-inch to 3/8-inch gap. If the gap is missing, grab an oscillating multi-tool. Carefully trim back the edge of the plank while it’s still on the floor. It’s messy, and your hands will vibrate for twenty minutes afterward, but that instant ‘sigh’ the floor makes when it settles back down is worth the numb fingers. Understanding flooring installation mistakes early can save you this headache during the initial layout.
Flatten the Peaks Without Tearing It All Up
Once you’ve restored the expansion gap, those “mountains” might not flatten instantly. They’ve developed a bit of muscle memory. I’ve found that using a tapping block and a rubber mallet is the most effective way to massage them back into place. But be careful—the the rubber mallet mistake that ruins tongue and groove joints is real. If you hit the joint directly, you’ll shatter the locking mechanism, and then no amount of gravity will keep it down. Always use a scrap piece of flooring or a professional tapping block to distribute the force. I once tried to “persuade” a peak back down with a standard hammer and a rag. One slip-up later, I had a permanent crescent-moon-shaped dent in a brand-new plank. Learn from my impatience: use the right tools or prepare to buy more boxes.
Fix the Foundation to Stop the Bounce
If the peaking returns after you’ve trimmed the edges, you aren’t fighting expansion; you are fighting gravity. LVP is flexible, but its joints are brittle. If there is a dip in your subfloor, the weight of your footsteps forces the planks down, which pivots the short joints upward. This is why mastering floor leveling is non-negotiable. You want a subfloor that is flat within 3/16 of an inch over a 10-foot span. When I prepped my second sunroom, I actually used a 10-foot straight edge to find the low spots. It felt overkill at the time, but three years later, those joints are still as flat as a frozen lake. If you find a massive dip, you might need to pull the floor back to that spot and apply a self-leveling compound. Just make sure you know the mixing paddle speed that ruins your leveling compound before you start pouring, or you’ll end up with a bucket of bubbles instead of a flat floor.
Manage the Sun and Heavy Objects
Heavy furniture can act like an anchor, pinning the floor down and preventing it from expanding toward the walls. If you have a 500-pound oak cabinet sitting on one side of the room and a sun-drenched window on the other, the floor will expand toward the cabinet, hit it, and then peak in the middle. I solved this in my office by putting felt pads under everything and ensuring the floor had room to move under the heavy legs. If you’re dealing with high-heat areas, you might need to consider how to stop luxury vinyl planks from sliding or shifting while still allowing for thermal movement. It’s a delicate balance, much like trying to keep a rug straight on a tile floor.
One of the most persistent myths I encounter is that a thicker underlayment equals a higher-quality floor. Retailers love to upsell those 5mm foam rolls, promising a ‘whisper-quiet’ home. In reality, this is a recipe for disaster. Luxury vinyl is designed to sit on a rigid base; adding too much ‘squish’ creates a trampoline effect that puts immense pressure on the locking mechanisms. Every time you walk across the room, those tiny plastic tongues are bending. Eventually, they fatigue and snap. The Tile Council of North America (TCNA) and major manufacturers warn that excessive vertical deflection is the leading cause of joint separation. If you want a floor that lasts, prioritize density over thickness and stick to the manufacturer’s specific underlayment requirements. Have you ever fallen into this trap of buying the thickest pad available? Let me know in the comments below. 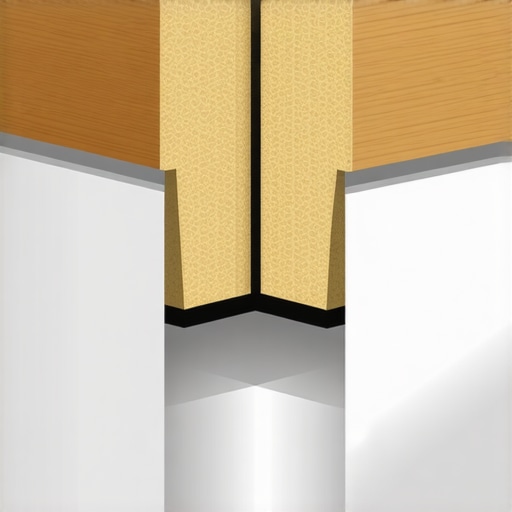
The Chemistry Behind Your Leveling Disaster
Another nuance that separates the pros from the weekend warriors is how they handle the chemistry of the pour. I’ve seen dozens of DIYers mix leveler with a standard paint stirrer and wonder why their floor looks like a moonscape later. If you don’t respect the mixing paddle speed that ruins your leveling compound, you are essentially whipping air into the slurry. Those bubbles eventually rise and pop, leaving behind tiny craters that will eventually show through your LVP. To avoid this, you need to use a specialized tool designed for the job. The spiky roller secret for a mirror smooth pour isn’t just a pro gimmick; it is the only way to break surface tension and release trapped air before the compound sets. Skipping this step is why so many people struggle with flooring installation mistakes that are easily preventable.
Why does your leveler look like a topographical map even after a perfect mix?
The culprit is often a ‘thirsty’ subfloor. If you don’t prime your concrete or plywood correctly, the dry substrate will suck the moisture out of the leveling compound before it has a chance to flow. This creates ‘islands’ and ridges, which is exactly why your self-leveling pour looks like a topographical map. I always recommend a double-prime on old, porous concrete to create a sealed surface. This allows the leveler to remain fluid long enough to find its own level. Mastering floor leveling isn’t about how fast you pour; it’s about how well you prepare the surface to receive the material. If you ignore the bond-breaker or the primer, your floor will never be flat, no matter how expensive the LVP is.
Don’t Let Your Subfloor Telegraph Your Laziness
Finally, we have to talk about the ‘out of sight, out of mind’ trap. People think LVP is thick enough to hide small imperfections in the subfloor. It isn’t. Over time, the vinyl will conform to every bump and dip, a process known as telegraphing. If you have a screw head sticking up or a glob of old drywall mud, you will eventually see it on the surface. This is why flooring installation fundamentals always emphasize a clean, scraped, and vacuumed subfloor. I spent four hours on my hands and knees with a floor scraper in my last project, and it was the most important work I did all week. A tiny bit of grit under a plank can create a high point that eventually causes a peak or a crack in the joint. Take the time to prep, or take the time to redo the floor in two years—the choice is yours.
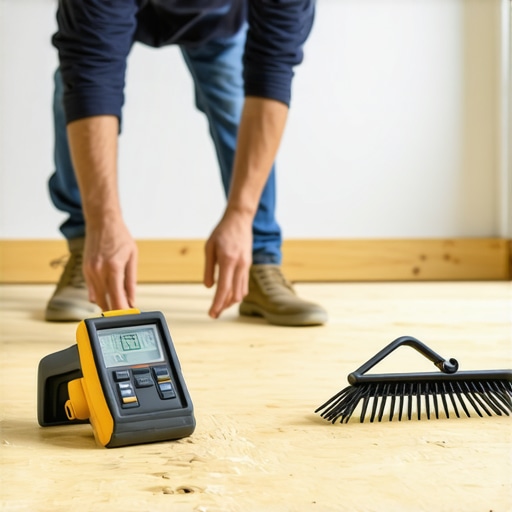
If you’re serious about the long-term health of your floor, you have to stop guessing and start measuring. I used to think I could ‘feel’ if a concrete slab was dry enough just by touching it. Spoiler alert: I was wrong every single time. Now, I never start a project without my Wagner Meters Orion 950. It’s an expensive piece of kit, but compared to the cost of a failed $5,000 floor, it’s a bargain. According to the National Wood Flooring Association (NWFA) Technical Publication No. A100, moisture content in the subfloor should be within 2-4% of the flooring material before you even think about nailing a single plank down. This is the gold standard of how to use a moisture meter before you lay wood floors that prevents those dreaded gaps and buckles from showing up six months later.
Stop Guessing and Start Measuring with a Moisture Meter
When it comes to the actual pour for your subfloor, my secret weapon is a gauge rake followed immediately by a spiky roller. Most DIYers try to move material around with a floor squeegee, but a gauge rake lets you set the exact depth of the leveler, ensuring you don’t end up with thin spots that crack under pressure. If you want that glass-like finish, the spiky roller secret for a mirror smooth pour is the only way to go. It breaks up those tiny bubbles that often lead to why self-leveling compounds bubbled over your subfloor, giving you a professional-grade substrate for your LVP or tile. I’ve found that taking the extra ten minutes to roll out the air saves hours of sanding down high spots later.
How do I keep my high-traffic floors from dulling out over time?
Maintenance isn’t just about cleaning; it’s about protection. For my hardwood projects, I always emphasize that hardwood floor care secrets to longevity and shine start at the door. Use high-quality walk-off mats and avoid any cleaner that contains wax or oil-based soaps. These products create a sticky residue that actually attracts more dirt, which acts like sandpaper under your feet. If your wood has already lost its luster, you might be looking at mastering hardwood floor refinishing expert tips for 2025 to bring back that factory-fresh glow without a total tear-out. For LVP, the rules are simpler but just as strict: no steam mops. The heat can compromise the internal bond of the layers, leading to that peaking we discussed earlier.
Why the Next Decade of Flooring Belongs to Hybrid Cores
Looking ahead, I predict a massive shift toward hybrid mineral cores. We’re already seeing ‘Wood-Plastic Composite’ (WPC) being phased out for ‘Stone-Plastic Composite’ (SPC), but the next step is 100% PVC-free mineral boards that offer even higher thermal stability. These materials will essentially eliminate the expansion gap headache, allowing for massive continuous runs without transition strips. But even with these ‘perfect’ materials, the basics still apply. Before you lay a single plank of any new material, I highly recommend performing the hammer test for finding loose subfloor nails. A single loose nail can create a clicking sound that will haunt your dreams for as long as you live in that house. Trust me, go around the room and tap every square foot—if it sounds hollow or clicks, throw a screw in it. That extra hour of prep is the difference between a floor that feels solid and one that feels like a cheap hotel.
Lessons from the Floor That Would Not Stay Down
Looking back at my sunroom disaster, I realized that my biggest mistake wasn’t the material choice, but my lack of respect for the environment. I’ve learned that a floor is a living, breathing thing. First, never trust the label ‘waterproof’ to mean ‘bulletproof.’ Just because water won’t rot the plank doesn’t mean heat won’t warp it. Second, your expansion gap is a safety valve, not a suggestion. If you block it, the floor will find another way to move—usually up. Lastly, I discovered that a thick, squishy underlayment is the fastest way to ruin a good floor. It feels great for a week, but it’s essentially a slow-motion wrecking ball for your locking joints. If you follow a solid step-by-step guide to flooring installation and leveling success, you’ll avoid these expensive ‘lightbulb moments’ that cost me my sanity and a few hundred dollars in wasted planks.
The Gear I Trust to Prevent My Own Flooring Disasters
I don’t start a single project anymore without my trusted ‘trio of flatness.’ My first must-have is a professional moisture meter; it’s the only way to know if your subfloor is ready or if it’s hiding a moisture trap that will eventually blow your seams. Next, for any leveling work, I swear by a specific roller selection that prevents air bubbles in leveler. It’s a game-changer for getting that glass-like finish. Finally, I never use a standard hammer; I use a dead-blow mallet and a high-density tapping block. These tools ensure the force goes into seating the joint, not shattering the plastic tongue. I trust these tools because they’ve turned my 4-hour ‘quick fixes’ into 20-year installations. If you’ve ever wondered why self-leveling compounds bubbled over your subfloor, it’s almost always because you skipped one of these essential mechanical steps.
#IMAGE_PLACEHOLDER_E#
Reclaim Your Home from Those Peak-y Planks
Fixing a floor that has already started to peak can feel like fighting a losing battle, but I promise you, it is manageable. By relieving the pressure at the walls and addressing the subfloor dips, you are giving your flooring installation a second lease on life. You don’t have to live with a floor that trips you up or looks like a DIY fail. Take a deep breath, grab your multi-tool, and start trimming back those edges. A flat, quiet, and beautiful floor is well within your reach if you just stop and do the prep work you skipped the first time. Your home deserves a foundation that stays where it belongs—flat on the ground. Have you ever discovered a hidden expansion gap issue after you already finished your baseboards? Let me know in the comments below!