
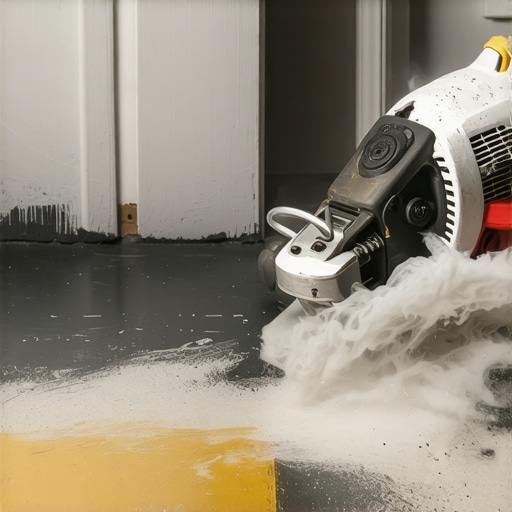
I’ll never forget the sound of that first ‘crunch.’ It was three weeks after I’d finished what I thought was a masterpiece of a laundry room renovation. I had spent a weekend laying beautiful porcelain, skipping the tedious task of grinding off the old, ugly gray paint because it felt ‘solid enough.’ That crunch was the sound of my hard work—and my money—literally detaching from the subfloor. It turns out, your tile is only as good as the bond beneath it, and paint is a notoriously flaky middleman. If you’re staring at a painted slab and wondering if you can just thinset right over it, stop. We’re going to get your floor ready the right way so you don’t have to learn the hard way like I did. [image placeholder]
Why Your Painted Subfloor Is Sabotaging Your New Tile
The hard truth is that thinset is designed to grip into the pores of concrete or the fibers of wood, not the slick surface of a 10-year-old coat of semi-gloss. When you apply mortar over paint, you aren’t bonding the tile to the floor; you’re bonding it to the paint. If that paint decides to let go—and it will under the weight of heavy traffic—your whole installation fails. I see this happen most often with elegant tile designs that people want to rush into place. Believe me, I’ve been there, scraping up dried mortar and shards of broken ceramic because I tried to cut corners on the concrete etching step that would have saved the whole project.
Can’t I just use a high-bond primer and skip the grinding?
It’s the question I get asked every time I help a neighbor with their basement. While there are specialty primers on the market, the Tile Council of North America (TCNA) generally recommends a mechanical bond for the best results, noting that most coatings must be removed to reach a sufficient tensile bond strength. Have you ever tried to ‘cheat’ a prep step only to have it bite you in the back six months later? Today, we are going to look at why most floor levelers fail on top of painted concrete and the exact steps to ensure your new floor stays stuck for a lifetime. Whether you are aiming for lasting results or just a quick weekend refresh, the foundation is where the battle is won or lost.
The Tape Test That Saves Your Weekend
Before you commit to a full day of labor, you need to perform a ‘stick check.’ It’s the simplest way to see if your subfloor is lying to you. Take a six-inch strip of heavy-duty duct tape, burnish it onto the painted surface with your thumb, and rip it up as fast as you can. If you see even the smallest flecks of paint on that tape, your bond is compromised. It’s like trying to build a house on a foundation of wet playing cards—eventually, the weight causes everything to slide. If the paint fails this test, you must learn how to remove old mastic without damaging the slab or any other existing coating before moving forward.
Why Mechanical Removal Is Your Only Real Option
I once worked on a basement in Troy where the homeowner had used a thick, oil-based garage paint. We tried every chemical stripper under the sun, but it just created a gooey, toxic mess that was harder to clean than the paint itself. Since then, I’ve sworn by mechanical removal. This isn’t just about getting the paint off; it’s about ‘scarifying’ the surface. Using a 7-inch angle grinder with a diamond cup wheel and a dust shroud is the gold standard. You want to see the ‘pores’ of the concrete. This ensures you are installing tiles like a pro by creating a surface profile that mortar can actually grab onto. 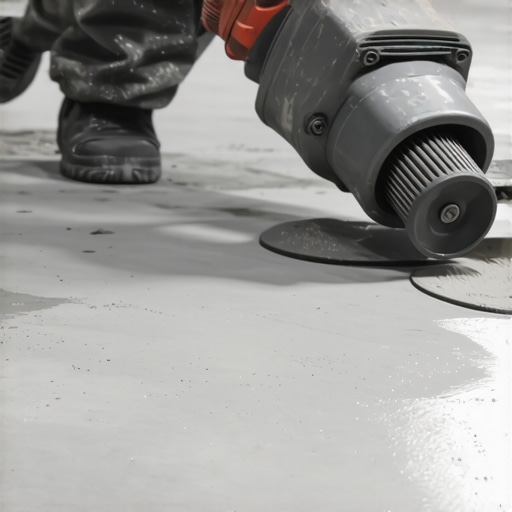
The Secret to a Dust-Free Grinding Session
Many DIYers avoid grinding because they fear the dust cloud. The trick is a high-quality HEPA vacuum attached directly to your grinder’s shroud. If you see dust escaping, you’re either moving too fast or your seal is broken. In that Troy basement, we cleared 400 square feet in an afternoon without a single speck of dust landing on the upstairs furniture. Once the concrete is bare, you might realize the slab is uneven. At this stage, the concrete etching step you shouldn’t skip before leveling can help clean out the deep pores of the concrete, preparing it for a primer that actually sticks.
Leveling the Playing Field After the Paint Is Gone
Once you’ve exposed the raw concrete, the ‘moon craters’ and dips will become obvious. Don’t try to fill these with extra thinset as you lay tile; that’s a recipe for lippage. Instead, use precise floor leveling techniques to achieve flawless surfaces. When mixing your leveler, watch your RPMs. I’ve seen many floors ruined because people ignored the mixing paddle speed that ruins your leveling compound. High speeds whip air into the mix, creating tiny bubbles that turn into ‘pinholes’ once the floor dries. Use a slow, steady mix and follow up with the spiky roller secret for a mirror-smooth pour to pop any remaining bubbles. This prep work is what separates a floor that lasts decades from one that cracks within a year.
Plan Your Transitions Early
While you are focused on the concrete, don’t forget where the tile meets the rest of your home. If you are transitioning to the right hardwood floors for your home, your subfloor heights need to be calculated now. Knowing how to fix a transition between tile and uneven concrete during the leveling phase prevents those awkward ‘toe-stubber’ lips between rooms later on. Every minute spent with a grinder or a level today is worth an hour of repairs five years from now.
Common wisdom suggests that self-leveling compounds are a simple ‘pour and forget’ solution, but that’s a dangerous oversimplification. In my years on the job, I’ve found that the most expensive failures happen when people trust the chemistry of the product more than the physics of the room. Most homeowners assume that more volume automatically equals a flatter floor, yet excessive thickness without proper reinforcement or moisture management often leads to structural cracking. I’ve seen dozens of projects stall because the installer believed the leveler would magically fix a structurally unsound subfloor—it won’t. If you don’t address the root cause, you’ll eventually find why your self-leveling pour looks like a topographical map instead of a flat surface.
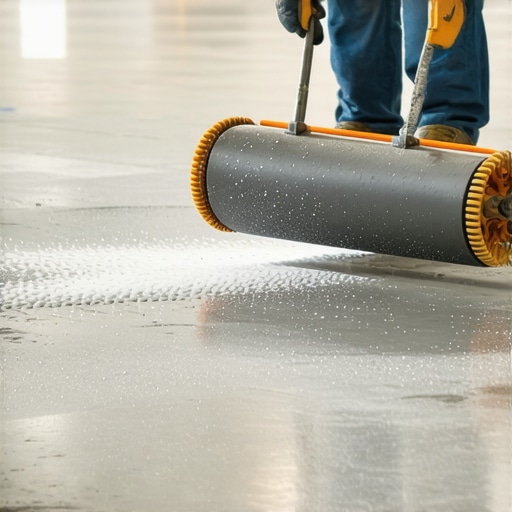
Let’s talk about the ‘Oops’ factor that ruins a weekend: the air bubble epidemic. If you’ve ever seen a finished floor that looks like the surface of the moon after it dries, you’ve witnessed outgassing. This isn’t just an aesthetic issue; those tiny craters weaken the integrity of the surface where your thinset needs to grip.
Why is my self-leveling compound bubbling despite the primer?
This is the most common advanced-level headache I encounter. It happens when the subfloor isn’t fully sealed, or—more often—when the primer was diluted incorrectly. The Tile Council of North America (TCNA) emphasizes in their handbook that substrate porosity must be neutralized; otherwise, air escapes from the concrete’s pores as the leveler settles, creating those annoying pinholes. If you miss this crucial seal, you will be left wondering why self-leveling compounds bubbled over your subfloor before you even open a box of tile. Mechanical preparation is key, but the chemical barrier is what keeps the air where it belongs—under the slab.
Another trap is the tool in your hand. Most DIYers use a standard paint mixer on a high-speed construction drill. That’s a massive mistake. Using the mixing paddle speed that ruins your leveling compound—usually anything over 650 RPM—whips air into the slurry like a giant meringue. You want a slow, methodical fold to keep the mix dense. Once the pour begins, don’t just leave it to settle. Using the spiky roller secret for a mirror-smooth pour is the only way to release surface tension and ensure you aren’t dealing with how to prevent ghosting marks on your self-leveling finish once the light hits it at an angle.
We also need to consider the timeline after the leveler dries. If you’re transitioning to wood, you aren’t just looking for a flat surface; you’re looking for a dry one. I’ve seen gorgeous wide-plank installations warp because the leveler was still ‘sweating’ moisture. For those mastering hardwood floor refinishing expert tips for 2025, patience is the ultimate tool. You have to wait until a proper moisture test confirms the slab is ready, regardless of what the ‘walkable in 4 hours’ label claims. Avoiding these flooring installation mistakes to avoid for lasting results is what separates a frustrating DIY attempt from a professional-grade home transformation. Once you have that mirror-smooth, bone-dry base, you can finally focus on hardwood floor care secrets to longevity and shine. Have you ever fallen into this trap? Let me know in the comments.
The Gear That Separates Pros from Amateurs
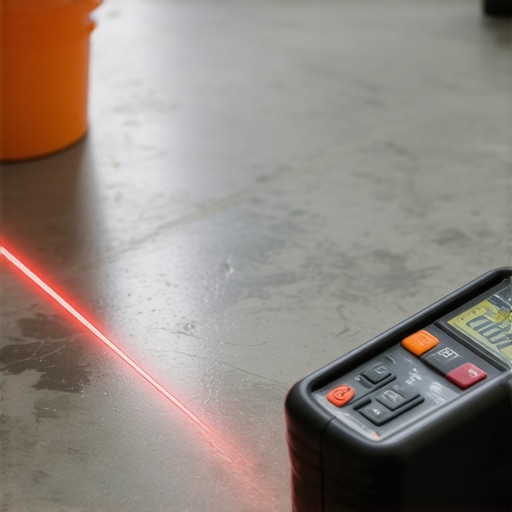
After decades of getting my hands dirty, I’ve realized that the ‘self-leveling’ label is a bit of a marketing lie. It doesn’t level itself; you level it using the right physics and the right tools. My go-to for every single job is a high-accuracy rotary laser. I don’t just use it for the big pours; I use the laser level move for perfectly straight hallways to ensure every transition is dead-on. If you aren’t checking your heights with a laser, you are just guessing, and guessing leads to lippage. When I’m prepping for a big project, I also rely on the International Concrete Repair Institute (ICRI) guidelines, specifically looking for a Concrete Surface Profile (CSP) of 3. This is the ‘goldilocks’ texture—not too smooth, not too rough—that ensures your thinset actually becomes one with the slab. For those aiming for precise floor leveling techniques to achieve flawless surfaces, hitting that CSP rating is the secret sauce.
How can I ensure my subfloor bond lasts for decades?
Maintenance and longevity are actually decided before the first tile is even buttered. Most people think maintenance starts with a mop, but it actually starts with a moisture meter. I personally use a Tramex non-destructive meter because it tells me if there’s hidden hydrostatic pressure trying to push my floor up. If you ignore this, you’ll find why your basement floor needs a moisture barrier even if it feels dry the hard way—with popping tiles and moldy grout. Once the floor is in, protect that investment by following hardwood floor care secrets to longevity and shine. Avoid the temptation to use harsh chemicals; they strip the sealers we worked so hard to apply during the the ultimate guide to floor leveling for a perfect finish phase.
Where Flooring Prep is Headed in 2025 and Beyond
I’m seeing a massive shift toward ‘smart’ leveling compounds and digital scanning. In the very near future, we’ll likely see augmented reality (AR) apps that can scan a subfloor and tell you exactly how many bags of leveler you need down to the ounce. This will eliminate the guesswork that leads to floor leveling challenges and common mistakes. We are already seeing more installers move toward high-tech underlayments; for instance, understanding why your apartment building requires cork underlayment is becoming standard knowledge for urban renos. As materials get thinner and stronger, the margin for error on the subfloor becomes razor-thin. If you want to stay ahead, I highly recommend trying the ‘Laser Level Move’ on your next layout. It’s a small adjustment that provides an immediate, professional-grade confidence boost. Don’t just pour and pray; measure and master.
The Most Expensive Lessons Learned from My Worst Flooring Jobs
If you take nothing else away from my trial-and-error journey, remember that time spent on prep is never wasted time. First, stop trusting the ‘walkable in 4 hours’ promise on the bag of leveler. In humid environments, that moisture lingers, and how to achieve flawless floor leveling before tile laying requires a bone-dry substrate to prevent mold and delamination. Second, your knees will thank you for investing in a high-quality rolling seat—flooring is a marathon, not a sprint. Finally, never assume the manufacturer’s instructions account for a 100-year-old house; you have to adapt your strategy to the actual conditions under your feet rather than following a generic box label. [image placeholder]
My Essential Tool Kit for a Lifetime of Solid Floors
I’ve cycled through dozens of gadgets, but a few stay in my kit for every single project because they eliminate the guesswork that causes failures. I never start a pour without a dedicated low-RPM mixer; this is a vital part of mastering floor leveling pro secrets for perfect installations without introducing air bubbles. I also highly recommend picking up the Tile Council of North America (TCNA) handbook, which serves as the definitive guide for every possible substrate scenario you’ll encounter. For moisture checks, I rely on a non-destructive meter to verify my subfloor is ready, which is a cornerstone of a step-by-step guide to flooring installation and leveling success.
Turn Your Subfloor Anxiety into Long-Term Durability
There is a unique kind of pride that comes from walking across a floor that doesn’t creak, pop, or shift under your weight. By removing that old paint and committing to mechanical prep, you aren’t just making a room look good—you’re building a structural element that will last for decades. Once you’ve conquered the subfloor and the tile is set, you can shift your focus to the fun part: maintaining that beauty with hardwood floor care secrets to longevity and shine. Don’t be intimidated by the grinder or the laser; they are simply tools to help you reach a professional finish. Have you ever had a tile floor fail because of a bad bond to an old coating? Let me know about your experience in the comments below.