
I still remember the sinking feeling in my gut when I walked into my basement and heard a hollow ‘crunch’ under my boots. Just two weeks earlier, I had poured what I thought was a flawless layer of self-leveling compound over an old, battleship-gray painted floor. I was proud of it. But as I stood there, a massive chunk of the new leveler literally slid across the floor like a hockey puck. It hadn’t bonded to the concrete; it had merely sat on top of the paint, waiting for the slightest bit of tension to snap. If you are staring at a glossy garage or basement floor right now, thinking you can just pour and go, please put the bucket down. Most DIYers—and even some pros who should know better—treat paint like a solid foundation, but in the world of flooring, paint is nothing more than a very thin, very effective bond breaker. Today, I am going to show you exactly why that beautiful paint job is secretly sabotaging your project and how you can actually get a leveler to stick for good. Have you ever tried to scrape up ‘solid’ paint only to find it flakes off the moment it gets wet?
That Glossy Finish Is Your Worst Enemy
It sounds counterintuitive, doesn’t it? You’d think a clean, painted surface would be the perfect canvas. In reality, the very properties that make paint great—its water resistance and smooth finish—are exactly what cause common floor leveling challenges. Cement-based levelers need to ‘climb’ into the pores of the concrete to create a mechanical bond. When you put paint in the way, you’re basically putting a layer of plastic between two heavy stones. According to the Tile Council of North America (TCNA), any surface contaminant, including paint, sealer, or oil, must be mechanically removed because these substances act as bond breakers that prevent the necessary tensile strength for a lasting installation. I learned this the hard way during my first big renovation when I skipped the concrete etching step you shouldn’t skip. I thought a ‘high-grip’ primer would save me, but the leveler ended up looking more like a topographical map than a flat floor.
Can’t I just use a really expensive primer and call it a day?
I get this question all the time from neighbors who want a shortcut. The short answer is: rarely. Even the best primer in the world is only as strong as the paint it’s sitting on. If the old paint decides to lift off the concrete due to moisture or age, your expensive primer and your heavy leveler are coming up with it. You absolutely have to understand why you must prime concrete properly, but that only works after you’ve dealt with the ‘skin’ of the paint. We aren’t just looking for a flat surface; we are looking for a permanent one. Let’s dive into how we actually prep this mess so you don’t end up with a crunchy floor like I did.
Before you touch a bag of compound, you need to know if the paint is even worth fighting with—spoiler alert: it usually isn’t. I once tried to save a ‘sturdy’ looking epoxy coat by just scuffing it with 80-grit sandpaper in a small laundry room. I spent six hours on my knees, thinking I was being thorough. Three months later, the whole floor delaminated because the epoxy itself wasn’t bonded to the substrate properly. To avoid this heartbreak, use the duct tape test. Slap a piece of high-strength tape on the floor, rub it in with a blunt tool, and rip it off like a band-aid. If any paint flakes come with it, your project is doomed unless you strip it back to the bone.
The Best Way to Strip the Surface Without Losing Your Mind
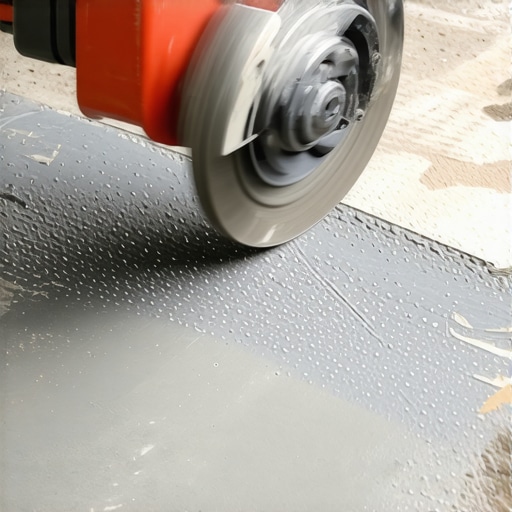
Mechanical removal is the only way to be 100% sure of your bond. Think of it like a first date; you can’t build a lasting relationship if there is a literal wall of plastic between you and the other person. Renting a walk-behind floor grinder or using a hand-held angle grinder with a diamond cup wheel is the definitive pro move when learning how to prep a concrete slab for glue down hardwood or heavy tile. This process physically opens up the concrete ‘pores,’ creating a profile that the leveler can actually bite into. Without those pores, you are just pouring expensive mud on a slip-and-slide.
Cleanliness Is More Important Than the Compound Itself
Once the paint is gone, you have to clean like your security deposit depends on it. Any leftover dust acts as thousands of tiny ball bearings that make your leveler slide right off the surface. After vacuuming with a HEPA-filtered shop vac, you must apply a high-solids primer. This isn’t house paint; it’s a specialized liquid bridge. Many DIYers skip this because they don’t realize why you must prime concrete before every leveling job—it stops the dry concrete from sucking the water out of your leveler too fast, which is the primary cause of spiderweb cracks. I’ve found that using a soft-bristled broom to work the primer into the slab works far better than a roller, which tends to just move the liquid around without forcing it into the grain.
Mastering the Pour and the Spiky Secret
When you finally get to the mixing stage, pay close attention to the RPM of your drill. I’ve seen too many people use high-speed mud mixers that whip air into the bucket like a giant meringue. You’ll end up with a floor that looks like Swiss cheese once it dries. Be sure to check the mixing paddle speed that ruins your leveling compound to ensure your mixture is dense and bubble-free. As you pour, use a gauge rake to set the depth and follow up immediately with a spiky roller. This tool is essentially the ‘magic wand’ of the flooring world. It breaks the surface tension and releases any trapped air that could cause pinholes. If you want a glass-like finish for your next step-by-step guide to flooring installation and leveling success, the spiky roller secret for a mirror smooth pour is non-negotiable. Don’t just pour and walk away; you have to work the material to get it to work for you.
Now that we’ve addressed the surface-level nightmare of paint, let’s get into the technical nuances that separate a DIY weekend warrior from a master installer. One of the biggest misconceptions I see in the flooring world is the obsession with the word ‘level.’ Everyone wants a level floor, but in my experience, seeking a perfectly level surface is often a waste of time and money. What you actually need is a flat floor. If your house has a slight pitch but the floor is perfectly flat, your furniture won’t wobble and your tile won’t crack. However, if you dump bags of compound trying to achieve a true horizontal plane without fixing subfloor movement, you are just building a very expensive, very heavy cracker that is waiting to snap.
Stop Chasing Level and Start Finding Flat
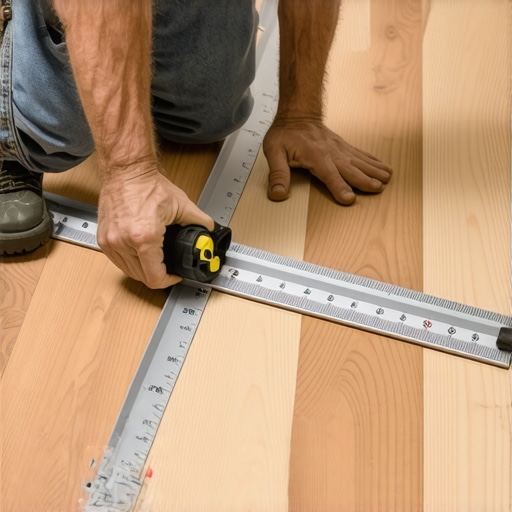
This is where the ‘Oops’ factor usually kicks in. Most people assume that once the self-leveler is dry, the hard part is over. They forget that the leveler is a rigid product, and if the wood or concrete beneath it flexes even a fraction of an inch, the leveler will delaminate or crack. This is particularly dangerous when learning mastering floor leveling pro secrets for perfect installations. Before you pour, you must check for deflection. The Tile Council of North America (TCNA) suggests that for most tile installations, the subfloor should not deflect more than L/360 of the span. If you feel even a tiny bit of ‘give’ when you walk, no amount of compound will save you from flooring installation mistakes to avoid for lasting results. You might need to add blocking between joists or use a specific plywood grade you need for a stable tile underlayment to stiffen the structure before the pour.
How much bounce can your leveling compound actually handle?
The short answer is: almost none. Cement-based compounds are incredibly strong in compression but weak in tension. If your subfloor bows, the leveler is forced to stretch, and it simply can’t. This is why you see so many porcelain tiles cracking over plywood seams. To fix this, pros often use uncoupling membranes after leveling. This creates a ‘shear plane’ that allows the house to move slightly without telegraphing those stresses into your beautiful new floor. I’ve seen people skip the membrane to save fifty cents a square foot, only to lose five thousand dollars in tile and labor when the season changes and the wood shifts. Another hidden trap is moisture. You must use a moisture meter to prevent floor failure before you even think about installing hardwood or LVP over a fresh pour. Levelers can take days or even weeks to fully release their internal moisture, even if they feel dry to the touch. If you seal that moisture in with a non-breathable flooring material, you are inviting mold and adhesive failure to the party. Have you ever fallen into this trap or noticed cracks appearing months after you finished? Let me know in the comments below.
The Gear That Separates Pros from Weekend Warriors
To keep that glass-smooth surface from becoming a distant memory, I always reach for a high-quality laser. I’ve tried the old-school string lines and the standard 6-foot levels, but nothing beats the precision of a self-leveling 360-degree laser. It’s the difference between guessing where your low spots are and knowing exactly where to pour. I personally swear by the Bosch GLL3-330CG because it shows me exactly where the subfloor dips before I even open a bag of compound. Using the laser level move for perfectly straight hallways isn’t just about the layout; it’s about mapping the topography of your home’s foundation. If you aren’t seeing the high spots highlighted by a sharp beam of light, you’re flying blind. I also recommend a heavy-duty mixing station. Holding a 5-gallon bucket between your feet while a 10-amp drill tries to twist your wrists off is a recipe for a bad mix. A dedicated mixing stand allows you to get a consistent, lump-free slurry every single time, ensuring you know how to achieve flawless floor leveling before tile laying without the physical toll on your body.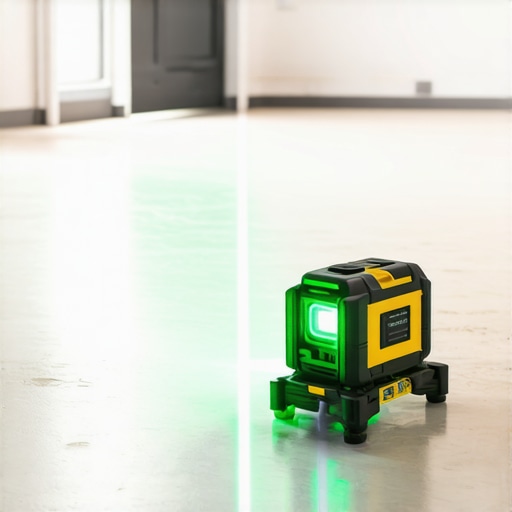
How do I maintain my leveling results over time?
Maintenance actually starts long before the furniture goes back into the room. The biggest threat to a leveled floor isn’t foot traffic; it’s seasonal movement and environmental shifts. For those of us dealing with wood subfloors, you need to follow hardwood floor care secrets to longevity and shine, which starts with managing your home’s internal humidity levels. The ASTM F710 technical standard emphasizes that the moisture content of the slab must remain consistent with the flooring manufacturer’s requirements for the life of the installation. If your basement humidity spikes in the summer, that rigid leveler and the tile on top will face massive pressure as the substrate expands. I recommend installing a dedicated dehumidifier that drains directly into your sump pump to keep things stable year-round. It’s a boring ‘tool’ compared to a fancy saw, but it’s more important for your floor’s health than any mop or bucket. Looking ahead, I suspect we will see the rise of ‘smart’ underlayments that can alert your smartphone if moisture levels under the planks hit a danger zone. For now, sticking to mastering hardwood floor refinishing expert tips for 2025 and keeping your environment stable is your best defense. You’ve put in the hard work to get the floor flat; don’t let a humid July ruin it. It’s also vital to remember that flooring installation mistakes to avoid for lasting results almost always involve rushing the drying process. I never step onto a job site without my digital moisture meter. You might think you can ‘feel’ if concrete is dry, but you can’t. I’ve seen slabs that looked bone-dry on top but were still weeping moisture from the center. This is why you must use a moisture meter to prevent floor failure before laying any final material. My best advice? Go rent a professional-grade floor grinder for your next project and feel the difference in bond strength for yourself.
Hard Lessons from My Most Expensive Flooring Mistakes
Reflecting on my own journey through the dust and debris, I’ve realized that the most expensive mistake you can make isn’t buying the wrong tile—it’s trusting a surface you didn’t personally prep. One of the biggest ‘lightbulb moments’ I ever had was accepting that the ultimate guide to floor leveling starts and ends with the bond. If you wouldn’t trust a piece of tape to hold onto that old paint, don’t trust five hundred pounds of wet cement to do it either.
Another hard-earned truth? Your eyes are liars when it comes to moisture. I once lost an entire week’s worth of work because I assumed a slab was dry since the house was thirty years old. Knowing how to repair a cracked concrete slab before tiling properly includes checking for ‘invisible’ dampness that will eventually push your leveler right off the floor. Finally, remember that ‘good enough’ is the enemy of ‘done right.’ Taking an extra hour to grind that one stubborn patch of epoxy is much cheaper than tearing up a finished floor next summer.
The Toolkit That Keeps Me Sane on Job Sites
I don’t go into any project without a few non-negotiable items that have saved my back and my budget over the years. First, a professional-grade diamond cup wheel for your angle grinder is the only way to effectively strip old paint and open those concrete pores. Second, I highly recommend the TCNA (Tile Council of North America) Handbook; it’s the ‘Flooring Bible’ that provides the technical standards needed for any high-stakes installation. I also swear by a digital moisture meter—it’s the only tool that can tell you the truth about what’s happening inside your slab. For those looking for tile installation pointers that save time and money, these tools are your first line of defense against rework.
Time to Stop Worrying and Start Pouring
At the end of the day, flooring is about more than just aesthetics; it’s about creating a foundation that will stand up to the chaos of daily life. Don’t let the fear of a little dust or a loud grinder stop you from doing the prep work correctly. When you take the time to strip that paint and prime the surface, you aren’t just following a tutorial—you are ensuring your home stays beautiful for decades. You’ve got the knowledge and the plan, so go out there and get that floor leveling project done right the first time. You’ll thank yourself every time you walk across that perfectly flat, silent surface.
Have you ever tried to level a floor only to have it ‘crunch’ or crack a few weeks later? I’d love to hear about your DIY wins or ‘fails’ in the comments below!