
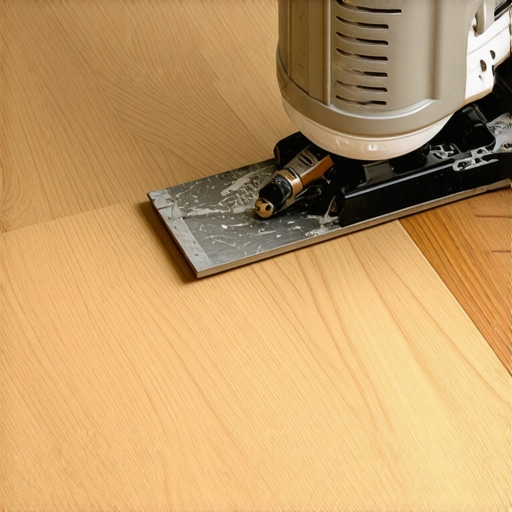
I will never forget the sound of my own footsteps on a high-end white oak floor I finished just six months prior. Creak. Pop. Ka-thunk. It was the sound of a very expensive mistake. I had spent weeks picking out the perfect wide planks, but I had ignored the physics of wood expansion. Those 7-inch beauties were starting to cup at the edges, turning a flat surface into a series of mini-valleys. It was embarrassing. I realized then that when you cross that 5-inch threshold, the old rules of just nail it down simply do not apply anymore.
Stop Your Wide Planks from Turning into Tortilla Chips
The problem with wide planks is not the wood itself; it is the math. A wider board has more surface area to absorb moisture, which means it exerts a lot more force when it expands or contracts. If you only use nails, you are basically asking a tiny piece of metal to hold back hundreds of pounds of pressure. This is where flooring installation mistakes to avoid often start. I learned the hard way that a glue-assist is the only way to ensure hardwood floor longevity and shine. Today, we are going to dive into why the combination of glue and nails is the belt and suspenders approach every DIYer and pro needs. We will solve the mystery of floor movement and keep your investment flat and quiet for decades.
Is the Extra Mess of Glue Actually Necessary?
I get the skepticism. Glue is sticky, it is a hassle, and it adds to the cost. When I was starting out, I figured I could skip it if I just used a moisture meter to prevent failure and kept the house humidified. But here is the reality: even with perfect climate control, wood is organic. According to the National Wood Flooring Association, wide plank flooring (anything over 5 inches) requires supplemental fastening because the distance between the nails is simply too great to resist the natural leverage of the wood. If you are choosing the right hardwood floors for your home, you have to plan for the installation method from day one. Have you ever walked across a floor that felt hollow or made a clicking sound with every step?The clicking sound you hear when walking across a new floor is usually the wood bouncing off a low spot in your subfloor because the surface isn’t perfectly flat. Before you even open a bucket of adhesive, you must address the foundation. You need to be mastering floor leveling pro secrets for perfect installations if you want a silent walk that lasts for decades. I once tried to bridge a quarter-inch dip with just extra nails on a job in a century home; I spent the next three years listening to that board clack every time I went for a midnight snack.
Start with a Subfloor That Is Flat Enough to Skate On
If your subfloor looks like a topographical map, your wide planks will eventually fail. I always use a 10-foot straightedge to find the valleys. If you find a spot deeper than an eighth of an inch, it is time to pour some compound or sand down the high spots. This is the stage where flooring installation fundamentals leveling for a seamless look becomes your best friend. A flat subfloor ensures that the adhesive makes 100% contact with the board. Without that contact, the glue is just an expensive, useless decoration sitting under your wood.
The S-Pattern Snake Keeps Boards From Cupping
When I first started using the glue-assist method, I thought I had to trowel the whole floor like I was laying tile. That is a sticky nightmare and totally unnecessary for most residential hardwood jobs. Instead, use a high-quality moisture-cure urethane adhesive in a sausage foil or cartridge. Lay down a serpentine or S-bead of glue across the back of the board or directly on the subfloor. 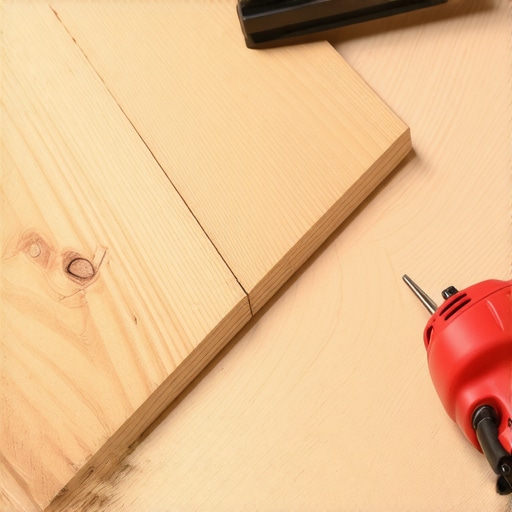 This gives the wood enough room to breathe while creating a mechanical bond that no nail can match. I remember a specific install in a coastal home where the humidity swung 40% between seasons. We used a heavy-duty urethane glue in that snake pattern, and those 8-inch white oak planks are still as tight as the day we put them in.
Why You Can’t Trust Nails Alone on Wide Boards
Think of a nail as a temporary anchor and the glue as the permanent weld. On a narrow 2-inch strip, the nail is close enough to the center to hold the edges down. On a 7-inch board, the edges are miles away from that metal cleat, and the wood will naturally want to curl up like a dried leaf when the seasons change. By adding adhesive, you are essentially laminating the hardwood to your subfloor. This prevents the hollow feeling that often plagues poorly installed jobs. If you have ever wondered how to fix a hollow sound under your luxury vinyl or hardwood, the answer usually points back to a lack of proper bonding or leveling during the initial phase.
Don’t Forget the Perimeter Gap
Even with glue, wood is organic and needs room to move at the walls. I see DIYers jam the boards tight against the drywall all the time because they think it looks cleaner. That is a recipe for tenting where the floor literally lifts off the ground. Always leave a half-inch expansion gap. This is one of those flooring installation mistakes to avoid that sounds simple but saves you from a total floor replacement later. If you are working over a crawlspace or basement, remember why your basement floor needs a moisture barrier even if it feels dry; moisture coming from below can weaken your glue bond before it even has a chance to cure.I will never forget the sound of my own footsteps on a high-end white oak floor I finished just six months prior. Creak. Pop. Ka-thunk. It was the sound of a very expensive mistake. I had spent weeks picking out the perfect wide planks, but I had ignored the physics of wood expansion. Those 7-inch beauties were starting to cup at the edges, turning a flat surface into a series of mini-valleys. It was embarrassing. I realized then that when you cross that 5-inch threshold, the old rules of just nail it down simply do not apply anymore.
Stop Your Wide Planks from Turning into Tortilla Chips
The problem with wide planks is not the wood itself; it is the math. A wider board has more surface area to absorb moisture, which means it exerts a lot more force when it expands or contracts. If you only use nails, you are basically asking a tiny piece of metal to hold back hundreds of pounds of pressure. This is where flooring installation mistakes to avoid often start. I learned the hard way that a glue-assist is the only way to ensure hardwood floor longevity and shine. Today, we are going to dive into why the combination of glue and nails is the belt and suspenders approach every DIYer and pro needs. We will solve the mystery of floor movement and keep your investment flat and quiet for decades.
Is the Extra Mess of Glue Actually Necessary?
I get the skepticism. Glue is sticky, it is a hassle, and it adds to the cost. When I was starting out, I figured I could skip it if I just used a moisture meter to prevent failure and kept the house humidified. But here is the reality: even with perfect climate control, wood is organic. According to the National Wood Flooring Association, wide plank flooring (anything over 5 inches) requires supplemental fastening because the distance between the nails is simply too great to resist the natural leverage of the wood. If you are choosing the right hardwood floors for your home, you have to plan for the installation method from day one. Have you ever walked across a floor that felt hollow or made a clicking sound with every step? The clicking sound you hear when walking across a new floor is usually the wood bouncing off a low spot in your subfloor because the surface isn’t perfectly flat. Before you even open a bucket of adhesive, you must address the foundation. You need to be mastering floor leveling pro secrets for perfect installations if you want a silent walk that lasts for decades. I once tried to bridge a quarter-inch dip with just extra nails on a job in a century home; I spent the next three years listening to that board clack every time I went for a midnight snack.
Start with a Subfloor That Is Flat Enough to Skate On
If your subfloor looks like a topographical map, your wide planks will eventually fail. I always use a 10-foot straightedge to find the valleys. If you find a spot deeper than an eighth of an inch, it is time to pour some compound or sand down the high spots. This is the stage where flooring installation fundamentals leveling for a seamless look becomes your best friend. A flat subfloor ensures that the adhesive makes 100% contact with the board. Without that contact, the glue is just an expensive, useless decoration sitting under your wood.
The S-Pattern Snake Keeps Boards From Cupping
When I first started using the glue-assist method, I thought I had to trowel the whole floor like I was laying tile. That is a sticky nightmare and totally unnecessary for most residential hardwood jobs. Instead, use a high-quality moisture-cure urethane adhesive in a sausage foil or cartridge. Lay down a serpentine or S-bead of glue across the back of the board or directly on the subfloor. #IMAGE_PLACE_HOLDER_B# This gives the wood enough room to breathe while creating a mechanical bond that no nail can match. I remember a specific install in a coastal home where the humidity swung 40% between seasons. We used a heavy-duty urethane glue in that snake pattern, and those 8-inch white oak planks are still as tight as the day we put them in.
Why You Can’t Trust Nails Alone on Wide Boards
Think of a nail as a temporary anchor and the glue as the permanent weld. On a narrow 2-inch strip, the nail is close enough to the center to hold the edges down. On a 7-inch board, the edges are miles away from that metal cleat, and the wood will naturally want to curl up like a dried leaf when the seasons change. By adding adhesive, you are essentially laminating the hardwood to your subfloor. This prevents the hollow feeling that often plagues poorly installed jobs. If you have ever wondered how to fix a hollow sound under your luxury vinyl or hardwood, the answer usually points back to a lack of proper bonding or leveling during the initial phase.
Don’t Forget the Perimeter Gap
Even with glue, wood is organic and needs room to move at the walls. I see DIYers jam the boards tight against the drywall all the time because they think it looks cleaner. That is a recipe for tenting where the floor literally lifts off the ground. Always leave a half-inch expansion gap. This is one of those flooring installation mistakes to avoid that sounds simple but saves you from a total floor replacement later. If you are working over a crawlspace or basement, remember why your basement floor needs a moisture barrier even if it feels dry; moisture coming from below can weaken your glue bond before it even has a chance to cure. Let’s dig deeper into the hidden nuances of a long-lasting bond. While most pros focus on the wood, the real secret is the chemistry of the subfloor. I’ve seen thousands of dollars wasted because an installer skipped one crucial step: ensuring the glue can actually grab the surface. Most people believe that a quick sweep of the concrete or plywood is enough. In reality, modern homes often have a ‘laitance’ or factory-sealed sheen that acts like a non-stick frying pan for adhesive. This is why you must prime concrete before every leveling job or glue-down project. If the primer isn’t there to create a bridge, that expensive urethane will simply sit on top and eventually peel.
Does Your Adhesive Bond Actually Reach the Subfloor?
It is a common myth that the weight of the furniture will hold the boards in place if the glue bond is weak. According to research by the NWFA Technical Manual, the internal stresses of a 7-inch board can exceed the downward pressure of typical residential loads. I’ve fallen into the ‘clean enough’ trap myself, only to find the glue bonded to a thin layer of dust rather than the slab. Another advanced ‘oops’ factor involves your prep tools. Using a high-speed drill to mix your primers or levelers introduces micro-bubbles that compromise structural integrity; the mixing paddle speed that ruins your leveling compound is a nuance that separates a quiet floor from one that sounds like popcorn. #IMAGE_PLACE_HOLDER_C# These tiny air pockets eventually collapse, leading to the dreaded ‘crunch’ underfoot. Have you ever fallen into the trap of rushing the prep and paying for it later? Let me know in the comments. Mastering these details is the only way to avoid flooring installation mistakes to avoid for high-end results.
Why I Never Start a Job Without My Moisture Meter
I used to think my hands were calibrated instruments. I’d touch a subfloor, decide it felt dry enough, and start nailing. That hubris cost me a five-figure repair job on a lake house where the wood essentially drank the slab’s humidity and swelled. Now, I don’t move a single plank until my Wagner Orion 950 gives me the green light. Using a moisture meter to prevent floor failure is the only way to ensure the wood and the subfloor are within the mandatory 2% to 4% moisture content range of each other. If you are skipping this step, you aren’t installing a floor; you’re setting a timer on a moisture bomb.
How Do I Keep My Floors From Warping Over the Years?
Maintenance is where most homeowners accidentally destroy their own investment. I’ve walked into multi-million dollar homes and seen people using steam mops on wide-plank white oak. It makes me cringe. You have to stop using vinegar on your hardwood floors immediately and ban the steam mop forever. The heat and moisture from a steam cleaner force water into the joints, weakening the glue-assist bond we worked so hard to create. For real hardwood floor longevity and shine, stick to a pH-neutral cleaner and a microfiber pad. The goal is to keep the wood’s environment stable. This means maintaining a consistent relative humidity between 35% and 55% in your home. According to the Wood Flooring Manufacturers Association (NOFMA), even the best installation cannot overcome extreme environmental fluctuations.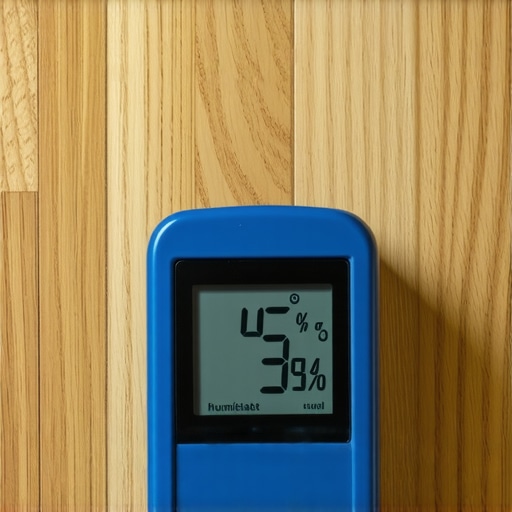
The Spiky Roller and Other Tools That Actually Earn Their Keep
If you are doing your own leveling, stop trying to spread the compound with just a rake. I always use a heavy-duty spiky roller. It’s not just for show; the spiky roller secret for a mirror-smooth pour is that it releases trapped air bubbles that cause pinholes and structural weak spots. When I combine this with a high-speed mixing paddle—checking the mixing paddle speed that ruins your leveling compound to avoid over-aeration—the result is a glass-like surface that requires zero sanding. This level of prep is the difference between a floor that lasts five years and one that lasts fifty. Looking forward, I predict we will see a massive shift toward bio-based, VOC-free urethane adhesives that cure in half the time. The industry is moving toward ‘smart’ underlayments that can actually alert homeowners to leaks before the wood starts to cup. For now, the best thing you can do is focus on the fundamentals. I challenge you to try the ‘S-bead’ glue-assist method on your next wide-plank row; once you feel how solid that board becomes, you’ll never go back to just nails. To truly master the craft, keep mastering hardwood floor refinishing expert tips for 2025 in your toolkit as your floors age.
What Wide Wood Taught Me About Humility
When I look back at that first ‘mini-valley’ floor I mentioned earlier, I realize I wasn’t just fighting moisture; I was fighting the nature of the material itself. One lightbulb moment for me was realizing that wide planks don’t just move; they exert massive mechanical leverage. If you aren’t following a step-by-step guide to flooring installation and leveling success, you are essentially guessing, and wood is a very unforgiving teacher. I also learned that the ‘acclimation’ phase is non-negotiable—skipping even 48 hours of seasoning time in the room where it will live can ruin a glue bond before you even finish the first row.
My Non-Negotiable Kit for Flawless Floors
I don’t go onto a job site without three specific items that have saved my reputation more times than I can count. First is a professional-grade moisture meter; if the subfloor and the wood aren’t within a few percentage points of each other, the glue-assist is destined to fail. Second, I swear by the spiky roller secret for a mirror-smooth pour whenever I’m dealing with uneven subfloors; it eliminates the air bubbles that cause the ‘crunching’ sound later. Finally, invest in high-quality urethane adhesive in sausage packs—it’s easier to manage and leaves far less mess on your pre-finished surface than bulk buckets.
Build a Foundation Your Grandkids Will Walk On
There is a profound sense of satisfaction that comes from walking across a floor that is perfectly silent and dead-flat. By embracing the glue-assist method, you aren’t just doing extra work; you are creating a monolithic structure that treats the wood and the subfloor as a single unit. This prevents the need to ever look up how to fix a hollow sound under your luxury vinyl or hardwood because that sound simply won’t exist. Take your time with the prep, respect the moisture levels, and use the right bond. The result will be a floor that remains as beautiful and stable in twenty years as it is the day you pull up the last bit of blue tape. Hardwood flooring installation is as much about chemistry and physics as it is about aesthetics, and when you get both right, the results are timeless. Have you ever had a board start ‘clacking’ or cupping after the first season change? Let me know your biggest installation headaches in the comments below.