
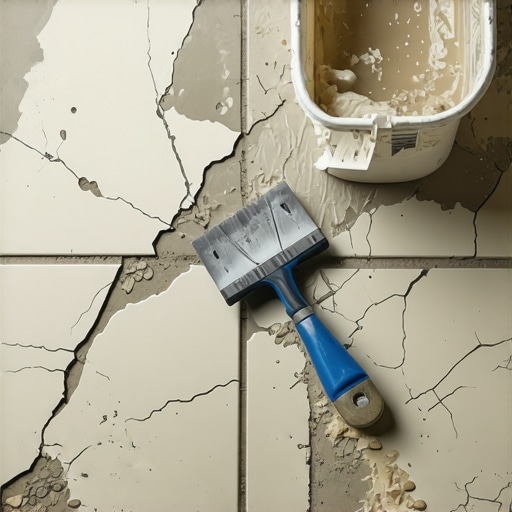
I vividly remember the moment I stepped onto my newly installed tile, only to have it wobble and shift under my feet. That sinking feeling when your hard work seems to go south right after you finish. The culprit? A stubborn old vinyl floor that just wouldn’t let the thinset stick. It felt like trying to glue a stubborn sticker to a greasy kitchen counter—frustrating and downright infuriating.
Getting to the Root of the Bonding Problem
Nobody wants to redo a tile job just because the adhesive refused to cooperate. So, what’s going wrong? The key is understanding the fundamental reasons why thinset often fails to bond to old vinyl floors. Age, surface contaminants, and lack of proper preparation are usually to blame. If you’re like me, you might have skipped some crucial steps—like cleaning the surface thoroughly or using a suitable primer—thinking it’s unnecessary. And trust me, that mistake can make all the difference.
But don’t worry. There’s a reliable way to get that stubborn old floor to accept new tile adhesive, and I’ll walk you through it. Before diving into the solutions, let me ask: Have you ever faced the disappointment of a weak bond on an old vinyl? If so, you’re not alone. Many DIYers and even seasoned pros stumble here.
Interestingly, according to research by the Tile Council of North America, proper surface preparation can increase bond strength significantly—sometimes by over 50%. That’s a massive boost just from taking a few extra steps!
To make sure your project succeeds the first time, we need to tackle this challenge head-on. The good news is, with some practical tips and the right materials, you can ensure your thinset bonds firmly, no matter how stubborn that old vinyl is. Ready to learn the secrets? Let’s get started with assessing your subfloor and preparing it the right way.
Prep the Surface with Precision
Start by thoroughly cleaning the vinyl floor using a degreasing cleaner to remove all oils, waxes, and residues. Use a stiff-bristled brush or a scrub pad for stubborn spots. After cleaning, perform the 2-foot level test to identify humps, dips, or high spots that could compromise adhesion.
Address Imperfections and Leveling
If you find uneven areas, apply a suitable self-leveling compound following the manufacturer’s instructions. For small dips or bumps, use a high-quality patching primer or heavy-duty floor filler. When mixing self-leveler, ensure the proper ratio of material to water to prevent cracking or cracking or bubbling.
Prime and Prepare the Subfloor
After leveling, prime the surface with a bonding agent compatible with both vinyl and thinset—this promotes adhesion and prevents de-bonding. Pay attention to the primer application to avoid trapped air or bubbles that can weaken the bond. This step is crucial for old vinyl, which may have a slick or dusted surface.
Choose the Right Adhesive for Your Project
Select a high-quality thinset mortar designed for bonding to plastic and vinyl surfaces. For heavy traffic or larger tiles, consider the dual-application technique, which involves priming first and then applying a premium adhesive to ensure maximum bond strength.
Apply Thinset Correctly and Consistently
Spread the thinset using a notched trowel matching the tile size—larger tiles typically need a wider notch. Maintain a consistent depth to prevent lippage and uneven surfaces. For example, I once installed a large-format tile on an uneven patch, and a uniform trowel notch prevented lippage—saving hours of grinding later.
Set Tiles with Precision
Press each tile firmly into the thinset, twisting slightly to ensure full coverage. Use spacers for straight grout lines. After setting, tap lightly with a rubber mallet to seat tiles evenly, especially over uneven sections. Allow the adhesive to cure as specified, avoiding foot traffic or moisture exposure during this time.
Finish with Proper Grouting and Sealing
Once the thinset has cured, remove spacers and grout using a high-quality epoxy or sanded grout compatible with your tiles. Seal the grout to prevent stains and water ingress. Regular maintenance with the proper tools and techniques, as outlined in flooring care secrets, can extend your installation’s lifespan.
Many homeowners and even seasoned DIYers approach hardwood flooring, tile installation, or floor leveling with basic knowledge, but overlook subtle pitfalls that can sabotage their projects. For example, a common misconception is that surface preparation is just about cleaning—truthfully, it involves understanding the chemistry between surface contaminants and adhesion properties. Skip this, and even the best materials will fail to bond properly, leading to costly rework. This nuance is often missed and can be the difference between a flawless finish and uneven, creaky floors.
An advanced mistake many make is assuming that every primer or leveling compound suits all subfloors equally. In reality, specific products are formulated for particular substrates, whether concrete, plywood, or old vinyl, and choosing incorrectly can cause delamination or cracking over time. As Robert Johnson, a flooring specialist, notes in his latest industry study, “Using the wrong bonding agents or levelers is a silent killer of longevity in floor installations.” For example, applying a cement-based leveler over a damp subfloor without proper moisture barriers traps future moisture, leading to bubbling or warping—an ‘oops’ trap that can turn a simple floor upgrade into a nightmare.
Have you ever fallen into this trap? Let me know in the comments.
A critical tip that often gets overlooked is the importance of going beyond visual inspection of subfloor flatness. Many rely on their eyes or a straightedge, but advanced techniques like the laser level and 3-foot ruler checks reveal high or low spots that are invisible to the naked eye. Such imperfections, especially under large-format tiles, cause lippage and cracks down the line—a costly oversight many skip due to time constraints.
Furthermore, misunderstanding the physical properties of wood during flooring installation can lead to buckling or gaps. Engineered wood reacts differently to humidity fluctuations compared to solid hardwood, and misjudging this behavior results in premature wear. For a deeper dive into this issue, check out this expert analysis.
The key takeaway? Successful flooring projects hinge on mastering these often-unspoken nuances—small details that significantly impact the durability and aesthetics of your space. Don’t underestimate surface chemistry, substrate-specific products, or precision leveling. Doing so elevates your craftsmanship from average to pro. For more insights on achieving a flawless surface, explore my step-by-step guide to professional tile installation.
Ready to elevate your next project? Keep these nuances in mind, and your finished floors will truly stand out for their quality and longevity.
Keeping It Working: Essential Tools for Durable Flooring
Maintaining hardwood floors and tiles over time hinges on using the right tools for cleaning, inspections, and repairs. I always recommend a high-quality moisture meter like the Pin-Type Moisture Meter because controlling moisture levels is critical for preventing buckling and warping, especially in areas prone to humidity fluctuations. Regularly checking moisture content ensures your subfloor and flooring materials stay within safe parameters, extending their lifespan.
For cleaning, I prefer microfiber mops with soft, dense pads. They trap dirt and dust effectively without scratching the surface—preserving the finish on hardwood and grout integrity on tile. The spray bottle with pH-neutral cleaner is an underrated tool that simplifies surface maintenance, preventing buildup that can ruin appearance over time.
Why a Laser Level Is a Must-Have
One underrated tool that revolutionized my flooring projects is the laser level. It guarantees perfect flatness and alignment, especially when addressing subfloor imperfections. A recent industry study emphasizes that precise flatness measurements dramatically reduce lippage and uneven grout lines. Investing in a good laser level minimizes guesswork, saves time on correction work, and results in a professional finish that lasts years.
Future Trends in Floor Maintenance
The trend toward smart home integration means we’re moving toward Wi-Fi-enabled moisture sensors and automated cleaning systems that monitor your floors around the clock. These innovations promise to catch issues early—mitigating costly repairs and keeping your floors looking pristine longer.
How do I keep my flooring’s appearance over the years?
Adopting a regular maintenance routine with specialized tools and products is key. Regularly inspect for signs of moisture intrusion or surface wear, using a moisture meter and proper cleaning agents. Additionally, scheduling professional check-ups using advanced levelers or surface analyzers helps identify subfloor issues before they become serious problems. Using quality sealing and sealing tools, like high-grade grout sealers or hardwood finishes, provides a protective barrier against damage and stains. This proactive approach ensures your investment in flooring remains beautiful and functional for decades, making it worth every penny. Want practical tips? Try evaluating your current maintenance routine and incorporate monthly checks with your moisture meter and cleaning regimen—small adjustments can keep your floors at their best for the long term.
Secret Lessons from My Flooring Journey
- Sometimes, the tiniest detail, like proper primer application, can make or break your tile bond—impatience with surface prep leads to costly fixes down the line.
- Age and condition of old vinyl flooring require a tailored approach; skipping surface testing can result in unforeseen settlement issues.
- Even experienced DIYers underestimate the importance of flatness tests—using tools like a laser level can reveal imperfections invisible to the naked eye, preventing future lippage and cracks.
- Choosing the wrong leveling compound or applying it over damp subfloors can cause delamination—understanding product compatibility saves headaches and money.
Tools and Resources That Feel Like Cheating
- High-quality moisture meters—like the Pin-Type Moisture Meter—are game-changers, helping me catch moisture issues before they turn into warping or bubbling problems.
- Laser levels—investing in a precision laser level has drastically improved my ability to lay tiles evenly, reducing time spent adjusting and correcting.
- Self-leveling compounds—using the right product in the correct ratio, guided by trusted resources, makes for a perfectly flat surface. I recommend this comprehensive guide for mastering this step.
- Educational books and expert blogs—such as the detailed guides on professional tile installation, have profoundly shifted how I approach each project.
Keep Moving Forward with Confidence
Every flooring project teaches us something new—embrace the learning curve and remember that meticulous preparation is your best tool for durability and beauty. The effort you invest in surface prep, correct material choice, and precise leveling will pay off by delivering floors that stand the test of time and traffic. If you’re ready to elevate your skills, explore the step-by-step strategies that can transform your next project into a professional masterpiece. Your floors deserve that level of craftsmanship—start today and see the difference it makes!