
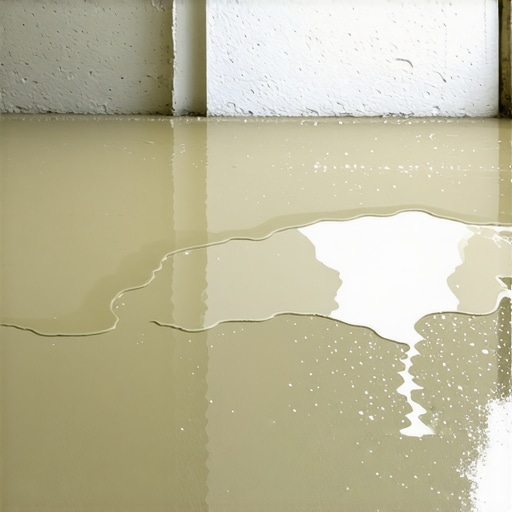
I remember the first time I poured self-leveling concrete for a flooring project and watched helplessly as the mix pooled stubbornly in one corner. It was a lightbulb moment for me—an unexpected, frustrating mess that seemed to defy every instruction I had read. I was impatient, eager to get my new floor laid, but that pooling issue kept delaying progress. Ever been there? That sinking feeling when your carefully prepared subfloor turns into a mini swimming pool at one end?
Understanding the Root Cause of Pooling in One Corner
This common hiccup isn’t just a random mistake; it’s often baked into the way we approach mixing, pouring, or preparing the subfloor. When self-leveler pools in one spot, it’s typically due to uneven subfloor surfaces, improper mixing ratios, or inadequate priming. These issues can cause the mixture to flow and settle unevenly, creating uneven surfaces that lead to lippage and future tile cracks.
From my early errors, I learned that the key is not just following the instructions but understanding the ‘why’ behind each step. For example, using the wrong water-to-powder ratio can cause areas of higher viscosity, making the mix more likely to settle and pool. Early on, I made the mistake of rushing through mixing without double-checking my ratios. Trust me—it’s a mistake you want to avoid. For a detailed overview on how to get that perfect pour, I recommend checking out this guide.
Is Pooling Actually Worth the Hype or Just a Sign of Poor Prep?
Some might think pooling is just a cosmetic flaw, but it can spell big trouble for your flooring’s longevity. Uneven surfaces can cause tiles to crack or become loose over time, especially in high-traffic areas. So yes, correcting this issue is well worth the effort. But the good news? With a handful of precise techniques, you can prevent pooling and achieve a uniformly smooth surface. And I’ll walk you through those solutions shortly.
If you’ve faced this sinking feeling during your project, you’re not alone. Many DIYers and pros alike stumble over their self-leveling mixes before nailing the perfect pour. Stick with me, and I’ll show you how to troubleshoot and fix this common pitfall, saving you time, money, and headaches down the line.
,
Prepare the Subfloor Thoroughly
Start by inspecting your subfloor for bumps, dips, or moisture issues. Use a straight 2-foot level to identify high or low spots. For instance, I once used a long straight edge to scan my concrete slab, noticing an uneven hump near the doorway that could cause uneven leveling. Addressing these imperfections before pouring self-leveling compound is crucial. Sand down high points and repair low areas with patching compounds for a flat surface. Proper prep ensures the self-leveler flows evenly and minimizes pooling risks, leading to a smoother finish.
Choose the Right Self-Leveling Compound and Mix Accurately
Select a fast-drying, high-quality self-leveling product suited for your project. Follow the manufacturer’s instructions meticulously, especially regarding water-to-powder ratios. I once made the mistake of adding too much water, resulting in a runny mix that pooled in corners. Use a clean bucket and a mixing paddle; mix thoroughly for at least 3 minutes, avoiding lumps. Proper mixing consistency—similar to thick pancake batter—allows the mixture to spread evenly without pooling. For detailed mixing techniques, check this guide.
Prime and Seal the Subfloor Properly
Applying a suitable primer ensures better adhesion and reduces moisture unevenness. I once skipped priming, which caused the compound to separate and pool when poured. Use a roller or brush to apply primer evenly; wait until it’s fully dry, usually 30 minutes, before pouring the leveling compound. This step enhances flowability and prevents premature cracking or pooling, ensuring a consistent surface.
Optimal Pouring Technique for Smooth Results
Think of pouring as guiding a flowing river—steady and controlled. Begin by pouring the mixture at the highest point of your space, allowing gravity to do the work. Spread the compound with a gauge rake or trowel, working from the center outward. I vividly recall pouring a ¾-inch thick layer in my hallway; I poured in sections, using a long trowel to feather the edges. Move swiftly but carefully to prevent the mixture from setting before spreading evenly. Using a spiked roller helps eliminate air bubbles and breaks surface tension, ensuring a smooth, even finish. For expert tricks, see this article.
Addressing and Preventing Pooling
If you notice pooling during or immediately after pouring, act quickly. Use a long trowel or screed board to level out high spots—drag it gently across the surface to flatten pooled areas. In my experience, the earlier you work on these spots, the better your outcome. For persistent dips or humps, consider adding more compound or re-pouring after the initial layer cures. Keep a close eye on the pour, and don’t hesitate to rework sections as needed before it fully sets. Remember, working efficiently is key to avoiding uneven surfaces that could compromise tile or hardwood installation later.
Many DIY enthusiasts and even seasoned pros often believe they know everything about flooring installation, tile, and hardwood floors. However, some nuances and common myths can trip you up, leading to costly mistakes. For example, a widespread misconception is that following the basic instructions is enough to achieve a perfect result. But in reality, understanding the subtle intricacies—like proper subfloor preparation or the nuances of floor leveling—can make all the difference. Overlooking these details can cause issues down the line, such as uneven surfaces or premature tile cracking.
A common trap is relying solely on fast-drying self-leveling compounds without assessing the moisture levels of your subfloor. Applying these products without proper moisture testing can lead to bubbling, delamination, or even structural failure. Experts emphasize that moisture content is a critical factor—testing your slab or existing subfloor before pouring is crucial to prevent these costly errors. According to a study published in the Journal of Building Materials and Structures, moisture imbalance is among the top reasons for flooring failures, underscoring the importance of thorough assessment.
Another advanced mistake involves misjudging the importance of subfloor flatness. Many assume that a slight dip or bump isn’t significant enough to impact flooring integrity. However, even small imperfections can lead to lippage in tile installations or squeaks in hardwood floors. Using a straightedge or a 2-foot level to identify high and low points, then addressing these issues with appropriate sanding or patching, ensures a flatter surface. For detailed techniques, I recommend reviewing this comprehensive guide.
**Why does floor leveling matter more than most realize?** Because uneven floors can cause tile to crack, grout to stain prematurely, or hardwood planks to gap and squeak. Many installers overlook the importance of proper primer application; skipping this essential step can cause adhesion problems and lead to delamination or pooling of self-leveling compounds in corners. Applying the correct primer not only improves adhesion but also helps to prevent moisture issues that might not be visible initially.
One hidden nuance often misunderstood involves the curing process of adhesive products and mortars. For instance, rushing the curing time or exposing new installations to inadequate climate conditions can result in an unstable floor. Experts recommend maintaining proper humidity levels and waiting longer than the minimum cure time when necessary, especially in challenging environments. For more on this, explore this expert advice.
Make sure to avoid these advanced pitfalls by investing time in proper prep, testing, and patience. Every step, from assessing moisture to ensuring flatness, contributes to the longevity and beauty of your flooring. Feel like you’ve fallen into these traps? Share your experience in the comments, and let’s learn together. For troubleshooting specific issues, check out this valuable resource.
Keep Your Flooring System Running Smoothly with Precision Tools
Maintaining pristine flooring requires the right equipment to ensure longevity and aesthetic appeal. I personally swear by a high-quality laser level, such as the Dewalt DW088K, because it provides pinpoint accuracy over large areas, making subfloor flatness checks quick and reliable. For surface preparation, a dehumidifier like the Frigidaire FFAD7033R1 is indispensable; controlling moisture levels is crucial to prevent issues like warping or mold growth, especially in damp environments. When dealing with hardwood refinishing, I prefer a dual-action sander like the Makita BO5041, which balances power and finesse, minimizing gouges and ensuring a smooth surface ready for sealing. These tools have stood the test of time in my projects, providing consistent, professional results.
Embrace Advanced Methods for Superior Results
Investing in quality tools and techniques can drastically improve the durability of your flooring installations. For example, precise moisture meters such as the Tramex CME4 help me quickly identify subfloor moisture content, preventing future delamination issues. Moreover, a good rubber grout float paired with a grouting sponge ensures flawless tile lines, minimizing cleanup time. As the industry evolves, I see a future where automated laser-guided systems will become standard, reducing human error even further. Staying updated and incorporating these innovations can give your projects a significant edge, reducing long-term costs and repairs.
How do I maintain my flooring tools over time?
Proper maintenance of your flooring tools can extend their lifespan and keep your work top-notch. Regularly cleaning power tools, like your sander or drill, with compressed air prevents dust buildup that can lead to motor burnout. Sharpening and replacing blades or sanding pads as needed maintains effectiveness and prevents uneven surfaces. Additionally, storing tools in a dry, climate-controlled space guards against rust and degradation. For electronics like moisture meters, calibration according to the manufacturer’s guidelines ensures consistent accuracy. Making a habit of inspecting and caring for your equipment not only saves money in the long run but also ensures your projects consistently meet professional standards. Remember, a well-maintained toolkit is the backbone of durable flooring installations—try cleaning your tools thoroughly after your next project and see the difference it makes.
What I Wish I Knew When I Started Laying Floors
One of the toughest lessons I learned was that even a slight oversight during subfloor prep could snowball into major issues later. For instance, skipping moisture testing nearly ruined a hardwood installation because of hidden slab humidity. Trust me, investing in a good moisture meter pays for itself by preventing costly repairs and rework. Another epiphany was realizing that no matter how perfect the pour looks, consistent curing conditions are vital. Rushing to finish the job without proper hygrometry or temperature control can lead to cracks or uneven surfaces. Lastly, I found that mastering the art of precise priming and surface assessment helps in achieving that seamless, professional finish we all strive for. These lessons transformed my approach and helped me avoid common pitfalls shared by many in the industry.