
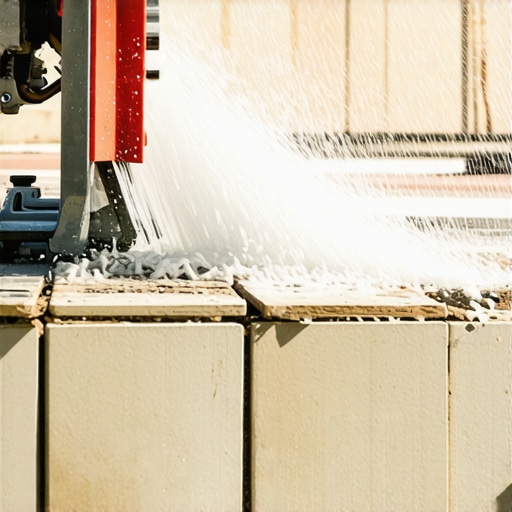
It was a sunny Saturday morning when I first faced the frustration of a crooked tile cut. I was feeling pretty confident about my DIY project, only to realize after installing a row of tiles that everything was just slightly off—enough to ruin the entire look. That lightbulb moment hit me hard: I had made a fundamental mistake with my wet tile saw, one that many DIYers and even professionals often overlook. This small error led to inaccurate cuts, wasted materials, and hours of rework.
Why Inaccurate Cuts Can Sabotage Your Tile Project
In my experience, the smallest mistake in tile cutting can cascade into bigger issues—uneven edges, lippage, and a less-than-perfect finish. Accurate cuts are the backbone of a seamless tile installation, impacting the overall aesthetic and longevity of your work. If you’re like me, you understand the importance of precision, but sometimes, the devil is in the details, especially when it comes to using a wet tile saw.
The key to mastering your tile cuts isn’t just about having the right tools or skills; it’s about understanding how the tool behaves and avoiding common pitfalls that lead to inaccuracies. Early in my projects, I fell into the trap of rushing the setup, especially not paying attention to the saw’s water flow and blade alignment. These seemingly minor oversights can cause the blade to wobble or drift, resulting in uneven cuts.
The good news? Once I identified the mistake, I could implement simple adjustments that dramatically improved my results. If you’ve faced similar frustrations, stick around. I’ll guide you through the common mistake many overlook and how to prevent it from ruining your project.
For further insights on achieving flawless results, I recommend checking out [this comprehensive guide on tile installation](https://tiletrendshop.com/installing-tiles-like-a-pro-step-by-step-strategies-for-2025), which covers essential techniques for professional-looking outcomes.
Let’s dive into what went wrong and how you can avoid making the same mistake—saving you time, money, and frustration in your next tiling project.
Set Up Your Equipment Correctly Before Cutting
My first mistake was rushing into cuts without preparing the wet tile saw properly. To avoid wobbling and inaccuracies, start by ensuring the saw’s water flow is steady and the blade is clean and sharp. I remember a time when I neglected checking the water flow, leading to blade overheating and jagged edges. Regularly inspect the water supply, and replace the blade if it shows signs of wear, much like sharpening a knife before slicing bread for smoother, cleaner cuts.
Align the Tile and Mark Precise Cut Lines
Accurate cuts begin with correct measurements. Use a high-quality tape measure and a pencil to mark your cut lines clearly. For example, I once tried measuring with a faulty ruler, which resulted in a tile that was too short. To mitigate errors, double-check your measurements and use a square to draw straight, accurate lines, ensuring your cut follows your intended design precisely.
Use a Guide or Fence for Straight Cuts
Imagine trying to cut a straight line freehand—it’s like trying to saw a board while blindfolded. To improve accuracy, set up a guide or fence along your marked line. When I was working on a backsplash, I clamped a straight edge parallel to my line, which helped me make consistent cuts across multiple tiles. This method minimizes drift and keeps your cuts neat, especially on long or intricate sections.
Maintain a Steady Pace and Gentle Pressure
Rushing the cut can cause blade wobble and uneven edges. I learned this after pushing too hard, resulting in chipped tiles. Instead, let the saw’s blade do the work—apply even, gentle pressure and maintain a consistent speed. Think of it like carving wood: patience yields clean, professional-looking results. Practicing this pacing reduces stress on the equipment and enhances cut precision.
Make Use of the Tile’s Edge as a Guide
If your cut doesn’t need to be exact to the edge, use the tile’s existing edges as a reference, flipping the tile and aligning your cut line accordingly. I once cut a tile upside down, causing the pattern to misalign. By flipping the tile and matching the pattern, I ensured a seamless look, which is especially important for decorative tiles or pattern-heavy layouts.
Test Your Technique on Scrap Pieces
Before cutting into your good tiles, practice on scrap pieces to fine-tune your setup. For example, I cut a few test pieces from an old tile to verify my measurements and the saw’s performance. This step prevents costly mistakes and builds confidence in your equipment’s setup, ensuring your final tiles are cut precisely.
Focus on Blade Care and Water Flow
Consistent water flow cools the blade and reduces dust, contributing to smoother cuts. I once ignored a clogged water port, which caused the blade to overheat and warp. Regularly clean and replace blades as needed, and monitor water flow throughout your project. Proper maintenance extends your tool’s lifespan and maintains cut quality, making your work more professional and efficient.
Use Appropriate Safety Measures
Always wear safety goggles and gloves when operating your wet saw, similar to how I learned the hard way after a tile chip flew into my eye. Safety gear allows you to focus on your work without distraction, and maintaining a safe workspace keeps accidents at bay. Remember, precision is meaningless if you get hurt during the process.
While many believe that proper tools and measurements are enough to guarantee a flawless flooring installation, the real nuances lie beneath these basics. One common misconception is that once the subfloor appears flat, the entire process is smooth sailing. However, subtle undulations—less than a quarter-inch—can cause significant issues like tile lippage or uneven hardwood planks over time. Experts like John Bridge, a well-known flooring contractor, emphasize the importance of detailed subfloor assessment and correction, often overlooked by DIYers eager to proceed quickly. Overlooking these minor imperfections can lead to costly rework or even premature failure of the flooring. The trap here is assuming surface appearance equals true flatness, but employing tools like a laser level or the “3-foot straight edge” test can reveal hidden dips and rises that sabotage your project’s integrity. #IMAGE_PLACEHOLDER_C# When it comes to leveling, many get hung up on applying too much self-leveling compound without considering the substrate’s absorption rate and moisture content. Excessive application can leave an uneven surface or cause the compound to crack as it cures. Studies indicate that controlling moisture levels and correct mixing ratios significantly reduce these issues, as detailed in the comprehensive guide on [floor leveling techniques](https://tiletrendshop.com/precise-floor-leveling-techniques-to-achieve-flawless-surfaces). Another nuance is choosing the right adhesive for your specific flooring type and subfloor conditions. For instance, using a standard thinset for large-format tiles on a slightly uneven substrate can cause lippage, whereas a high-flex or polymer-modified mortar might be necessary. Tone experts warn that skipping this step can lead to tiles cracking or lifting over the years. The advanced challenge for seasoned installers is understanding environmental factors: temperature, humidity, and substrate movement all influence adhesion and long-term durability. As discussed in [this expert insight](https://tiletrendshop.com/tile-installation-pointers-that-save-time-and-money), meticulous environmental control and compatibility checks are vital, especially in areas with fluctuating conditions. Remember, a successful flooring project isn’t just about laying materials—it’s about mastering the microscopic details that ensure longevity and perfection. Have you ever fallen into this trap? Let me know in the comments. For deeper insights, exploring [expert floor leveling tips](https://tiletrendshop.com/3-mixing-mistakes-that-pit-your-2026-floor-leveler-fixed-2) can be a game-changer.Maintaining your flooring tools and equipment is vital to ensure consistent, high-quality results over the long term. When it comes to floor leveling, tile installation, or hardwood flooring, the right tools paired with proper upkeep can make all the difference. I highly recommend investing in a high-precision laser level, such as the Bosch GSL10, which I personally use for its exceptional accuracy and durability. Unlike traditional bubble levels, a laser level provides continuous, reliable measurements across large surfaces, helping you spot subtle dips or humps before laying tiles or hardwood. Additionally, a quality wet tile saw with adjustable water flow, like the Dewalt D24000, is essential for precise cuts. Regularly cleaning the blade and ensuring proper water cooling prevents overheating and prolongs tool life. For surface preparation, a long-handled floor grinder equipped with a diamond cup wheel ensures your subfloor is perfectly flat. This step, often overlooked, directly impacts flooring longevity and appearance. It’s worth investing in a cordless, rechargeable vacuum system, like the Fein Turbo IINO, to keep your workspace free of dust, which not only protects your health but also prevents debris from compromising your work quality. As technology advances, I anticipate more smart connected tools that can record and analyze your work, providing real-time feedback and maintenance alerts. To keep your tools performing at their best, establish a routine: inspect blades for wear, check water connections, and calibrate laser levels before each project. For example, regularly verifying your laser level against a known true level, as suggested in the comprehensive guide on [floor leveling techniques](https://tiletrendshop.com/precise-floor-leveling-techniques-to-achieve-flawless-surfaces), will save you headaches on-site. Are you curious how to extend your tools’ lifespan effectively? One simple yet powerful tip is to apply a protective coating to metal parts after cleaning—this prevents rust and corrosion. I highly encourage you to try this advanced tip in your next project, as it can significantly reduce maintenance costs. Remember, your tools are an extension of your craftsmanship. Proper upkeep not only guarantees better results but also safeguards your investment, ensuring your long-term flooring endeavors stand the test of time.
What I Wish I Knew Before Starting
One of the most profound lessons I learned was that patience and meticulous preparation often outweigh speed. Rushing through subfloor assessments or tool setups led to costly mistakes that could have been easily avoided. Taking the time to double-check measurements and equipment alignment saved me hours of rework later on.
Why Cutting Corners Costs More Than You Think
I once tried to save time by skipping the test cuts on scrap tiles, only to realize my measurements were slightly off, resulting in wasted materials and a patchwork finish. Now, I always allocate time for practice runs—this tiny step is invaluable for ensuring precision and a professional appearance.
The Power of Consistent Tool Maintenance
Neglecting regular blade cleanings or water flow checks seemed harmless at first, but it dramatically affected cut quality and tool longevity. Developing a routine of inspecting and maintaining tools, like my laser level and wet saw, has been a game-changer for achieving flawless results every time.
Small Details Make the Biggest Difference
From using a proper guide to flipping tiles for pattern consistency, I found that paying attention to the microscopic details—like surface flatness and grout joint alignment—elevates the overall finish. These nuances separate an average installation from a truly professional one.
Curated Arsenal of Resources for Better Results
My toolkit includes a high-precision laser level, such as the Bosch GSL10, trusted for its accuracy and durability. For cleaning and maintenance, Espon water-soluble solutions keep blades in top shape. I also rely on comprehensive guides like [floor leveling techniques](https://tiletrendshop.com/precise-floor-leveling-techniques-to-achieve-flawless-surfaces), which continually refine my skills. Lastly, engaging with expert blogs and tutorials accelerates learning and provides fresh insights that I wouldn’t discover alone.
Keep Moving Forward: Your Flooring Journey Awaits
Every project teaches something new—embrace the challenges, stay curious, and never settle for mediocrity. Whether you’re leveling a subfloor or installing intricate patterns, remember that mastery comes from attention to detail and a willingness to learn. Your perfect floor is just one thoughtful step away. Are you ready to elevate your flooring skills and transform your space? Share your experiences or questions below—let’s grow together in this craft!