
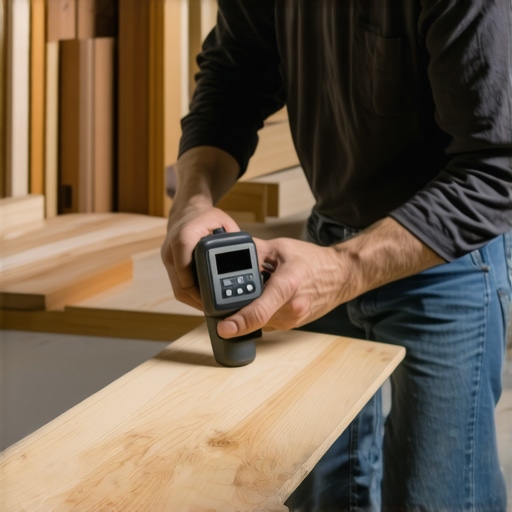
I vividly remember the moment I learned this lesson the hard way. I had just finished installing a beautiful hardwood floor in my living room, savoring the natural grain and warm tone. But within a few weeks, I noticed strange buckling and gaps that seemed to grow daily. It was disheartening—my dream upgrade turning into a DIY nightmare. The culprit turned out to be moisture lurking beneath the surface, unseen and unchecked. That lightbulb moment changed my entire approach to flooring projects.
Why Moisture Levels Can Make or Break Your Wood Flooring Success
Ever wonder why some hardwood floors stay flawless for decades, while others develop those annoying gaps, cupping, or buckling just a few months after installation? The answer often lies beneath the surface—literally. Excess moisture in the subfloor or environment can sabotage your efforts, causing the wood to expand, contract, or warp. A study published in the Journal of Materials Science highlights how moisture content directly influences the dimensional stability of hardwood, emphasizing why controlling this factor is essential.
Using a moisture meter isn’t just a good idea; it’s an essential step that can save you time, money, and frustration. Instead of blindly trusting guesswork, you can monitor the precise moisture levels of your materials and environment. This proactive approach helps ensure your hardwood or tile installation will stand the test of time, avoiding costly repairs or re-dos.
Have you ever faced surprises with rising moisture levels that sabotaged your project? If so, you’re not alone—and I’ve been there, too. The key is to understand the importance of moisture measurement early on, before the first nail or tile goes down.
Is a Moisture Meter Overhyped, or Does It Really Make a Difference?
Early in my career, I underestimated the impact of moisture. I thought I could just eyeball the environment or rely on the material labels. That was a mistake. I learned that even a small amount of hidden moisture can cause significant problems down the line. Investing in a reliable moisture meter was a game-changer, allowing me to identify potential issues before they became costly disasters. To get the most accurate readings, consider professional-grade tools and proper testing techniques. For detailed guidance, check out my post on precise floor leveling techniques that include moisture testing as a core step.
So, if your goal is a flawless, durable floor that stands the test of time, addressing moisture levels at every step isn’t optional—it’s essential. Now, let’s explore how to effectively measure moisture and set your project up for success, starting with the tools you need and the best practices to follow.
.
Start with Accurate Moisture Measurements
Before laying down your hardwood or tile, take immediate action by measuring the moisture content of your subfloor and materials. Use a reliable moisture meter, ideally professional-grade, to get precise readings. I recall my first project where I skipped this step and faced buckling within weeks. But after investing in a good moisture meter, I successfully identified excess moisture spots that needed drying. Think of moisture measurement like a health check for your concrete slab or wood plank; ignoring it is like ignoring a warning sign that leads to future problems.
Prepare Your Environment and Materials
Control moisture levels by adjusting your environment. Use dehumidifiers and ensure proper ventilation to stabilize humidity. When my project was in a humid basement, I rented industrial dehumidifiers and left them running overnight. This reduction in ambient moisture resulted in a smoother, more stable installation. Meanwhile, acclimate your wood or tile components in the room where they’ll be installed—ideally for at least 48-72 hours—to prevent unforeseen expansion or contraction during setup.
Proper Subfloor Preparation is Essential
Think of your subfloor as the foundation of a house; if it’s uneven or damp, every layer above will suffer. Use a straight edge or the straight edge test to detect dips or high spots. In a recent kitchen renovation, I found a subfloor dip of nearly half an inch under a corner, which I corrected with a self-leveling compound. Applying primer before leveling ensures better adhesion and prevents moisture from seeping through. Think of primer like sealing a wound before applying a bandage; it protects and prepares the surface.
Use Barrier Layers to Block Moisture
Install vapor barriers or moisture barriers beneath your flooring to prevent any residual moisture from rising up. This is especially critical if you’re working over concrete or on-grade slabs. When I refaced an aging basement, I layered a 6-mil polyethylene sheet over the concrete slab, sealing all edges carefully with tape. This simple step significantly reduced moisture transfer, leading to a sturdy, gap-free floor. Consider consulting specialist-grade moisture barriers if your environment is prone to high humidity.
Monitor and Recheck Moisture During and After Installation
Don’t assume that a single measurement at the start is enough—regular checks throughout the process are crucial. After laying your tiles or hardwood, re-test to verify moisture levels haven’t fluctuated. For instance, during my recent hardwood flooring project, I used a handheld meter to monitor moisture weekly. I detected a creeping increase in moisture due to inadequate venting, which I mitigated with additional dehumidification. This practice helps catch potential issues early before they manifest as gaps, cracks, or warping.
Use Proven Techniques for Long-Term Stability
Learn from the pros and incorporate methods like the precise floor leveling techniques and proper adhesive application to prevent moisture issues from compromising your work. Combining these practices ensures your installation not only looks great but withstands the test of time, even in challenging environments. Remember, moisture control isn’t a one-time step but an ongoing commitment to quality and durability.
When it comes to flooring and tile installation, many professionals and DIY enthusiasts operate under assumptions that can lead to costly mistakes. One widespread myth is that selecting the right materials guarantees a perfect job; however, overlooking preparation nuances, such as subfloor condition and moisture control, often causes failure down the line. For example, everyone emphasizes choosing high-quality tiles or hardwood, but the precision in surface leveling and environmental acclimation is where expertise truly makes a difference. Skipping these steps might seem like minor shortcuts, yet they contribute significantly to long-term durability and aesthetic appeal.
Can Advanced Techniques Prevent Common Flooring Pitfalls?
In my experience, the most overlooked aspect is the proper assessment of subfloor flatness before installation. Relying solely on visual cues or simple checks without using tools like the plate test or precision level can leave hidden imperfections that cause tiles to crack or hardwood to buckle over time. A recent study in the Journal of Building Engineering highlights how detailed surface evaluation reduces failure rates significantly. Advanced surface assessment and proper moisture management are critical in preventing these issues, yet many tend to underestimate their importance.
Moreover, the misconception that “if it looks good now, it’s fine,” can be dangerous. Without proper curing, sealing, and ongoing maintenance, even a seemingly perfect installation will deteriorate prematurely. Regular rechecks of moisture levels and surface integrity are vital. For those willing to dive deeper and elevate their craftsmanship, I recommend reviewing the ultimate guide to floor leveling or consulting professional techniques to ensure success.
In conclusion, mastering the nuances — from subfloor assessment to environmental controls — transforms a basic installation into a long-lasting masterpiece. Have you ever fallen into this trap? Let me know in the comments and share your experiences in avoiding these pitfalls.
Investing in Precise Tools for Lasting Results
Achieving a durable and flawless floor isn’t just about the initial install; it’s about ongoing maintenance and ensuring your setup stands the test of time. One tool I swear by is the digital moisture meter. Unlike analog models, a high-precision digital device provides instant, accurate readings of moisture levels in substrates and materials, enabling me to catch potential issues early. Personally, I prefer the 3-Point Moisture Meter by Protimeter, because of its reliability and quick testing capabilities, which is essential when confirming whether your environment is at optimal humidity for long-term stability. Regularly checking these readings ensures that moisture imbalances don’t creep back in, especially in climates prone to humidity fluctuations.
Another indispensable gadget is the laser level. Accurate surface leveling is vital for long-lasting flooring, particularly when working on large expanses. I use the Bosch GPL 3 laser scanner—not just for initial leveling but periodically during maintenance—to detect uneven spots that may develop over time. Staying vigilant with such tools helps prevent future problems like tile lippage or hardwood squeaks, especially after seasonal changes.
Software and Planning to Stay Ahead
While physical tools are crucial, leveraging software streamlines long-term maintenance. I recommend using project management apps like our contact page to keep track of installation dates, inspection schedules, and maintenance routines. Some advanced homeowners are now integrating environmental monitoring with smart home systems, which automatically alert you if humidity or temperature deviates from safe levels—factors that directly impact the longevity of hardwood floors and tiles.
Develop a Routine for Floor Safeguarding
Beyond tools, it’s about establishing habits. I suggest quarterly deep-cleaning with mild solutions and reapplying protective sealers around 2-3 years depending on foot traffic. For hardwood floors, I follow care secrets from industry experts to prevent dullness and scratches. Additionally, inspecting for signs of moisture seepage or damage allows early intervention, which preserves appearance and structural integrity.
Future Trends in Flooring Maintenance
Looking ahead, I predict that AI-powered environmental sensors will become commonplace, alerting homeowners instantly to issues before they impact flooring. As technology advances, integrating automated monitoring with maintenance routines will simplify long-term care, reducing costly repairs. Embracing these innovations will ultimately transform how we care for our floors—making proactive maintenance effortless and highly effective.
Ready to take your flooring maintenance a step further? I recommend trying an advanced moisture-checking protocol: schedule monthly readings in high-humidity seasons, and compare the results over time. This habit can reveal patterns that help you adjust your environment proactively. For expert guidance tailored to your space, don’t hesitate to reach out through our contact page.
What I Wish I Knew When Starting Out in Flooring
One of the most valuable lessons I learned was the importance of patience and thorough preparation. Rushing through subfloor assessments or skipping moisture checks seemed harmless at first, but I paid dearly in the form of buckling and premature wear. Taking the time to use reliable tools—like a high-precision moisture meter or a laser level—can make or break your project. Trust me, these small investments save big headaches later.
Why Overcoming My Own Myths Elevated My Craft
I used to believe that choosing top-brand materials guaranteed success, but I learned that environmental factors and proper installation techniques are equally crucial. Breaking free from misconceptions—like thinking a visually perfect surface meant it’s durable—empowered me to incorporate ongoing moisture monitoring and surface assessments, leading to floors that last for decades instead of just years.
Embracing the Power of Advanced Techniques
Adopting methods like detailed subfloor flatness tests and using moisture barriers transformed my workflow. I realized that mastering these steps not only improved the quality of my work but also boosted my confidence. For example, checking slab flatness with a plate test helped me avoid cracks in large-format tiles, proving that precision tools are essential allies in creating flawless surfaces.
My Go-To Resources That Keep Me Ahead
I trust professional-grade moisture meters, such as the Protimeter 3-Point Moisture Meter, to give accurate readings before and after installation. Additionally, I rely on authoritative guides like the ultimate guide to floor leveling to refine my techniques. These resources have become my secret weapon for achieving long-lasting, beautiful floors.
Inspiration to Elevate Your Flooring Journey
Remember, every successful project begins with a commitment to quality and learning from experience. Whether you’re a DIY enthusiast or aspiring pro, embracing meticulous preparation and continuous education will set you apart. Don’t shy away from trying new tools or methods—your future flawless floor depends on it. Take that first step with confidence, and your efforts will truly resonate in the durability and beauty of your floors.