
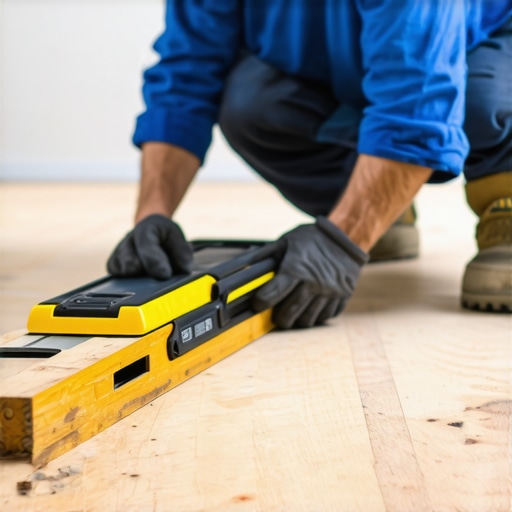
It was late Saturday afternoon when I stood in my living room, staring down at a seemingly flawless vinyl floor that suddenly revealed a frustrating ripple. A tiny bump here, a slight wave there—nothing obvious at first glance, but enough to ruin the entire look. That unsettling moment made me realize I had skipped an essential step during my installation process: checking the subfloor for humps and unevenness.
Why Even Small Bumps Can Wreck Your Vinyl Floors
Understanding the importance of a perfectly level subfloor is the key to avoiding costly repairs down the line. Tiny humps—those little high spots—can cause visible lippage, premature wear, and even cause tiles or vinyl planks to lift over time. I learned this the hard way when a simple oversight led to bubbling vinyl and a big mess to fix.
Have You Faced This Frustration Too?
Many DIY enthusiasts and seasoned pros alike have encountered the heartbreak of uneven flooring surface after spending hours laying down new material. My early mistake? Assuming that a quick visual check was enough. Spoiler alert: it isn’t. Fortunately, there’s a simple, reliable test I now swear by—the 2-Foot Level Test—that makes all the difference.
Knowing how to properly assess your subfloor can save you from all this headache. And trust me, it’s easier than you think. Once I started implementing this test regularly, my floors not only looked better but also lasted longer, and maintenance became a breeze.
But don’t just take my word for it. Experts highlight the significance of precise subfloor evaluation, emphasizing that neglecting it can lead to long-term issues [see this comprehensive guide on floor leveling techniques](https://tiletrendshop.com/precise-floor-leveling-techniques-to-achieve-flawless-surfaces). Now, let’s get into how you can master this crucial step before you even think about laying that vinyl or tile. Ready to make your flooring project a success from the ground up?
Perform the Straight-Edge Test to Detect Subfloor High Spots
Lay a 4-foot straight piece of plywood or metal ruler across the suspected area. Look for gaps underneath or points where the edge rocks slightly; these indicate bumps. I once used a level and this simple test in my very first DIY vinyl install. The results revealed a few high spots I hadn’t noticed visually, saving me from future buckling. Be methodical—check multiple points across your floor, especially in corners and high-traffic zones. If you find dips or humps, mark them clearly with chalk. Having a visual map ensures you address every imperfection before proceeding.
Use a 3-Foot Level for a Broader Perspective
This longer level helps you see more than short checks allow, akin to scanning a landscape for uneven terrain. Place it parallel to floor joists or in the direction of potential dips. When I used this on my wood subfloor, it uncovered a slight incline that my eye missed—crucial because vinyl flooring relies on a level base for longevity. Consistent readings across various points confirm that the surface is flat, or reveal where adjustments are necessary. Remember, small dips can lead to tile cracks or vinyl edges lifting over time, so don’t underestimate these subtle deviations.
Apply the Tape Measure to Find Hidden Bumps
Stretch a tape measure across the floor surface; any gaps underneath suggest high spots or dips. To double-check, place a small tool or a matchstick under the tape at different points. If it doesn’t sit flush, note those locations for correction. I encountered a bump that was barely visible but measured a 1/8-inch high difference—enough to cause alignment issues later. Using these measurements guides your sanding or leveling process precisely, preventing costly errors.
Utilize the Water Drop Method for Subtle Imperfections
Place a few drops of water on suspicious areas; water will pool or stay in dips, while high spots will shed it quickly. This simple trick acts like a mini flood test, revealing places that need leveling. I found this method particularly handy on my concrete slab, where visual checks were insufficient. It’s a quick, non-invasive way to confirm the flatness of your surface before applying leveling compounds.
Address High Spots and Dips with Appropriate Tools
Once you’ve identified uneven areas, proceed with planing or grinding high spots and filling low spots using self-leveling compounds. For high spots, a hand sander or a power planer works efficiently—think of it as shaving excess to create a smooth surface. For dips, apply leveling compound and use a trowel or a notched squeegee to spread evenly. My rough start involved using a hand plane on small areas, which proved effective but laborious; for larger jobs, a power grinder with a diamond cup wheel is faster and more consistent. Always follow manufacturer instructions and let the compound cure fully before proceeding with flooring installation.
Verify Your Work Before Moving Forward
After corrections, reapply the water drop test and the level checks. Confirm that no significant dips or humps remain. I recommend performing multiple tests from various angles to ensure comprehensive flatness—think of it as double-checking your road before paving. Only once the surface passes these rigorous evaluations should you confidently proceed with your vinyl or tile installation. Creating a perfectly level subfloor isn’t glamorous, but it forms the backbone of a durable, beautiful finish that withstands time and traffic. For more detailed strategies, see our full guide to floor leveling.Many assume that hardwood floors and tile installation are straightforward tasks, but critical nuances often trip up even experienced installers. For instance, a widespread misconception is that subfloor flatness is secondary to the choice of flooring material. In reality, neglecting proper leveling can cause cracks, buckling, and premature wear, regardless of the quality of the flooring products. Experts emphasize the importance of thorough subfloor assessment, as highlighted in our comprehensive floor leveling guide. An advanced mistake many make is over-relying on installing fresh flooring over existing, unprepared surfaces. This often leads to hidden issues like moisture traps or unevenness that can proliferate into major problems over time. For example, some believe that installing over old vinyl or imperfect plywood is acceptable, but a subtle slope or residual moisture can cause tiles to loosen or hardwood to cup, resulting in costly repairs. A typical trap to avoid is assuming that visual inspection suffices for subfloor evaluation. Professionals use tools like a long straightedge, a precise level, and even moisture meters to detect high spots, dips, or moisture issues that aren’t visible to the naked eye. In fact, a study published in the Journal of Building Engineering stresses that meticulous subfloor testing before installation significantly prolongs flooring lifespan. To prevent common pitfalls, always perform multiple flatness tests—using methods like the straight-edge and water drop techniques—and address any irregularities with proper leveling compounds or grinding. Remember, rushing this preparatory step often costs more in the long run than investing time upfront. Have you ever fallen into this trap? Let me know in the comments! For deeper insights, see our tips on large-format tile installation.Maintaining your hardwood, tile, or vinyl floors requires more than just initial installation expertise; it demands the right tools, routine checks, and a proactive approach to repairs and scaling. Personally, I rely on a combination of precision instruments and strategic methods to ensure my floors stay flawless for years. A digital moisture meter, for example, is a game-changer—by measuring moisture levels in concrete slabs or subfloors, it helps prevent future buckling or mold issues. I prefer models like the Protimeter Surveymaster because of its accuracy and ease of use, which I recommend to anyone serious about long-term floors. Additionally, a high-quality laser level, such as the Bosch GSL2 Professional, ensures that my subfloor remains flat, giving me confidence before pouring self-leveling compounds. These tools are not just high-tech extras; they are critical investments for anyone aiming for lasting results. \n\nThe trend points toward greater automation and integration—imagine using infrared thermography to detect hidden moisture issues or employing smart sensors that alert you to shifts in floor flatness over time. As flooring materials evolve to be more sensitive to environmental changes, staying updated with technological advancements becomes essential. To maximize your tool effectiveness, I recommend regularly calibrating your instruments according to the manufacturer’s instructions and keeping a detailed log of measurements and adjustments. Doing so helps identify patterns that could signal evolving issues needing scalable solutions, whether through additional leveling or replacing problematic sections.\n\nHow do I maintain my floors over time? Consistent cleaning using pH-neutral products, routine inspections for cracks or unevenness, and scheduling professional re-sanding or sealing when necessary keep my floors resilient. For instance, periodic refinishing of hardwoods can be streamlined with access to professional-grade buffers like the Bona PowerDrive, which I trust for smooth results. Remember, even the best installations can deteriorate without proper upkeep—hence, investing in good tools and establishing a maintenance routine is vital. For detailed guidance on refinishing hardwood floors to restore shine and durability, check out our expert tips for 2025 \n\nIn the end, long-term durability stems from a combination of quality tools, regular maintenance, and strategic scaling when problems arise. Try incorporating a moisture meter into your routine or scheduling a comprehensive inspection using a laser level and water test—small steps that dramatically extend the life of your flooring investments. Proper upkeep and smart tool use can prevent costly repairs and help maintain the beauty of your floors for generations.
The Hardest Lesson I Learned About hardwood floors,floor leveling,tile,flooring installation
One of the most valuable lessons I’ve gathered is that even tiny imperfections can ruin a meticulously laid floor—trust me, I’ve seen it firsthand. Ignoring proper subfloor preparation taught me that patience and thoroughness are the real keys to success, saving me from costly repairs later on.
3 Myths About hardwood floors,floor leveling,tile,flooring installation That Held Me Back
Believing that visual checks are enough or that old surfaces need no prep can seem tempting but often lead to failure. Dispelling these misconceptions early on helped me embrace detailed assessments and proper tools, making my installations more reliable and durable.
What Experts Won’t Tell You About hardwood floors,floor leveling,tile,flooring installation
The real secret is in the nuances—using precise tools like long levels, water drop tests, and moisture meters profoundly impacts the longevity of your floors. Learning from seasoned pros and their insider tips has transformed my approach, ensuring every project stands the test of time.
Comments are closed.