
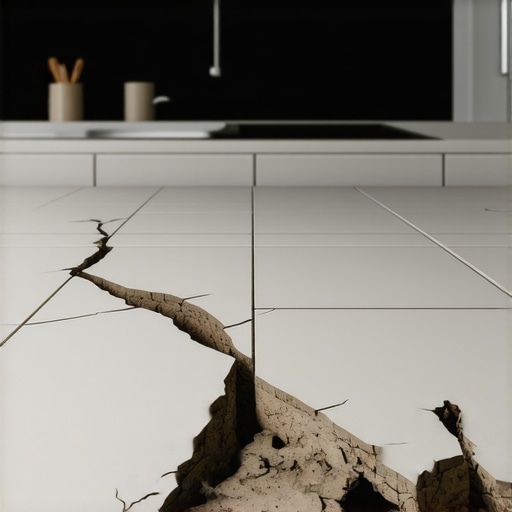
I remember a chilly Saturday morning when I first noticed that my beautiful kitchen tiles, around my island, had developed tiny cracks. It was unsettling, like discovering a hidden flaw in a carefully curated piece of art. Initially, I brushed it off, thinking it was just minor settling or perhaps an accident. But as the cracks grew, I realized I was looking at a deeper problem—something lurking beneath the surface that I had overlooked.
This experience taught me a vital lesson: understanding why tiles crack is only part of the puzzle. The real issue often lies in the hidden support under your subfloor, which many homeowners miss until it’s too late. Ignoring this can lead to costly repairs and repeated frustrations. So, if you’re like me, eager to understand the root cause and learn how to prevent it, you’re in the right place. Today, I promise to share insights that will help you diagnose and fix these issues effectively, backed by real-world experience and expert advice.
The Truth About Tile Cracks and Hidden Support Needs
When tiles crack unexpectedly, it’s usually a sign that something isn’t quite right underneath. Many people jump to conclusions about poor installation or subpar materials. However, one of the most overlooked factors is the condition of the subfloor support. A weak or uneven subfloor doesn’t just cause cracks; it compromises the entire flooring system, leading to long-term problems.
In my early projects, I made the mistake of assuming that perfect leveling was enough. I didn’t pay enough attention to the hidden support structure beneath. That oversight cost me dearly, both in repair expenses and time. Had I known then what I understand now—namely, that robust subfloor support is crucial for long-lasting tile installations—I could have avoided much of the pain. To get a clearer picture, you’ll want to check the stability and flatness of your subfloor first. Want to dive deeper? Check out these precise leveling techniques that could save your project from future cracking issues.
Is the Hype About Subfloor Support Really Warranted?
Honestly, I used to think all this fuss about subfloor support was overkill. But after witnessing cracks in my kitchen tiles and hearing stories from fellow DIY enthusiasts, I realized it’s a critical factor that affects the durability of your entire flooring. Experts confirm that inadequate subfloor support is a leading cause of tile failure—something I learned firsthand. Don’t fall into the trap of thinking that a quick fix will hold up long-term. Properly assessing and reinforcing your subfloor could be the difference between a lasting installation and recurring headaches.
If you’re ready to get serious, understanding the nuances of subfloor prep and support will make all the difference. Curious about how to evaluate the flatness of your subfloor? I recommend reading this comprehensive guide that walks you through every step.
Now, let’s move beyond the theory. In the next section, I’ll walk you through practical steps to assess and reinforce your subfloor support, ensuring your tiles stay intact in the years to come. Trust me, this is the kind of prep work that pays off big time when you want a flawless finish—without cracking or shifting.
Assessing Your Subfloor Support
Start by checking the current state of your subfloor. Use a long straightedge or a Level—imagine laying a ruler across your floor like a tightrope walker testing a wire—to identify dips or uneven spots. I vividly recall placing a 4-foot level across my kitchen and noticing a slight tilt at one corner, which was enough to cause future cracks. Mark these areas for targeted attention.
Check for Flatness and Stability
Next, press firmly on different sections; if you feel bouncing or soft spots, it signals weakness. Use a pry bar or hammer gently to test for loose or squeaky areas—these are signs of insufficient support. Think of your subfloor like the foundation of a building: if it’s unstable, everything above suffers.
Reinforcing Weak Support Zones
Once identified, reinforce these zones with additional support. For concrete slabs, consider installing concrete shims or adding a layer of self-leveling underlayment—akin to pouring a fresh layer of cement over uneven terrain to create a flat road. For wooden subfloors, sistering joists (attaching additional joists alongside existing ones) can solidify sagging spots. In my case, I decided to pour a thin layer of a high-quality floor leveling compound, which transformed a wobbly patch into a rock-solid base—this was messy but immensely rewarding.
Choosing the Right Support Materials
Use materials that mirror the strength and flexibility needed for your specific subfloor. For example, a blend of polymer-modified leveling compounds can bridge small gaps and support tile weight uniformly. Always match your support method to your subfloor type; a mismatch can lead to new stress points, causing cracks. For detailed techniques, I recommend reviewing these precise leveling techniques.
Ensuring Proper Adhesion and Preventing Future Cracks
After support reinforcement, prepare the surface for tile installation. Clean and prime the area thoroughly. Use a high-quality thinset mortar—think of it as the glue that holds everything together—applied with the right trowel angle to spread evenly like spreading peanut butter. During my project, employing a v-notch trowel and carefully combing the mortar resulted in a strong, even bed for the tiles, preventing future stress concentrations. Proper support combined with meticulous adhesion technique is your best defense against cracks, as highlighted in professional installation tips.
Final Checks Before Laying Down The Tiles
Before placing tiles, perform a final check for flatness—use a straightedge and a bubble level to ensure the support system is flawless. This step is crucial; even a small deviation can lead to uneven tiles or cracking over time. My early attempts overlooked this detail, leading to tile tenting months later, but precise final checks always help me catch issues early—saving me headaches and costly repairs in the long run.
Many homeowners assume that achieving a perfectly level subfloor is a simple matter of dropping a level and laying down some flooring. But in my experience, this common misconception overlooks critical subtlety—specifically, the importance of understanding how tiny deviations can cause major issues over time. For instance, a slight dip of just a few millimeters might seem insignificant during installation, but it can lead to tile cracking or hardwood warping months later.
One widespread myth is that using a self-leveling compound guarantees a flawlessly flat surface. While these products are powerful, they require meticulous preparation and correct application; otherwise, they may merely mask underlying support deficiencies rather than resolve them. Skipping proper surface testing, such as the flashlight trick for high spots, can result in hollow tiles or uneven floors that threaten long-term durability. Expert insights confirm that surface irregularities greater than 3/16 inch over ten feet should be addressed before installing flooring, as detailed in this guide.
Why Do Some Floors Still Fail Despite Following the Rules?
Once you understand the pitfalls, the next step is recognizing how advanced mistakes sabotage even well-planned projects. For example, neglecting the impact of moisture migration through the subfloor can cause hardwood floor cupping or buckling—an insidious error often missed during initial inspections. This is why comprehensive moisture testing, including industry-standard calcium chloride tests, is vital—unsupported by many DIY enthusiasts but reinforced in studies like those compiled by the National Wood Flooring Association. Also, improper expansion gaps can lead to buckling in engineered wood or large-format tile cracks, especially in climates with high humidity fluctuations. For in-depth strategies on this front, check out these flooring mistakes to avoid.
Beyond the basics, paying attention to the nuanced support structure—such as sistered joists for weak wooden subfloors or the use of aprons around the perimeter for concrete slabs—can dramatically improve project outcomes. Overlooking these details is like trying to build a house on shifting sands; no matter how much veneer you apply, the foundation remains fatally compromised. Remember, every tiny support flaw acts like a crack in a dam—eventually, the entire system can fail. Be proactive and check out subfloor leveling fixes to ensure permanent stability.
This highlights a recurring theme: the devil is in the details. Even seasoned pros sometimes fall prey to these advanced pitfalls, especially when rushing or taking shortcuts. To truly master durable flooring, immerse yourself in expert practices—such as meticulously testing for flatness, moisture, and support—and avoid the trap of assuming surface corrections alone will suffice. Ready to upgrade your approach? Remember, even small nuances hold the key to long-lasting results. Have you ever fallen into this trap? Let me know in the comments.
Keeping your floor installation in top shape calls for the right tools and a disciplined maintenance routine. I personally swear by a high-quality moisture meter like the Tramex Moisture Encounter Plus. It’s essential for early detection of moisture issues that could compromise your hardwood or tile over time. Regularly checking moisture levels prevents unseen problems from becoming costly repairs, especially in climates with fluctuations that threaten to cause cupping or buckling.
Another indispensable item in my toolkit is a laser level, such as the Bosch GCL2-50C. Unlike traditional bubble levels, laser levels give you an accurate, 360-degree horizontal and vertical reference, ensuring everything remains aligned, especially when you’re planning a large-scale flooring project or subtle joint alignments. This commitment to precision maintains both aesthetics and long-term durability.
For ongoing maintenance, I recommend using a pH-balanced cleaner suited for your flooring type—be it hardwood or tile. Regularly sweeping and gently mopping with appropriate products preserves the finish and keeps dirt and grit from scratching or dulling the surface. Implementing this routine can extend the life of your floors significantly, especially in high-traffic areas.
Looking ahead, I believe that integration of smart sensors into flooring systems may soon become mainstream. These devices could continuously monitor moisture, temperature, and structural shifts, providing real-time alerts to homeowners. Imagine receiving an early warning on your phone about rising humidity levels that might threaten your hardwood’s integrity, allowing you to act before damage occurs. This trend toward proactive care aligns well with the growing emphasis on smart home technology.
How do I maintain my flooring over time?
Establishing a consistent cleaning routine paired with periodic inspections is key. Use tools like an infrared moisture meter to keep tabs on environmental conditions, and invest in a good quality floor buffer or polish for periodic refreshes of your finish—particularly in high-traffic zones. Additionally, addressing minor issues swiftly, such as loose tiles or squeaky hardwood planks, can prevent bigger problems down the line. Assessing your support structure with a straightedge regularly helps catch foundation shifts early, as outlined in this guide.
For example, integrating a buffer with diamond pads not only restores shine but also removes superficial scratches, keeping your floors looking fresh without full refinishing. Also, schedule an annual professional inspection—many flooring experts now offer remote diagnostics via smart sensors, which could revolutionize long-term maintenance practices.
Remember, using the proper tools for routine care and early detection is your best defense against costly repairs down the line. Start with a moisture meter and a laser level, then build your maintenance routine around these essentials. Want to learn more about advanced leveling techniques? Check out these strategies to keep your floor in perfect condition for years to come. Don’t wait for issues to surface—be proactive and stay ahead of potential problems today!
The Hardest Lesson I Learned About Floor Support and Long-Lasting Floors
One of my most eye-opening moments was realizing that the secret to durable flooring isn’t just about choosing the right tiles or hardwoods—it’s fundamentally about building a support system capable of bearing the load. I once overlooked the importance of reinforcing weak subfloor zones, which led to inevitable cracks and costly repairs. Now, I know that a solid foundation is the backbone of any successful flooring project, and that investing time in proper reinforcement yields dividends in longevity and aesthetics.
This experience taught me that no matter how perfect your material selection or installation technique, unsupported or poorly supported subfloors undermine the entire effort. The key is to proactively assess support zones, use the right reinforcement methods, and always prioritize flatness and stability to ensure your floor stands the test of time.
My Secret Weapon for Truly Supportive Floors
Over the years, I’ve come to rely on specific tools that give me confidence when evaluating and reinforcing subfloor support. A reliable moisture meter like the Tramex Moisture Encounter Plus helps me detect hidden moisture issues that can weaken support and cause future problems. Additionally, a laser level such as the Bosch GCL2-50C assists in ensuring my subfloor remains perfectly flat before installation. These tools are worth their weight in gold, giving me peace of mind that support zones are properly prepared before I lay a single tile or hardwood plank.
Remember, a well-supported floor is the cornerstone of a successful overhaul. Combining proper evaluation with quality reinforcement methods—like sistering joists or applying leveling compounds—can turn a weak subfloor into a fortress of stability and beauty.
Take the Leap and Reinforce Your Floors Today
There’s an exciting future ahead for anyone committed to supporting their floors properly. By taking the time to assess and reinforce support zones, you’re not just preventing cracks—you’re ensuring that your flooring remains pristine for years to come. Embrace the process, leverage dependable tools, and invest in the stability of your subfloor support systems. Your future self will thank you for laying down the groundwork for perfection.
Are you ready to give your floors the support they deserve? Share your plans or experiences below—I’d love to hear how you’re tackling subfloor reinforcement and support challenges!