
I remember the first time I laid out that expensive, Italian-imported porcelain. I felt like a pro until the first ‘snap’ sounded less like a clean break and more like a bag of potato chips being crushed. I stared down at a jagged, ruined edge on a twenty-dollar tile. It wasn’t just a bad cut; it was a personal insult to my craftsmanship. If you’ve spent any time in the world of flooring installation, you know that porcelain is the beautiful, stubborn beast of the industry. It’s harder than ceramic, denser than stone, and far more likely to make you want to throw your tools across the driveway.
Stop Blaming Your Skills for Those Jagged Edges
Early in my career, I made the mistake of thinking I could treat porcelain just like ceramic. I used a cheap, worn-out diamond blade and shoved the tile through as fast as I could. The result? A mountain of waste. The truth is, porcelain requires a level of finesse that most big-box store manuals don’t bother to mention. You need to respect the material’s density. According to the Tile Council of North America (TCNA), porcelain’s low water absorption rate—less than 0.5 percent—makes it incredibly durable, but that same density is why it’s so prone to micro-fractures during a cut. It’s a high-stakes game where the wrong move creates a chain reaction of chips. If you are struggling with other materials, you might find that the secret to cutting glass mosaic without chipping involves similar patience.
Is Porcelain Actually Worth the DIY Headache?
I get it; you’re probably looking at your pile of shattered offcuts and wondering if you should have just gone with luxury vinyl. But let’s be real: nothing matches the longevity of a well-set porcelain floor. You don’t have to be a master mason to get those factory-clean edges, but you do have to stop cutting corners on your prep. I’ve found that even small adjustments, like using the wet saw water trick, can make a world of difference. When I finally mastered how to cut thick porcelain tiles without chipping, it wasn’t because I bought a three-thousand-dollar saw. It was because I slowed down and changed my approach to cooling and blade pressure. Have you ever reached the end of a perfect cut only to have the last half-inch break off in a jagged mess? Tell me about your most frustrating tile disaster—I promise I’ve probably done worse. Before we dive into the specific mechanics, you need to understand that chipping isn’t just one problem. It’s a symptom of heat, vibration, and tension. If your saw sounds like it’s screaming, your tile is going to look like it’s been bitten by a shark.
Throw Away the Blade that Came with the Saw
The biggest mistake I see DIYers and even some ‘pro’ handymen make is using the factory blade that comes in the box with a budget wet saw. Those blades are built for speed and durability on cheap ceramic, but on porcelain, they are essentially a blunt instrument. You need a continuous rim diamond blade specifically rated for porcelain. Think of it like the difference between a steak knife and a surgical scalpel. I remember a job in a high-end condo where I tried to ‘save time’ by using an old blade I had in the truck; within three cuts, the glaze was flaking off in chunks. I had to stop everything, drive to the supplier, and buy a premium mesh-rim blade. The difference was night and day. If you don’t upgrade, you’ll find that why porcelain tiles crack more often than ceramic on wood becomes a very expensive lesson in material science.
Slow Your Feed Rate to a Crawl
Speed is the enemy of a clean cut. When you push a tile into the blade too fast, the friction generates localized heat that the water can’t dissipate quickly enough. This heat causes the porcelain to expand and then shatter at the microscopic level. You should let the blade do the work—your hands are just there to guide it. If you feel resistance, you are pushing too hard. Use a light, steady pressure, almost as if you are moving a piece of delicate glass. This patience is a core part of installing tiles like a pro step-by-step strategies for 2025 because it prevents the micro-fractures that lead to long-term failures.
Keep the Water Reservoir Crystal Clear
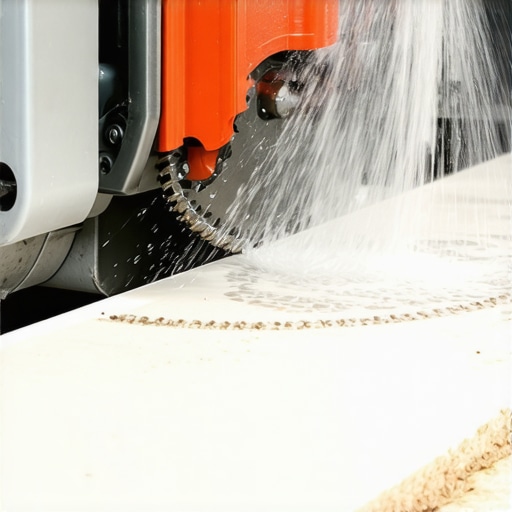
A wet saw doesn’t just use water to keep things cool; it uses it to flush away the ‘slurry’—the fine porcelain dust that turns into a thick paste. If your water tray is full of gray muck, that grit is getting caught between the blade and the tile, acting like sandpaper that grinds down your clean edge. I make it a rule to change my water every 10 to 15 cuts. It sounds tedious, but the wet saw water trick for cleaner porcelain cuts really boils down to maintaining that lubrication. I once ruined a set of expensive Italian planks because I was working in a basement with no easy drainage and got lazy with the water changes. By the end of the day, every cut looked like it had been chewed by a dog.
Use a Rubbing Stone to Kill the Factory Edge
Even a perfect cut from a wet saw will have a slightly sharp, ‘raw’ feel compared to the factory-finished edge of the tile. This is where the pros separate themselves from the amateurs. Take a 200-grit diamond sanding pad or a silicon carbide rubbing stone and lightly run it at a 45-degree angle along the cut edge. This ‘softens’ the edge and removes any tiny burrs you can’t even see. This extra thirty seconds of work is one of those tile installation pointers that save time and money by ensuring your grout joints look perfectly uniform. If you skip this, even a slight lippage in the floor will catch the light and scream ‘amateur hour.’ Ensuring your substrate is right is also vital, so don’t forget to check if the trowel size error that leads to hollow sounding tiles is affecting your final layout.
Don’t Trust Your Eyes When Testing for Flatness
Everyone tells you that the goal of floor prep is to get the surface ‘flat,’ but in my experience, that is only half the battle. You can have a floor that looks as smooth as a mirror, but if it has too much vertical movement—what we call deflection—your porcelain will eventually fail. This is the contrarian truth of the industry: stiffness matters more than flatness. According to the Tile Council of North America (TCNA), the industry standard for deflection is L/360, meaning the floor should not bend more than the span divided by 360 when under a live load. If you are installing over a wooden subfloor that bounces when you walk, you are setting yourself up for disaster. This structural nuance is the primary reason why porcelain tiles crack more often than ceramic on wood; the material is so rigid that it cannot absorb the subfloor’s flex.
The Mixing Mistake That Ruins Your Leveling Compound
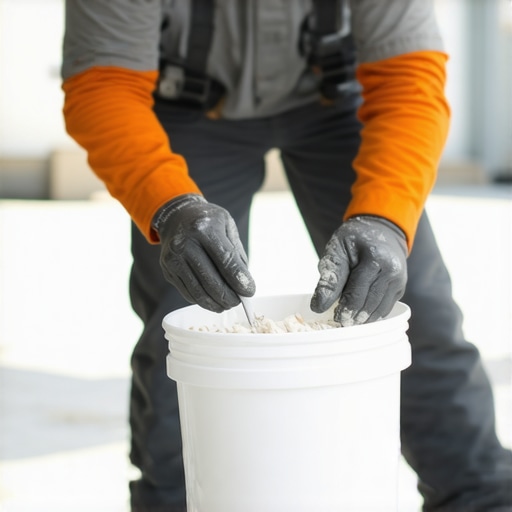
Let’s talk about the ‘Oops’ factor that kills a project before it even starts: the water-to-powder ratio in your self-leveler. Most DIYers treat self-leveling compound like pancake batter—if it looks a bit thick, they just add another splash of water. This is a fatal mistake. Adding even 10% too much water breaks down the polymer chains that give the compound its strength. I once walked onto a job site where the installer thought he was being clever by making the mix ‘extra runny’ to save on trowel work. Two days later, the entire floor was chalky and brittle. This oversight is exactly why your self-leveling compound is cracking like a dry lake bed. If you want a floor that actually lasts, you need to use a graduated measuring bucket and follow the best way to mix self-leveler for a perfectly smooth surface to the letter.
How Much Subfloor Flex Can Your Tile Actually Handle?
This is the question that separates the pros from the amateurs. For large-format porcelain (anything over 15 inches), there is zero room for error. If your joists are spaced too far apart or your plywood is too thin, the tile will ‘tent’ or snap at the grout lines. Before you even think about thinset, you should be checking for structural stability. Often, flooring installation mistakes to avoid for lasting results start with ignoring the subfloor’s moisture content. I always recommend using a tool to verify the environment, as learning how to use a moisture meter to prevent floor failure can save you thousands in material replacement. Have you ever poured a beautiful floor only to have it start squeaking or cracking a month later? Let me know in the comments—I’ve spent years troubleshooting these ‘phantom’ failures, and it almost always comes back to the foundation.
Finally, remember that your floor doesn’t exist in a vacuum. If you are transitioning from porcelain to another material, you need to plan your heights early. Achieving the secret to seamless flooring transitions between kitchen and living rooms isn’t about the trim piece you buy at the end; it’s about the precision of your leveling today. If you follow a step-by-step guide to flooring installation and leveling success, you’ll find that the hardest work happens before the first tile is even buttered.
I’ve seen guys try to level a whole floor with a 4-foot bubble level and a prayer. If you want to scale your work from ‘decent DIY’ to ‘architectural grade,’ you need to stop guessing. I personally swear by a self-leveling rotary laser. It is the only way to ensure your kitchen tile perfectly meets the hardwood in the living room without a massive, tripping-hazard transition strip. Mastering the laser level move for perfectly straight hallways is what saved my reputation on a 2,000-square-foot commercial gallery job last year. But tools are only half the battle. If you don’t understand the substrate chemistry, the gear won’t save you. For example, why you must prime concrete before every leveling job isn’t just a suggestion—it’s the law of adhesion. Without that primer, the concrete sucks the moisture out of your leveler too fast, leading to the brittle, chalky mess that ruins projects.
The Gear That Separates Masters from Amateurs
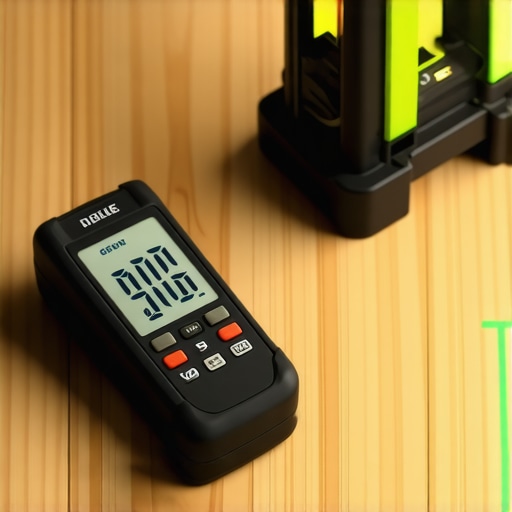
You don’t need every gadget in the aisle, but you do need the right ones. I always tell my crew that there are 7 tools you actually need for a professional DIY hardwood install, and at the top of that list is a high-quality moisture meter. According to the National Wood Flooring Association (NWFA), wood flooring must be within 2% to 4% moisture content of the subfloor (depending on plank width) before you drive a single nail. If you ignore this, your beautiful floor will cup or crown within the first season. Learning how to use a moisture meter to prevent floor failure is the difference between a floor that lasts fifty years and one that needs to be ripped out in five. I’ve walked away from jobs where the homeowner was in a rush because the subfloor was too wet—it’s better to lose a day than lose your shirt on a warranty claim.
How do I keep my floor’s factory shine after the first year?
Maintenance is where most people drop the ball. You’ve spent thousands on the material, so don’t ruin it with a five-dollar grocery store cleaner. For hardwood, you need to avoid anything that leaves a waxy residue or uses steam. I’ve seen steam mops turn high-end engineered floors into peeling disasters. Instead, focus on hardwood floor care secrets to longevity and shine that rely on pH-neutral cleaners and microfiber. If the finish is starting to look a bit dull but isn’t scratched through to the wood, you might be a candidate for a ‘screen and recoat’ rather than a full sand. This is a huge part of mastering hardwood floor refinishing expert tips for 2025 because it saves the thickness of your wear layer while restoring that deep luster.
The Industry is Shifting Toward Intelligent Adhesives
Looking ahead, I predict we are going to see a massive shift toward ‘smart’ adhesives and subfloor systems. We are already seeing the rise of ultra-low VOC (Volatile Organic Compound) glues that don’t just stick planks down but also act as a permanent moisture barrier and sound dampener. This eliminates the need for multiple layers of underlayment. As we move further into 2025 and beyond, the focus will be on ‘deconstructable’ flooring—systems that are easy to install but can also be removed and recycled without destroying the subfloor. It’s an exciting time to be in the trade, provided you keep your skills as sharp as your chisel. I challenge you to do one thing on your next project: don’t just trust your eyes. Use a moisture meter on your subfloor. It sounds like a small step, but it is the single most important ‘pro’ move you can make for long-term success.
The Harsh Truths I Learned on the Job Site
After years of ruined tiles and creaking planks, I realized that the secret isn’t just in the tool—it’s in the environment. One massive lightbulb moment for me was realizing that temperature matters as much as technique. If you bring frozen tiles into a heated room and start cutting immediately, the thermal shock can cause microscopic stress fractures that appear days later. Also, never underestimate the ‘ghost squeak.’ I used to think a few random screws would fix a bouncy subfloor, but I learned that how to fix a bouncy floor with a few well-placed screws requires finding the exact joist center and using the right length, or the friction between the layers will just create new, more annoying noises. Finally, I’ve learned to always over-buy my material by 15%. That one discontinued dye lot can turn a small cutting mistake into a total project replacement when you can’t find a match.
The Kit That Makes My Life Easier
If you want to move past the ‘beginner’ phase of flooring, there are a few items I never step onto a job site without. First is a silicon carbide rubbing stone; it’s the only way to get a factory-smooth edge after a wet saw cut. Second, I always keep a copy of the TCNA Handbook nearby—it’s the industry ‘bible’ for a reason. For leveling, don’t just guess with a 2×4 and a prayer; investing in a rotary laser will change how you perceive your subfloor. I also highly recommend looking into the best tile trends for complementing hardwood floors this year to ensure your design choice stays relevant for a decade, not just a season. Lastly, a quality moisture meter is non-negotiable for anyone attempting to revamp your home with expert flooring installation tips, as it prevents the warping that ruins hardwood and the bond failures that kill tile jobs.
Your Path to a Flawless Finish
At the end of the day, successful flooring installation is about patience and precision. It’s easy to get overwhelmed by the math and the dust, but there is nothing quite like the feeling of sliding that final transition piece into place and seeing a perfectly level surface. Whether you are dealing with stubborn porcelain or sensitive oak, take it one square foot at a time. Your home deserves the effort, and you now have the professional strategies to mastering floor leveling pro secrets for perfect installations. Which part of the process are you most nervous about—the initial demo, the precision cutting, or getting that self-leveler perfectly flat? Let me know in the comments below!