
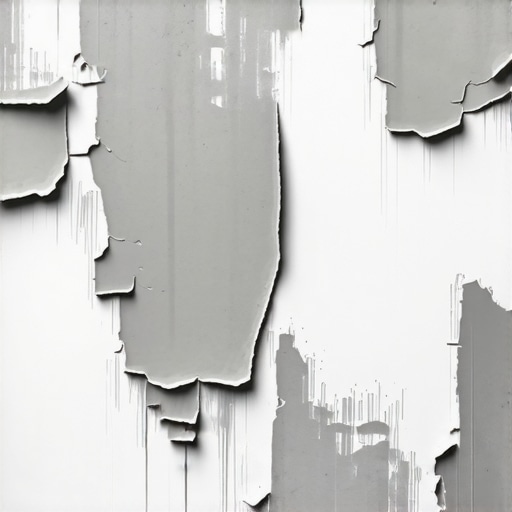
I still remember the sinking feeling I got when I walked into a client’s home and saw their freshly installed hardwood floor bubbling up, especially around the edges. That was the moment I realized my own mistake — neglecting the importance of proper primer application before pouring the self-leveling compound. The primer was peeling off, taking my perfect subfloor with it. It’s a rookie mistake, but one that can turn a smooth project into a costly redo in no time.
Why Is My Primer Peeling Off the Slab?
Many DIYers and even seasoned professionals stumble here. The truth is, peeling primer isn’t just a minor hiccup; it signals that something went wrong either during the prep or application process. Issues like moisture trapped in the slab, poor surface cleaning, or using the wrong primer can cause adhesion problems that leave your surface vulnerable.
A common mistake I made early on was skipping the moisture testing of the concrete slab. Moisture is a silent villain—if the slab has excess humidity, the primer can’t stick properly, leading to delamination. According to industry standards, performing a moisture test is essential; in fact, neglecting this step has led to widespread failures in floor leveling projects.
Moreover, choosing the wrong type of primer for your specific application can be a disaster. Not all primers are compatible with self-leveling compounds or various slab materials. Ensuring compatibility is crucial to prevent peeling and ensure longevity.
The key to avoiding all these pitfalls? Proper surface preparation, using the correct primer, and verifying moisture levels. Next, we’ll dive into the step-by-step process to get your primer to stick like glue, setting the foundation for flawless flooring.
Ensure Smooth Surface Preparation Before Primer Application
Start by thoroughly cleaning the concrete slab with a vacuum and a degreasing agent to remove dust, oil, or debris. Use a stiff-bristled brush or power washer if necessary. Think of this step as prepping a canvas—it must be spotless for the paint (primer) to adhere properly. During a project I handled, neglecting this cleaning caused the primer to peel within days, leading to costly rework. Never underestimate the power of a clean surface.
Test and Address Moisture First
Perform a moisture test using a plastic sheet method or a pin-type meter. Place a 4’x4’ plastic sheet on the slab, tape the edges, and leave it for 24 hours. If moisture collects beneath or the sheet appears damp, dehumidify the area and wait until the slab dries. This is akin to checking if a sponge is dry before painting—it prevents future peeling. Once I skipped this step, the self-leveling compound didn’t bond, and I faced bubbling issues that delayed my schedule.
Select the Right Primer for Your Application
Choose a primer compatible with your self-leveling compound and concrete. For moisture-prone slabs, use a penetrating, primer with good moisture resistance. Refer to the manufacturer’s specifications or consult a specialist. Think of primers as the bridge—they must be designed to bond both your substrate and the leveling material. I misjudged this once and ended up with peeling—learning the hard way highlighted the importance of matching primer to project needs.
Apply Primer Evenly and in Thin Coats
Pour a measured amount of primer into a roller tray. Using a high-quality roller cover, apply a uniform, thin layer over the entire surface, working in small sections. Overapplication can lead to lifting or bubbling, akin to slathering too much paint on a wall. During a past job, I applied a thick coat to save time, but it cured unevenly, causing adhesion failures. Patience and even spreading create the best results.
Allow Adequate Drying Time and Check Adhesion
Let the primer dry according to the manufacturer’s guidelines, usually a couple of hours. Avoid foot traffic or any disturbance during this period. Conduct a simple adhesion test by gently pressing with your finger; the surface should be tacky but not sticky. I once rushed this step, and the primer never set properly, leading to future peeling around edges. Proper drying ensures the primer forms a reliable foundation for the leveling compound.
Seal the Edges and Unconfined Areas
Use painter’s tape to protect adjacent surfaces and prevent primer from spreading onto unwanted areas. This step is like sealing a container before pouring in the contents—keeps the process clean and controlled. In one project, neglecting to protect the edges resulted in uneven primer edges that telegraphed flaws into the final floor. Attention to detail here pays off during the later stages of the installation.
While many believe that the basics of flooring—like leveling, proper subfloor prep, or selecting the right materials—are straightforward, the truth is that the devil is in the details. A prevalent misconception is that achieving a smooth, long-lasting floor hinges solely on surface-level steps. In reality, subtle nuances like understanding subfloor flexibility or the adhesive’s chemistry can make or break your project. For instance, overestimating the rigidity of a plywood subfloor can lead to unexpected buckling or squeaks over time. Many installers fall prey to the myth that all hardwood finishes react similarly to environmental changes, but expert insights reveal that choosing the right finish dramatically extends floor longevity, especially in high-traffic or humid areas. An advanced mistake often overlooked is ignoring the influence of subfloor temperature and humidity during installation, which can cause significant issues down the line. A comprehensive approach involves not just surface leveling but also ensuring that the entire substrate environment is conducive to material behavior, a fact supported by studies from flooring durability researchers. One crucial tip is to avoid the trap of rushing the adhesive curing process, which can lead to delamination or hollow spots. Instead, employing precise [floor leveling techniques](https://tiletrendshop.com/precise-floor-leveling-techniques-to-achieve-flawless-surfaces) ensures a perfect foundation for tiles or hardwoods alike. Additionally, the use of uncoupling membranes can make a noticeable difference in preventing cracks from underlying slab movements. Don’t make the mistake of neglecting the nuances that differentiate beginner results from professional-level flooring. Need to master the art of flawless installation? Check out [mastering hardwood refinishing](https://tiletrendshop.com/mastering-hardwood-floor-refinishing-expert-tips-for-2025) for advanced insights. Remember, the key lies in understanding and respecting these hidden factors—your floor’s lifespan depends on them. Have you ever fallen into this trap? Let me know in the comments.
Keep Your Floors in Top Shape with the Right Tools
Achieving professional-looking flooring installation and maintenance hinges on using precise and reliable tools. As someone who has spent years perfecting my craft, I swear by a select few equipment pieces that streamline the process and ensure long-term durability. Investing in quality tools isn’t just about convenience; it’s about guaranteeing your floors stand the test of time, whether it’s hardwood, tile, or laminate.
Why a Laser Level Is a Game-Changer
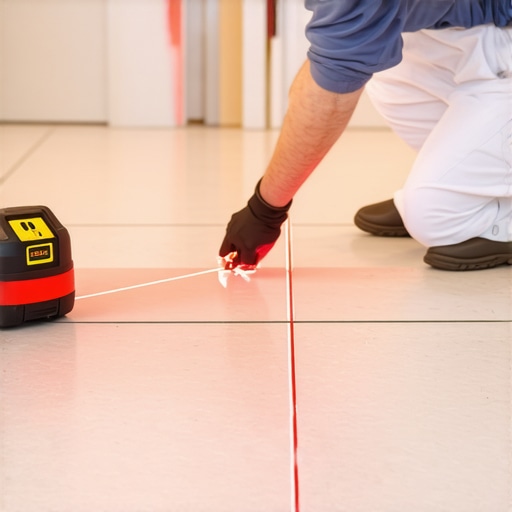
Nothing beats the accuracy of a high-quality laser level when aligning tiles or hardwood planks. Unlike traditional bubble levels, laser levels project straight lines across the entire surface, making it easier to spot dips or uneven spots that could compromise the finish. I personally rely on the top-grade laser levels recommended for professional use, which emits bright, precise lines even in brightly lit rooms. This tool has drastically reduced my installation errors and saved hours of rework.
Range of Trowels for Different Subfloors
The choice of trowel impacts how well your thinset or self-leveling compound bonds with the substrate. I prefer using notched trowels with consistent, sharp edges that help control the spread of adhesive without creating air pockets or uneven thickness. For larger tiles or uneven surfaces, adjusting the notch size (commonly 1/4″ x 1/4″) ensures proper coverage, minimizing lippage and enhancing longevity. Check out my detailed recommendations on selecting the juiste trowel for your specific application.
Why a Moisture Meter Will Save You Time
Moisture trapped beneath the surface is the silent enemy of durable floors. Using a digital moisture meter provides accurate readings that prevent foundation failures. My preferred model features quick readings and data logging capabilities, allowing me to verify that slabs are dry enough before pouring primer or leveling compounds. This simple step can save you from peeling or buckling in the future, especially in humid climates.
Future Trends: Smarter, More Integrated Tools
As technology advances, we can expect floor installation tools to become more integrated with digital guides and smart sensors. Imagine laser levels that auto-calibrate based on room dimensions or moisture meters connected via Bluetooth to your smartphone app. Staying ahead with such tools will be a key factor in delivering impeccable results consistently.
How do I keep my equipment performing over time?
Regular maintenance is vital. Clean laser lenses with isopropyl alcohol, check calibration periodically, and keep your tools stored in dry, dust-free environments. And don’t forget to replace worn notched edges on trowels to maintain even adhesive application. Proper upkeep ensures your investment lasts longer and maintains accuracy, ultimately translating into floors that look and perform flawlessly for years.
Ready to elevate your flooring projects? Try calibrating your laser level today with a simple self-check as outlined in this expert guide and experience a marked boost in precision.
The Hardest Lesson I Learned About Flooring Projects
One invaluable lesson I discovered is that patience and meticulous attention at each step save endless headaches later. Rushing through surface prep or neglecting moisture checks can turn a simple installation into a costly nightmare. It took a few failed projects—peeling primer and uneven tiles—to realize that mastering the foundational steps pays off in the long run.
What I Wish I Knew Before Starting My First Floor Renovation
Before diving into any flooring project, I wish I had invested more time understanding the nuances of surface compatibility and environmental conditions. Knowing the specific needs of different materials, like moisture barriers for concrete slabs or proper acclimation for hardwood, could have prevented many issues. Going forward, I recommend consulting detailed guides—like these techniques for perfect leveling—to build a solid baseline for success.
How Overcoming My Myths About Floor Prep Changed My Results
One misconception I held was that a quick surface cleaning was enough. However, thorough cleaning with proper tools and testing moisture levels before primer application transformed my approach. It revealed that the secret to durable, flawless floors isn’t just about choosing high-quality materials—it’s about respecting the process. I now prioritize detailed surface assessments and leverage tools like moisture meters to inform every step.
Where to Go from Here
If you’re eager to elevate your flooring skills, start by refining your surface preparation, investing in quality tools, and learning advanced installation techniques through resources like this comprehensive guide. Remember, every successful project hinges on the foundations you lay today. With patience and precision, your floors will not only look stunning but also stand the test of time—just like mine now do. Feel free to share your own flooring challenges or victories in the comments below; I love hearing about your journeys!