
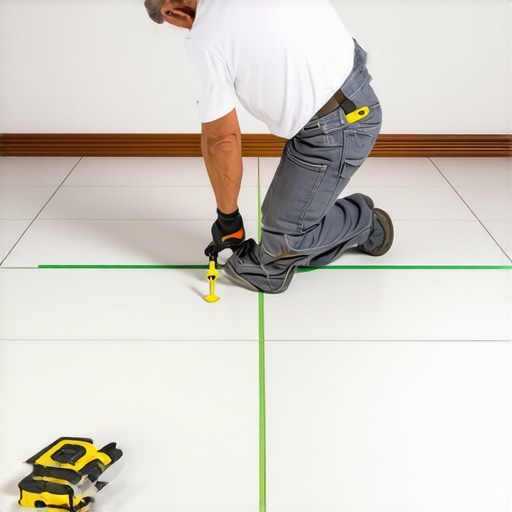
Have you ever laid out a stunning new tile pattern only to realize that in trying to center it, you’ve ended up with crooked edges or uneven spacing? I remember the first time I attempted a complex tile layout in a room with awkward dimensions. It was a disaster—time-consuming, frustrating, and honestly, a blow to my confidence. I spent hours adjusting and measuring, only to find the pattern shifted just enough to throw off the entire aesthetic.
Why a Simple Trick Changes Everything
It wasn’t until I discovered the Chalk Line Trick for Centering Tile Patterns that things finally clicked. This straightforward method transformed my approach, saving me from the headache of incessant recalculations and misaligned tiles. If you’ve ever faced the challenge of uneven walls or irregular room shapes, then you know how tricky it can be to get everything perfectly aligned without a reliable guide.
Today, I promise to share the exact techniques I wish I knew when I first started. Together, we’ll learn how a simple chalk line can become your best friend—helping you achieve professional-looking results even in the most challenging spaces. Whether you’re tackling a partial retrofit or a new installation, mastering this trick will give you confidence and save you money and time in the long run.
Is the Chalk Line Trick Really That Effective?
Now, I know what some of you might be thinking—”Is this just another DIY myth?” To be honest, I made a few rookie mistakes early on, like assuming measuring tape alone was enough or trusting just the room’s walls for alignment. Trust me, relying solely on your eyes or walls can lead to costly errors. But once I started using a chalk line properly, everything changed. This tool became my secret weapon for ensuring symmetry and precision, especially in rooms where walls are not perfectly square.
In fact, studies show that even small measuring inaccuracies can lead to major visual discrepancies in flooring patterns—something you’ll definitely want to avoid. So, stick around. We’re about to turn a simple string-and-chalk trick into your go-to strategy for perfect, professional tile layouts in any room.
Ready to get started? Let’s dive into how this little hack can make your next tile job seamless and stress-free.
Align Before You Start: Setting Up Your Reference Lines
First, identify the midpoint of your room by measuring across the walls. Mark this center point with a pencil, ensuring it’s as accurate as possible. From this point, stretch a chalk line to the opposite wall, aligning it with your measurements. Snap the chalk line to create a straight reference line that runs through the center of the room. This line acts as your baseline, preventing the common mistake of starting with uneven edges. I remember when I did this in a particularly awkward-shaped kitchen—once I established my central reference line, everything else fell into place. For additional guidance on preparing your subfloor and ensuring a flat surface, check out the floor leveling guide.
Marking the Main Axes: Creating Your Grid
Next, stretch perpendicular chalk lines from your first line to divide the room into quadrants. Use a carpenter’s square to ensure these lines are perfectly perpendicular. These axes will serve as your primary reference points, helping you keep the tiles aligned and avoiding the dreaded crooked pattern. When I laid out a large-format ceramic tile, I used this technique to make sure each row was true to the room’s center, saving me hours of adjusting later. Remember, a room’s imperfections mean your lines should be adjusted slightly to compensate for walls that aren’t perfectly straight, but your layout should remain symmetrical around your room’s true center. For more tips on tile installation strategies, visit the step-by-step tile guide.
Measuring and Adjusting for Irregular Walls
Real-world rooms often have walls that aren’t perfectly square, which can throw off your pattern if you rely solely on the room’s edges. To compensate, measure from your central chalk lines to each wall at multiple points. If discrepancies exist, adjust your chalk lines slightly to create a balanced pattern that looks symmetrical rather than perfect measurements that may accentuate room imperfections. During my last project, I had to shift the initial chalk line by a quarter inch after noticing that one wall was not square. This small adjustment kept my tile pattern looking even and professionally finished. For detailed insights on floor and wall irregularities, consult floor leveling techniques.
Smoothing Out the Final Pattern
Once your lines are set, dry lay your tiles along the grid without adhesive to preview the pattern. This step helps identify any awkward cuts or visual inconsistencies before committing to the actual installation. Use tile spacers to verify even grout joints, and make small adjustments to your layout as needed. During my practice run, I found that shifting a few tiles slightly enabled me to avoid tiny slivers of cut tiles at the ends, making the final look cleaner. Remember, it’s better to make minor tweaks at this stage than to try and fix misalignments after the adhesive is down. For tips on ensuring precise tile placement, see tile installation tips.
Using the Chalk Line to Prevent Lippage and Crooked Rows
As you begin adhering tiles along your reference lines, periodically snap additional chalk lines across the room to check for lippage—uneven tile heights that cause a crooked appearance. These lines act as visual guides, helping you keep each tile level during the installation process. When I used this method on my hallway project, I snapped lines across each row of tiles to verify they stayed in plane, which significantly reduced the need for grinding or sanding afterward. A tip: use a level or a straightedge alongside your chalk lines to ensure accuracy over larger distances, especially in rooms with uneven subfloors.
Closing Thought: Mastering the Technique for Perfect Results
By establishing a clear, straight reference line using a chalk line, planning your grid carefully, and making minor adjustments for imperfections, you’ll dramatically improve your tile laying accuracy. This simple yet effective method allows you to focus on precision rather than guesswork, reducing frustration and costly mistakes. When in doubt, practicing this technique on scrap materials or small sections can build your confidence before tackling larger areas. For additional insights on precision flooring installation, explore the advanced flooring strategies.
Many DIY enthusiasts and even seasoned pros often overlook nuanced yet critical aspects of flooring installation, leading to costly mistakes and subpar results. A common misconception is that achieving a perfectly level subfloor is merely about grinding down high spots; however, this approach can sometimes neglect underlying issues like moisture intrusion or structural inconsistencies that compromise long-term durability.
For instance, relying solely on self-leveling compounds without addressing their appropriate application or the underlying substrate is a recipe for failure. Field studies suggest that improper use of self-levelers can result in cracks and bubbling over time, especially if the primer step is skipped. An expert tip is to always verify that the primer interacts properly with your chosen compound—something often underestimated by DIYers eager to expedite the process. To avoid these pitfalls, review comprehensive floor leveling techniques that emphasize proper substrate preparation.
Are hardwood floors more forgiving than tiles when it comes to uneven subfloors?
This is a prevalent question among homeowners aiming for a quick fix. Contrary to popular belief, hardwood flooring isn’t inherently forgiving of subfloor imperfections. Small dips or humps can lead to squeaks, buckles, or gaps over time, especially if the material isn’t installed with attention to detail. Some assume that hardwood can ‘hide’ unevenness better than tile, but in reality, even minor flaws can become noticeable and affect the finish. Gaining expertise in proper hardwood refinishing and installation procedures ensures a smoother outcome and longevity. Remember, the key is thorough preparation and understanding the nuances; neglecting this can result in costly repairs down the line.
Another common myth is assuming all tile adhesives are suitable for every substrate. The reality is that choosing the wrong thinset or grout can lead to cracking or uneven surfaces. For advanced installers aiming for perfection, understanding the chemical properties of adhesives and grouts, and how they interact with different base materials, is essential. Expert insights reveal that testing adhesion through simple methods—like the “penny test” for tile lippage—can save you from future headaches. Check out the study on self-leveler cracking to understand how material compatibility impacts results.
Ultimately, mastering these subtleties involves a shift from thinking of flooring as just a cosmetic upgrade to viewing it as a precise craft that demands careful planning and execution. Incorrect assumptions about what works can turn a straightforward project into a saga of repairs and rework. So, before starting your next flooring upgrade, make sure you’re equipped with the knowledge to avoid these hidden pitfalls. If you’ve ever fallen into this trap, share your experience in the comments—I’d love to hear your story and help you troubleshoot!
Staying Ahead with Proper Maintenance
Achieving a long-lasting, beautiful floor involves more than just careful installation; your ongoing maintenance plays a crucial role. Regular cleaning routines tailored to your flooring type—be it hardwood or tile—are vital. For hardwood floors, I personally swear by using a microfiber mop and a pH-balanced cleaner to prevent buildup and preserve the finish. Tiles, on the other hand, benefit from periodic grout sealing and gentle scrubbing with soft brushes to keep them looking pristine. Incorporating a routine ensures your investment remains stunning and functional for years to come.
How do I maintain hardwood floors over time?
Consistency is key. I recommend cleaning with a damp microfiber mop weekly, avoiding excessive water that can damage the wood. Applying a high-quality polyurethane topcoat every few years restores durability and shine. For deeper care, periodic buffing with a floor buffer equipped with soft pads can rejuvenate the surface. Additionally, using felt pads on furniture prevents scratches, and placing rugs in high-traffic areas reduces wear. Staying vigilant about spills and cleaning them immediately avoids staining. For comprehensive guidance, check out hardwood floor care secrets.
Tools I recommend for ongoing upkeep
Investing in the right tools is essential for maintaining your flooring’s integrity. A high-quality vacuum with a hardwood floor attachment ensures dirt and debris are removed without scratching the surface. I always opt for a microfiber mop paired with a gentle cleaning solution designed specifically for hardwood or tile. For tile grout maintenance, a dedicated grout float and mild abrasive cleaner make the difference in preserving those tight joints. An investment in these tools prevents small issues from becoming costly repairs, ultimately saving you money and frustration. For in-depth suggestions, visit the flooring maintenance toolkit.
Anticipating future flooring trends
The future of flooring maintenance points towards smart technology integration. Imagine sensors embedded in floors that detect moisture or structural shifts, alerting homeowners before issues escalate. Self-healing finishes, which utilize advanced polymers, are on the horizon, reducing the frequency of resealing and refinishing. Staying informed about these innovations can help you plan long-term investments wisely. As technology advances, maintaining your floors will become more automated and less labor-intensive, allowing you to enjoy their beauty without constant worry.
Unspoken Lessons That Changed My Approach to Flooring
- Don’t rush the initial measurements—taking extra time to mark a precise room center prevents hours of corrections later. I once assumed eyeballing was enough, only to realize how small inaccuracies accumulate into noticeable flaws.
- Embracing adjustments for uneven walls is a game-changer. Instead of forcing measurements to fit walls, I learned to subtly tweak my chalk lines, resulting in a more harmonious pattern that disguises imperfections.
- Dry-laying tiles before adhering is essential—seeing the pattern come together visually helps catch issues early. Practice runs saved me from costly rework, reinforcing the value of patience before committing.
- The importance of periodic reference lines while laying tiles can’t be overstated. They serve as ongoing guides to maintain level rows and prevent crooked formations, especially in large spaces.
- Mastering this simple tool—the chalk line—is about confidence. Once I saw how it transformed my precision, I felt more capable tackling complex patterns I previously avoided.
Tools and Resources That Elevate My Craft
- Quality Chalk Lines: Investing in durable, snap-quality chalk lines ensures straight, reliable guides every time. I trust brands known for their visibility and longevity, which make a noticeable difference over cheap alternatives.
- Carpenter’s Square: Accurate perpendicular lines are vital. A sturdy, easy-to-handle square simplifies setting main axes, preventing skewed layouts. My favorite tool for precision.
- Level or Straightedge: Checking reference lines against level ensures your entire pattern remains true, especially over expansive areas prone to subtle dips or humps.
- An Expert Reading: “The Ultimate Guide to Floor Leveling for a Perfect Finish” has been instrumental in understanding how subfloor irregularities affect your pattern, reinforcing the need for thorough prep.
- Flooring Workshops and Tutorials: Visual guides from trusted sources like the expert hardwood refinishing can refine your techniques and inspire confidence.
Seize Your Flooring Future Today
Embarking on a flooring project with the right mindset and tools can turn a daunting task into an enjoyable craft. Remember, mastering this simple chalk line trick isn’t just about aesthetic; it’s about empowering yourself to create durable, beautiful spaces that last. Every seasoned pro was once a beginner who decided to give it a try, so take that first step with confidence. The house you shape with your own hands will be a testament to your growing skill. Ready to elevate your flooring skills? Start with that first accurate measurement and see how far it takes you.
What was the biggest challenge you faced when laying out your tiles or hardwood floors? Drop your stories below—I’d love to hear and help troubleshoot!