
It was late one evening when I noticed a small, stubborn stain on my new tile floor. I scrubbed, soaked, and even tried a few home remedies, but the stain wouldn’t budge. That’s when I realized something was off—my grout wasn’t as protected as I thought. That lightbulb moment made me wonder: how can homeowners tell if their tile grout is truly sealed and protected from stains and damage? The frustrating part? Many of us assume a sealed grout line is forever, but in reality, it can wear down unnoticed. Today, I promise to share a straightforward test I use to check if my tile grout is still protected—helping you avoid costly repairs and keep your floors looking pristine.
Knowing if Your Tile Is Truly Guarded from Stains and Damage
What’s the secret to maintaining your beautiful tile flooring? It’s simple—regularly testing your grout’s sealant. Over time, even the best sealers can wear thin due to foot traffic, cleaning agents, or natural deterioration. Without proper protection, tiles become vulnerable to staining, moisture intrusion, and even structural damage. But many homeowners overlook this crucial step, assuming their grout is still sealed just because it looks okay.
Here’s the deal—if you’re anything like me, early on I made a costly mistake: I relied solely on visual cues, thinking that if the grout looked clean, it was protected. Spoiler alert—appearance can be misleading. According to expert flooring tips, a grout may appear pristine yet be unsealed underneath, leaving your floors exposed to grime and water damage. A simple test can save you from unexpected issues.
Have you ever faced a stubborn stain that just wouldn’t come out or wondered whether your grout really keeps out moisture? If yes, you’re not alone. Many of us only realize the significance of sealer when it’s too late. That’s why I want to walk you through a quick, reliable method to check your grout’s protection—so you can act before damage occurs.
Is a DIY Test For Sealer Worth It?
In my early days, I underestimated this simple check and paid the price with unsightly tiles and costly repairs. Now, I make testing a routine part of my floor maintenance. Curious about how to do it? Keep reading, because this straightforward method will become your secret weapon in preserving your gorgeous space. Want to learn the tried-and-true steps? Let’s dive into them—because a protected grout line means peace of mind and beautiful floors for years to come.
Choose the Right Time for Testing
After cleaning your tile floor thoroughly with a damp mop, wait at least 24 hours to ensure the grout is dry and ready for testing. I learned this the hard way when my initial test failed because the grout was still moist, causing misleading results. This step is similar to letting freshly poured concrete cure before applying paint—it ensures accuracy.
Perform the Water Test
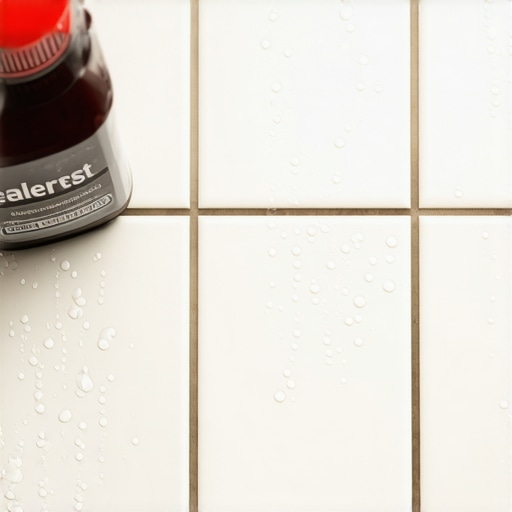
Pour a small amount of water—about a tablespoon—onto the grout line using a clean spray bottle or a teaspoon. Observe how the water behaves: does it bead up and stay on the surface, or does it soak in quickly? If the water beads up and remains on the surface, your grout is likely sealed. If it absorbs swiftly, it’s time to reseal. I once tested my kitchen grout and found the water absorbed within seconds, indicating my sealant was compromised—prompting me to reapply a quality sealer.
Inspect the Water Bead Pattern
Look closely at how the water interacts with the grout. Beads with clear edges suggest a protective layer, much like rain rolling off a waxed car. Conversely, irregular or soaking patterns reveal porous grout, vulnerable to stains. Using a flashlight at a low angle can help see these details more clearly—similar to inspecting the windshield of a new car for hazy spots.
Confirm with a Residue Test
After the water test, lightly wipe the area with a dry cloth. If you see a faint watermark or discoloration, it signals moisture penetration. This residue shows the seal isn’t fully effective. I recommend performing this step on different sections of the floor to ensure uniform protection, especially in high-traffic zones.
Apply the Sealant if Needed
If the test indicates your grout isn’t sealed, choose a high-quality penetrating sealer designed for tile grout. Before application, clean the grout thoroughly to remove dirt and grease—these can prevent proper sealing. Use a brush or applicator sponge to apply the sealer evenly, working into the joints. Let it penetrate for the time specified on the product label before wiping away excess. Consider re-testing after 48 hours to verify the seal has been established effectively. Remember, regular testing—perhaps every 6 to 12 months—can save you from staining or water damage over time.
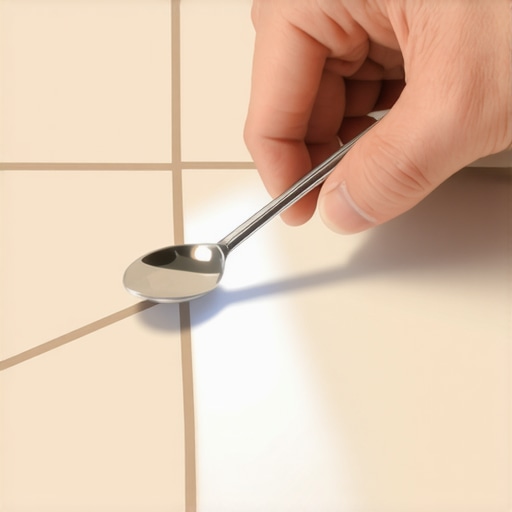 Many homeowners fall prey to widespread misconceptions about hardwood floors, floor leveling, and tile installation—believing, for example, that once properly installed, floors are maintenance-free forever. In reality, these projects involve nuanced techniques that are often misunderstood, leading to costly mistakes down the line. Let’s explore some common myths and advanced pitfalls that even experienced DIYers and professionals frequently overlook.
One prevalent myth is that a perfectly level subfloor isn’t crucial for tile installation. In fact, neglecting proper leveling can result in uneven surfaces, lippage, and even cracked tiles over time. Expert insights, such as those found in precise floor leveling guides, emphasize that small irregularities can have magnified effects months after installation. Skipping or rushing this step is a surefire way to compromise the longevity of your flooring.
When it comes to hardwood floors, many assume that choosing a high-quality species or finish guarantees durability without considering environmental factors. For instance, I’ve seen projects where homeowners selected elegant hardwoods but failed to account for humidity fluctuations, leading to warping or gaps. The secret lies in understanding the detailed nuances of wood acclimation and expansion—topics often glossed over but critical for lasting results. To avoid these issues, explore expert tips on hardwood refinishing and carefully follow acclimation protocols.
Another advanced mistake involves misjudging adhesive selection and application during tile or hardwood installation. Believe it or not, using the wrong thinset or failing to prime the substrate properly can cause tiles to loosen or hybrid floorings to bubble. This is especially insidious because the signs of failure may not appear immediately, giving a false sense of security. According to research-backed studies, adherence to proper adhesion tests is vital—see spotting a bouncy subfloor for detailed methods.
Why Do Subtle Mistakes Ruin Floors Over Time?
Most homeowners overlook the small details that lead to major problems. For example, neglecting to perform a plastic sheet moisture test before installing flooring can result in trapped moisture, promoting mold, warping, or delamination. This oversight is akin to building on a shaky foundation; the damage is often hidden until it manifests catastrophically. An article on moisture testing techniques highlights the importance of pre-installation assessments.
Overall, consistent education on the advanced aspects of flooring installation can significantly improve outcomes. Rushing the leveling process, neglecting environmental conditions, choosing incompatible materials, or skipping proper testing are pitfalls that can cost hundreds or even thousands later. For comprehensive guidance, I recommend reviewing home renovation tips that cover these nuances.
Have you ever fallen into this trap? Let me know in the comments! Remember, an informed homeowner or installer recognizes that the devil is in the details—and those details determine how long your beautiful floors will last.Maintaining your hardwood, tile, or leveling work over time requires more than just occasional cleaning—investing in the right tools and adhering to proven methods ensures long-term beauty and durability. One essential tool I personally rely on is a high-quality laser level, like the Bosch GLL 3-80, which provides precise, 360-degree alignment for both tile and hardwood installation projects. Its accuracy helps in achieving perfect leveling, reducing lippage or uneven gaps that can cause issues months later. Additionally, I recommend a moisture meter, such as the Wagner MMC220, to routinely assess subfloor conditions—crucial in preventing future warping or adhesion failures, especially as moisture intrusion is a common culprit behind flooring degradation. For ongoing maintenance, a microfiber mop combined with specialized cleaning solutions like Bona Hard-Surface Floor Cleaner keeps surfaces spotless without damaging finishes; I prefer it over generic products because it cleans effectively without residue buildup that attracts dirt. When it’s time for refinishing hardwoods, investing in a dual-drum sander—like the Lagler Hummel—accelerates the process while delivering an even finish, thanks to its adjustable speed and superior dust collection. Looking ahead, automation and smart sensors will likely become more accessible, enabling real-time floor condition monitoring and predictive maintenance, significantly extending the lifespan of your installation. How do I maintain floors and prevent issues over years? Regular inspections paired with these precise tools make all the difference. For example, conducting a moisture test using the Wagner MMC220 every six months can catch undetected humidity problems early, especially in basements or climates with fluctuating humidity—detailed guidance on this process can be found in the article on plastic sheet moisture testing. I urge you to try incorporating a laser level into your next project or routine check. It’s a game-changer for ensuring your floors remain flawless and functional for years to come.
How I Stumbled and What It Taught Me About Flooring Durability
One of my toughest lessons was realizing that even the tiniest oversight—like neglecting a moisture test—could turn a beautiful floor into a maintenance nightmare. Watching small cracks emerge months after installation reminded me that attention to detail isn’t just recommended, it’s essential for long-term success.
Choosing the right tools, such as a reliable laser level, significantly reduces errors in leveling and prevents lippage. I’ve learned that investing in quality equipment upfront pays off by saving time and money in repairs down the line. It’s about working smarter, not harder, and understanding that every step influences the final look and durability.
Patience in preparation—letting the subfloor dry thoroughly and performing comprehensive adhesion tests—sets the stage for a flawless finish. Rushing these steps often leads to uneven surfaces or unexpected cracking. The key is embracing thoroughness as part of your routine, which ultimately yields beautiful, resilient floors that stand the test of time.
My Secrets to an Unshakable Flooring Foundation
For homeowners and professionals alike, I trust highly-researched guides like precise floor leveling techniques and water damage prevention tips. These resources delve deep into foundational strategies that prevent future headaches.
Additionally, quality products like premium sealers and moisture meters—such as Wagner’s MMC220—have become staples in my toolkit. They offer peace of mind, catching issues early before they become costly fixes, and ensure that every installation is built on solid ground.
Don’t overlook the value of ongoing education and staying updated with industry advancements. I regularly follow trusted sources like expert flooring tips to refine my craft and adopt best practices, making each project better than the last.
Embrace Your Journey Toward Flawless Floors
Remember, each project is a chance to learn and improve. Starting with the right knowledge, tools, and mindset transforms DIY attempts into durable, beautiful results. Don’t be discouraged by early missteps—they’re the stepping stones to mastery. Keep learning, testing, and refining your approach, and watch your floors become a testament to your care and skill.
What’s the next step you’re excited to try in your flooring journey? Share your plans or questions below—I love hearing about your progress!