
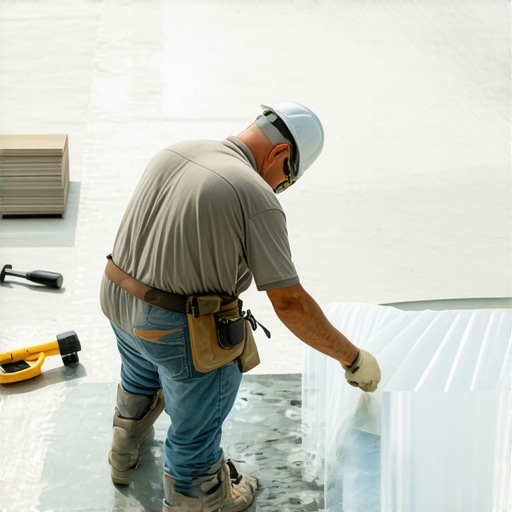
I vividly remember the moment I discovered my new hardwood floor was doomed long before I even started laying the planks. It was a chilly Saturday morning when I unrolled that plastic sheet meant to be a quick moisture test and found it soaked through in just a couple of hours. My heart sank. That lightbulb moment made me realize I had been blissfully ignoring an invisible enemy lurking beneath my slab—moisture. If you’ve ever faced a similar panic, you know how frustrating it can be to realize that a seemingly simple step could have saved you thousands and a lot of headache.
Why Spotting Slab Moisture Matters More Than You Think
Here’s the truth I wish someone had told me earlier: ignoring slab moisture can ruin your entire flooring project. Moisture wicks up from the concrete and can cause everything from warping and buckling to mold growth—serious issues that often require costly repairs or replacement. This is where the plastic sheet test comes into play. It’s a straightforward, DIY method to identify potential problems before the mistake becomes irreversible. I’ve used this test myself, and early detection saved my project from a disaster.
Still Skeptical About the Plastic Sheet Test? Think Again!
You might be thinking, “Is this test really reliable enough to base my flooring decisions on?” Well, I’ve been there, too. My early mistake was trusting the naked eye over a simple moisture test, leading me to install tiles on a damp slab. That costly blunder taught me that quick checks like the plastic sheet test are invaluable. According to industry experts, unaddressed moisture issues can lead to bond failures and floor damage. Taking this step can be the difference between a long-lasting floor and a recurring nightmare.
If you’re curious about how to effectively perform this test or want to learn about other moisture mitigation strategies, I recommend checking out detailed guides like the ultimate guide to floor leveling. Stay tuned, because next, we’re diving into the practical methods to spot slab moisture accurately and confidently—so you can avoid costly mistakes from the start.
Prepare Your Subfloor for Success
Start by thoroughly inspecting the subfloor for visible signs of moisture or damage, such as staining or warping. Use a moisture meter specifically designed for concrete or wood to get quantitative readings. I remember one project where I rented a pin-type moisture meter, and after testing multiple spots, I discovered a high-moisture zone that needed addressing. This prevented major issues later on. Ensure your readings are within acceptable levels—generally below 4% for wood and below 5% for concrete—before proceeding.
Perform the Plastic Sheet Test Correctly
Lay a clear plastic sheet, about 2 feet by 2 feet, directly on the slab or subfloor, sealing the edges with painter’s tape. Wait 24 hours, then check beneath for condensation or damp spots. I once neglected this step on a basement remodel, and by the time I saw the dampness, it was too late—the moisture had already compromised the adhesive bond. Remember, if moisture is present, use a vapor barrier or a moisture mitigation system before laying flooring. This step is simple but critical, as detailed by the ultimate guide to floor leveling — don’t skip it.
Inspect the Surface for High Spots
Use a long straightedge or a laser level to identify uneven areas that can trap moisture or cause installation issues. I used a 12-foot level on a recent tile job and discovered a subtle dip of just a few millimeters that could have led to lippage or cracking. Set an appropriate correction plan; for minor dips, self-leveling compound can smooth the surface efficiently (see techniques here). Achieving a flat and stable surface is like providing a foundation that keeps your flooring looking perfect for years.
Upgrade Your Moisture Barrier Strategy
For concrete slabs, install a high-quality vapor barrier beneath the subfloor layers. Think of it as a waterproof shield that keeps moisture from wicking up. I personally used a polyethylene sheet rated for vapor reduction, and it worked wonders in a basement renovation where moisture levels were high. For added protection, consider installing a moisture mitigation system—especially in damp climates. This proactive approach saves money and effort compared to fixing buckled or moldy floors later (more about moisture barriers). Proper barrier installation might seem straightforward, but paying attention to seams and edges is vital to prevent leaks.
Test Subfloor for Slab Movement
Check if your slab flexes or moves under pressure by applying targeted force—using your foot or a tap test with a hammer. A loose or unstable slab can cause tiles to crack or hardwood to squeak. I’ve found that a slight bounce or creak indicates the need for additional subfloor reinforcement or leveling. Reinforce weak spots with suitable shims, plywood overlays, or self-leveling compounds (learn about subfloor leveling). This step is like reinforcing a deck’s joists before installing the decking boards—crucial for longevity.
Implement Drying Techniques When Necessary
If moisture levels are high, use industrial dehumidifiers or drying mats to lower humidity. I once used a moisture meter to check the slab after a heavy rain and saw readings lingering above recommended levels. Running a dehumidifier for a few days made a huge difference, resulting in a flawless installation. Remember, patience during this phase pays off, ensuring your hard work doesn’t wind up in failure due to trapped moisture.
Many homeowners and even some DIY enthusiasts believe that choosing the right flooring material or following basic installation steps guarantees a perfect result. However, there’s a hidden nuance that often gets overlooked: the critical importance of detailed subfloor assessment and moisture management. Contrary to popular belief, simply selecting durable hardwood or following the manufacturer’s instructions isn’t enough; the success of a flooring project hinges on addressing subtle but impactful variables. For example, many assume that leveling the surface is a straightforward task, but neglecting precise subfloor correction can lead to lippage, creaking, or even premature failure. Advanced mistakes also include underestimating the effects of slab movement or moisture migration over time. A common myth is that moisture barriers are only necessary in basements or humid climates; in reality, even moderately sealed concrete slabs can emit enough moisture to cause havoc, especially with hardwood or tile adhesion. Experts emphasize that proper moisture mitigation involves meticulous detection—beyond just visual inspection—and comprehensive barrier installation, as detailed in the ultimate guide to floor leveling.
Keep Your Flooring in Top Shape with the Right Tools
Maintaining hardwood floors and tile surfaces over time demands precision and reliable equipment. Personally, I swear by a high-quality CMX moisture meter—specifically the Tramex CME3—which provides instantaneous, accurate readings to detect hidden moisture lurking beneath the surface. This tool has saved me from premature failures by alerting me to damp conditions before laying new flooring. For floor leveling, I rely on the QEP 51124Q Self-Leveling Underlayment Spreader, which ensures an even, smooth surface. Its adjustable flow control helps prevent overapplication, reducing the risk of lumpy patches that could cause tile lippage or hardwood gaps. In tile installation, a Schumann 23-2125 notched trowel is my go-to because of its durability and precise notch sizes, allowing for optimal adhesive coverage—crucial for long-term adhesion and durability. These tools aren’t just gadgets; they’re investments in your craft, ensuring professional results and minimizing long-term repair costs.
Predicting the Future of Flooring Maintenance
As advancements in materials and technology evolve, I believe we’ll see a surge in smart flooring systems integrated with sensor technology, allowing homeowners to monitor moisture, temperature, and wear in real-time via smartphone apps. Such innovations could revolutionize how we approach maintenance, shifting from reactive repairs to proactive care. Staying ahead means investing in durable materials and tools that can adapt to these new technologies—like moisture meters with Bluetooth connectivity or self-healing surface coatings that reduce wear and tear over time.
How do I maintain hardwood floors and tiles over time?
Consistent cleaning with moisture-controlled methods is vital. Using microfiber mops rather than harsh chemicals preserves surface integrity. Regularly inspecting grout joints and applying sealants can prevent water infiltration that leads to cracks or mold; I recommend sealing grout annually for best results, as outlined in hardwood floor care secrets. Moreover, employing a floor roller after applying self-leveling compounds ensures even distribution and reduces the risk of bubbles or uneven surfaces, a technique supported by self-leveler application tips. Implementing these maintenance routines with the right equipment will extend your flooring’s lifespan. For example, using a professional-grade sander during refinishing can restore luster and remove superficial scratches—try a drum sander with adjustable grit levels for best results. Don’t forget, regular upkeep combined with excellent tools is your best defense against long-term deterioration.
Are you ready to elevate your maintenance game? Try integrating a moisture meter into your routine and see how early detection saves you from costly repairs. For more expert-approved strategies and advanced tools, visit our comprehensive guides and start transforming your flooring experience today.
What I Wish I Had Known Before My First Flooring Project
- I underestimated the importance of thorough moisture testing, which led to costly repairs; now, I always perform multiple moisture assessments using reliable tools like the Tramex CME3, ensuring my subfloor is truly ready for installation.
- I used to believe a flat surface was enough, but over time, I realized that fine-tuning subfloor flatness with precise techniques like laser leveling prevents lippage and future cracks, saving headaches down the line.
- Skipping the vapor barrier was a mistake I paid for dearly. Installing quality moisture barriers, as recommended in the ultimate guide to floor leveling, creates a crucial shield against unseen moisture migration that can wreck even the most durable floors.
- Purchasing specialized equipment such as a high-accuracy moisture meter and professional self-leveling compounds transformed my approach, giving me confidence and professional results that lasted for years.
Tools and Resources That Shaped My Craft
- Installing tiles like a pro: It’s packed with expert strategies that I rely on to guarantee perfect grout lines and level surfaces.
- The ultimate guide to floor leveling: This resource became my blueprint for achieving flawless flatness, especially on tricky slabs.
- Rapid prep fixes: It saves me time and ensures a tight, lasting bond, which is critical for any flooring project.
- Buckling fixes: Knowledge from this guide keeps my hardwood floors in top condition, especially in humid climates.
Your Next Step in Flooring Excellence
Armed with lessons learned and tools trusted over years of experience, I invite you to take action today. Proper moisture detection and precise leveling are your best defenses against costly errors, and embracing these strategies will elevate your flooring projects from good to professional-quality results. Whether you’re tackling a DIY renovation or overseeing a contractor, investing in proper preparations today ensures a beautiful, durable floor tomorrow. Are you ready to transform your space confidently? Share your biggest flooring challenge below—let’s learn together and build a community of knowledgeable homeowners and enthusiasts alike.
Comments are closed.