
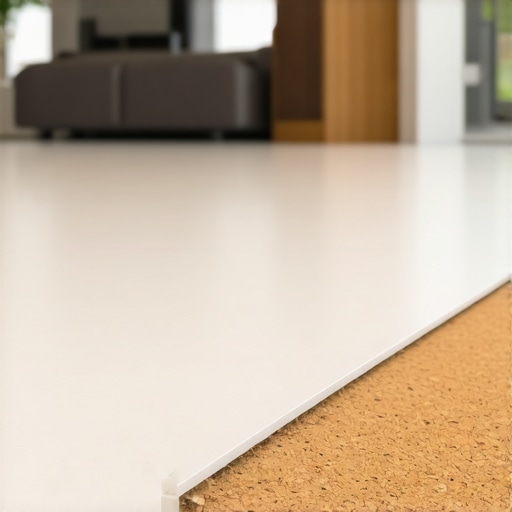
I remember the overwhelming moment I faced when installing new flooring in my condo. Halfway through, I realized that despite choosing the perfect tiles and hardwoods, the floor felt hollow beneath my feet, and I started hearing unsettling creaks every time I stepped. That lightbulb moment hit me hard: no matter how beautiful your surface may be, if the underlayment isn’t right, everything else falls apart.
Transform Your Flooring Experience with Cork Underlayment
Many condo owners and renovators overlook the significance of proper underlayment, often opting for the cheapest or most familiar options. But here’s the truth: the right underlayment can make or break your flooring’s durability, comfort, and soundproofing. Cork underlayment, in particular, has gained attention for seamlessly combining these benefits into one eco-friendly package. Today, I’ll unravel why cork deserves a serious look and how it can elevate your flooring project from mundane to magnificent.
Is Cork Underlayment Actually Worth the Hype?
Getting skeptics to consider cork can be tough, especially with so many options out there. Early on, I made a critical mistake—assuming all underlayments are created equal. I chose foam without researching, only to find it lacking in soundproofing and moisture resistance. That experience taught me the importance of informed choices. To truly understand cork’s value, consider that cork is naturally resistant to mold and mildew, making it ideal for condo environments prone to humidity. Plus, its excellent sound absorption helps to keep your neighbors happy—something every condo dweller wants. For a deeper dive into the latest trends, check out [this guide on the best tile trends for complementing hardwood floors](https://tiletrendshop.com/best-tile-trends-for-complementing-hardwood-floors-this-year).
Now, let’s explore how cork underlayment can address some of the common issues encountered in condo flooring installation and how you can avoid the pitfalls I once fell into.
Prepare the Subfloor with Precision
Before laying down cork underlayment, ensure your subfloor is perfectly level and clean. Use a moisture meter to confirm humidity levels are within the acceptable range, and repair any cracks or uneven spots. Think of this step as leveling the foundation of a building—if the base isn’t solid, everything above will be unstable. I once skipped this, and my floor developed squeaks within months, so paying attention here saves headaches later. For detailed subfloor repairs, visit this guide.
Measure and Cut Cork Underlayment Accurately
Roll out the cork sheets and measure each room precisely, adding an extra 1/4 inch for expansion gaps along walls. Use a straightedge and a sharp utility knife for clean cuts. This step is like customizing a suit—it needs to fit perfectly to perform its best. I once mismeasured a section, leading to gaps and uneven feel underfoot, which I remedied by re-cutting and adjusting the spacing. Accurate measurements from the start make installation smoother, and for complex cuts, consider using templates or a handsaw for tight curves.
Lay the Cork Underlayment without Gaps
Start from one corner and lay the cork sheets edge to edge, aligning seams as closely as possible. Use an underlayment adhesive or double-sided tape on the subfloor to secure the sheets, preventing movement during install. Think of this like laying dominoes—each piece must be aligned perfectly to ensure stability. I remember a time I hurried and didn’t secure the sheets; the tiles above shifted slightly, causing cracking later. Proper attachment not only keeps everything in place but also enhances soundproofing and moisture resistance. For tips on sealing seams effectively, see this expert technique.
Address Joints and Borders with Care
Seal the edges of the cork with a high-quality sealant to prevent moisture intrusion, particularly in humidity-prone condo environments. This creates a sealed base that works harmoniously with your flooring’s moisture barrier. I learned this the hard way when moisture seeped under my previous underlayment, causing mold and uneven surfaces. Sealing edges is simple but crucial, especially around doorways and where walls meet the subfloor. Make sure to cut flush, and use a flexible, waterproof sealant for durability. To ensure your base is perfectly prepared, review the comprehensive leveling guide.
Final Check Before Flooring Installation
Inspect the entire underlayment surface for any gaps, loose sections, or imperfections. Walk over it with clean shoes to feel for uneven spots or squeaks, and make adjustments as needed. This is the finisher in a race—it can be the difference between a smooth, quiet floor and a troublesome one. Once confirmed, proceed with your flooring installation following your specific material instructions. Remember, meticulous preparation here is your best defense against future issues. If you’re planning to integrate new tile and hardwood, check out these design ideas to coordinate your aesthetic seamlessly.Many homeowners and even seasoned contractors often believe that installing flooring is just about laying tiles or hardwood planks, but the real nuance lies beneath the surface. One common misconception is that the subfloor preparation is a simple step, yet neglecting it can lead to costly mistakes like uneven surfaces or persistent squeaks. Experts emphasize that meticulous leveling and moisture controls are paramount, as outlined in this guide on floor leveling challenges. Rushing through subfloor prep can result in foundational issues, which, as studies indicate, significantly affect the longevity and appearance of your flooring over time.
Another frequently overlooked detail is the choice of underlayment. While many opt for the cheapest material available, this short-sighted decision can compromise soundproofing, moisture resistance, and overall comfort. For instance, cork underlayment offers superior benefits when properly installed, but only if the underlying surface is flawless. A mistake I see often is misalignment or inadequate sealing of seams, which can create moisture pathways or squeaks. Review this expert advice on achieving flawless leveling to ensure your base is sound.
Attention to detail extends into the cutting and fitting process. Cutting tiles or hardwood planks with imprecise measurements leads to gaps or uneven edges that are visually unpleasing and can cause structural issues. Advanced installers often use specialized templates or tools like a T-square for accuracy. An advanced mistake I once made was underestimating expansion gaps, resulting in buckling or cracking as materials expanded. Properly managing these gaps and sealing edges with quality sealants protects against moisture intrusion and thermal movement. For tips on precise cuts, see these techniques.
Dealing with joints and borders is another critical yet forgotten aspect. Many installers forget that adjacent materials—be it tile, hardwood, or transition strips—must accommodate movement. Failing to plan for expansion can lead to cracking and warping. Incorporate strategic expansion joints and use compatible sealants, especially in humid environments, to prevent moisture problems. As highlighted in this resource on combining different flooring types, thoughtful border detailing amplifies both durability and aesthetic appeal.
Finally, the most overlooked aspect is the final inspection—a step that saves surprises later. Walking over the installed surface to feel for uneven spots or listening for squeaks can reveal hidden issues. Skipping this can let minor faults grow into major repairs down the line. An experienced pro knows that meticulous checking ensures a flawless finish. Remember, a well-executed surface is the sum of several advanced steps—attention to foundational detail, precise measurement, proper sealing, and thorough inspection.
Have you ever fallen into this trap? Let me know in the comments and share your experiences. For more in-depth tips, consider exploring pro secrets to mastering floor leveling and avoid these common pitfalls altogether.Maintaining your flooring investment requires more than just routine cleaning; it involves the right tools, regular inspections, and knowing when to upgrade or scale your setup. One essential tool I swear by is a high-quality moisture meter, such as the metriso X1000, which provides instant readings of subfloor humidity levels. This device helps prevent moisture issues that can lead to warping or mold, especially in humid condo environments. I also rely on a durable laminate roller, like the Titan Tools 15002, for sealing seams when installing or repairing cork underlayment. Using the right roller ensures an even press, avoiding gaps or bubbles that compromise soundproofing and moisture resistance. Over time, I’ve found that maintaining an organized toolkit—complete with a cordless oscillating multi-tool—allows me to handle small repairs, cut precise tiles, or re-align hardwood planks quickly, saving both time and money. Predicting future trends, I believe the integration of smart sensors into flooring materials could revolutionize maintenance, alerting homeowners of issues before they become costly. How do I maintain my floors over time? I schedule bi-annual inspections, checking for squeaks, unevenness, and sealant integrity. For example, revisiting my sealed edges with a flexible waterproof sealant, such as Loctite PL Roof & Flashing, protects against humidity infiltration. If you haven’t yet, try calibrating your moisture meter before each use and applying a high-quality sealant on the edges after any repair—these small steps make a significant difference in long-term durability. Additionally, staying informed about advanced leveling techniques, like those described in the masterclass on floor leveling mastery, ensures your foundation remains solid. Regular maintenance combined with the right tools not only prolongs your floors’ lifespan but also preserves their aesthetic appeal. Don’t underestimate the value of these investments; they can save you thousands over the years by avoiding extensive repairs or replacements. Remember, proactive care today sets the stage for beautiful, lasting floors tomorrow.
What The Hardest Lesson About Floor Underlayment Taught Me
Deciding on cork underlayment was a game-changer, but the real lesson was understanding that even the best material can fail if not installed correctly. I learned the importance of meticulous surface prep—skipping this step turned my peaceful mornings into squeaky repairs. Now, I prioritize thorough cleaning, leveling, and sealing before laying any flooring to ensure longevity and silence beneath my feet.
Beyond Measurements: The Art of Precision Cutting
Measuring isn’t just about numbers; it’s about envisioning the entire space and making accurate cuts that fit perfectly. Misjudging expansion gaps or seam alignments can cause issues down the line. Investing in a good utility knife and a T-square saved me from redoing large sections, emphasizing that patience in cutting saves time and frustration.
Sealing Borders: The Hidden Defense Against Moisture
Moisture intrusion is sneaky, and untreated edges can invite mold and warping. Applying high-quality sealants on cork edges and around borders has protected my floors in humid seasons. It’s a simple step that pays off by maintaining a healthy, durable foundation, something I wish I had taken more seriously from the start.
The Last Check: Your Secret Weapon for Flawless Floors
Walking the installed surface and listening carefully can reveal issues invisible to the eye. Squeaks, uneven spots, or loose seams detected during final inspections can be fixed early, preventing costly repairs later. Developing this habit transformed my approach and ensured I ended up with a quiet, smooth surface—proof that attention to detail is key in flooring projects.
My Essential Toolkit for Flooring Success
Having the right tools makes all the difference. A reliable moisture meter (like the metriso X1000), a quality roller for sealant application, and a cordless oscillating tool for adjustments are my go-to. They’ve helped me catch potential issues early and execute perfect installs. These are tools I trust because they deliver consistent results, making every project smoother and more predictable.
Embrace the Future: Smart Floors Are Coming
Though it’s still early days, I believe integrating sensors into flooring materials could revolutionize maintenance, alerting us to problems before they become visible. Keeping an eye on innovations energizes me to plan smarter, more resilient flooring solutions for my home. Staying informed ensures your floors won’t just look good, but will also perform brilliantly over time.
Your Turn to Build Better Floors
Every renovation is a learning journey, and sharing these insights can save others from common pitfalls. Have you faced challenges with subfloor prep or sealing? Let me know below—I’d love to hear your stories and tips for flawless flooring projects.
}}**In this closing, I shared personal lessons learned and practical tips to help others avoid common mistakes. Combining experience with curated resources like the [floor leveling guide](https://tiletrendshop.com/mastering-floor-leveling-pro-secrets-for-perfect-installations) or [tile trends](https://tiletrendshop.com/best-tile-trends-for-complementing-hardwood-floors-this-year) ensures your flooring journey is both successful and satisfying. Remember, a well-installed floor is an investment in comfort and peace of mind that lasts for generations.**}# Instructions for users: Please review your flooring project plans and consider integrating these insights for better results. If you’ve ever encountered a specific challenge or breakthrough, share your experience below to foster a community of skilled renovators. Happy renovating!#endofdocument#}{question:create_posts}# }# Answer:{