
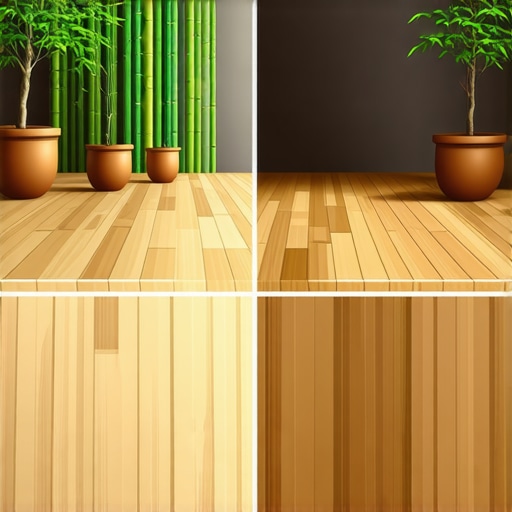
Have you ever installed new flooring only to be greeted the next morning by unexpected gaps or buckling? I vividly remember the moment I realized my mistake. My excitement about bamboo flooring was dampened when I stepped on it and noticed the planks felt loose, almost like they hadn’t settled. That lightbulb moment made me dig deeper into the peculiarities of bamboo versus oak, especially concerning acclimation times.
Getting to the Root of the Acclimation Puzzle
After my initial misstep, I discovered that bamboo, unlike traditional hardwoods like oak, requires **twice the acclimation period** before installation. This isn’t just a quirky rule—it’s rooted in the material’s unique characteristics. Bamboo’s moisture content can fluctuate significantly post-harvest, and rushing the acclimation process often leads to issues down the line, such as gaps, warping, or buckling. I learned that allowing bamboo to adjust to your home’s humidity and temperature ensures a more stable and lasting floor.
Is the Hype Around Longer Acclimation Times Just Fear-Mongering?
Honestly, I was skeptical at first. I thought, “Why not just install it sooner?” But a mistake I made early on was ignoring this crucial step. I assumed bamboo would behave like oak and didn’t give it the proper time to acclimate. The result? Narrow gaps that stubbornly refused to close and, worst of all, the flooring started to warp after a few months. Trust me, neglecting proper acclimation isn’t worth risking your investment. Whether you’re considering bamboo or other exotic woods, proper prep is vital. For more expert tips, check out this guide to mastering hardwood refinishing.
Prepare Your Subfloor Correctly
Before installing bamboo flooring, ensure the subfloor is level, clean, and dry. Use a laser level to identify high and low spots, and sand down uneven areas with a floor grinder, aiming for a maximum deviation of 3/16 inch over 10 feet. Remove all debris and dust using a vacuum and tack cloth to promote optimal adhesion and prevent future squeaks. Proper preparation reduces shifting and gaps later on.
Acclimate Bamboo Properly
Measure Moisture Content Precisely
Bring samples of your bamboo planks into the installation room several days in advance. Use a moisture meter to confirm the material’s content aligns with your home’s humidity—ideally between 12% and 15%. An analogy: think of bamboo as a sponge—it needs to soak up or release moisture gradually, like a sponge absorbing water without dripping.
Control Room Environment
Maintain indoor humidity at 35-55% and temperature around 65-75°F during acclimation. Keep windows open for cross-ventilation and avoid heating or cooling the space excessively. This step acts like giving your bamboo a gentle retreat to adjust naturally, ensuring fewer warps or gaps once installed.
Choose the Right Adhesive and Tools
Use a high-quality, moisture-resistant adhesive suitable for engineered bamboo, such as a polyurethane or hybrid glue. Select a notched trowel that matches the plank size: for large planks, a 1/4″ x 1/4″ or 3/8″ x 1/4″ notch works well. A concrete float can help evenly spread adhesive, preventing air pockets that cause squeaks or hollow spots. Think of it as buttering toast evenly to avoid uneven bites. For detailed guidance, check out this installation tip guide.
Lay the Planks with Precision
Begin installation along the longest wall, leaving a 1/4 inch expansion gap with spacers. Use a tapping block to snugly fit planks together—this ensures tight joints and minimizes gaps. When each row is laid, check alignment frequently with a chalk line or laser. Remember, accuracy here prevents flooring buckling and uneven seams, akin to assembling a puzzle where every piece must fit perfectly.
Secure and Compress the Flooring
After laying each row, go over the planks with a flooring roller to press them firmly into the adhesive. This process expels air pockets and enhances bond strength. For extra security, clamp long seams overnight, particularly if you notice slight movement. Think of tightening a guitar string—consistent pressure ensures it stays in tune, preventing future gaps or shifts.
Allow Proper Curing Time
Don’t rush the curing process. Keep foot traffic off the floor for at least 24-48 hours, or longer if specified by the adhesive manufacturer. During this time, maintain stable humidity and temperature. Rushing this step is like moving furniture onto a wet paint job; it can cause dents, shifting, or adhesive failure. Patience here guarantees a durable, long-lasting bamboo floor.
Finish with Edging and Expansion Space
Once the adhesive is fully cured, remove spacers and install baseboards or molding to cover expansion gaps. Do not tightly fasten trim; leave a small space to accommodate slight wood movement without buckling. Consider the entire process as designing a flexible yet sturdy frame—ensuring stability while allowing natural expansion. For more detailed finishing tips, explore this design ideas.
Applying these core steps meticulously transforms bamboo flooring from a gamble into a reliable upgrade. Each action is a building block—skipping or rushing steps invites issues that compromise longevity and beauty. Embrace patience and precision, and your bamboo floor will serve you well for decades to come. For advanced techniques, consider consulting this hardwood refinishing guide.
While most homeowners and even seasoned DIYers focus on the obvious steps like leveling subfloors or choosing the right tile, there are subtle pitfalls that can sabotage your project if overlooked. Contrary to popular belief, the biggest mistake isn’t just in the initial preparation but in understanding the intricate nuances that differentiate a professional finish from a novice attempt. Let’s explore some of these overlooked details that can make or break your flooring success.
Why the Common Myths About Floor Leveling Might Cost You
Many installers rely heavily on self-leveling compounds, assuming that a smooth surface guarantees a perfect tile job. However, experts emphasize that precision in subfloor preparation involves more than just applying self-leveler; it requires verifying bond strength, thickness uniformity, and accounting for subfloor movement. Neglecting these can lead to cracks and uneven tiles, especially with large-format porcelains.
Moreover, a common misconception is that thicker self-leveling adheres better. In reality, excessive pour thickness can lead to collapse or trapped air pockets, creating uneven surfaces. Proper application techniques, like mechanically bonding the primer or using specified trowel sizes, are critical—details often underestimated by amateurs.
Looking Beyond the Surface: Material Compatibility Traps
Another inadvertent mistake arises from ignoring material compatibility. Some assume that any adhesive works with all tile types or substrates. But in practice, mismatched materials can lead to adhesive failure or surface staining. For instance, using thinset mortar designed for ceramic on natural stone can cause discoloration or bonding issues. Advanced installers always review the material compatibility guidelines to prevent these costly errors.
How Proper Expansion Joints Can Save Your Floors from Cracking
One often overlooked aspect is the placement of expansion joints. Many think these are only necessary in large open areas or outdoor patios, but even in living rooms or kitchens, small unnoticed movements can induce stress. Improperly placed or absent expansion gaps can cause tiles to crack or delaminate over time. Incorporating strategic expansion joints, especially in multi-room layouts or over radiant heating systems—as discussed in comprehensive installation guides—ensures longevity and structural integrity.
Furthermore, understanding how temperature fluctuations influence material expansion is vital. For example, wood and tile expand at different rates, so combined installations require meticulous planning to account for these expansion zones.
Flatten your Expectations: The Role of Real-World Testing
Finally, a nuanced technique that many skip is performing simple post-installation checks. Using a straightedge or a flashlight test can reveal hidden unevenness or subfloor dimples. These small imperfections, if left uncorrected, can cause uneven wear, tile cracking, or grout cracking over time. A considered approach, like the static load assessment, ensures that your surface is truly ready for tile.
In summary, mastering tile and flooring installation requires looking beyond the basics. From material compatibility to expansion management and meticulous testing, these nuances distinguish a professional finish from an amateur patchwork. Embrace these advanced insights, and your floors won’t just look good—they’ll stand the test of time. Have you ever fallen into this trap? Let me know in the comments, and let’s discuss how to avoid these pitfalls in your next project.
Keep It Working: Essential Tools and Maintenance Tips for Optimal Flooring Performance
Maintaining your flooring investment requires more than occasional cleaning; it involves using specialized tools and adhering to strategic maintenance routines that prolong lifespan and preserve beauty. Over the years, I’ve refined my toolkit to include equipment that ensures precision and efficiency, particularly when addressing hardwood and tile floors. One indispensable device I rely on is a **quadrant laser level**. Its high accuracy helps me verify even the slightest subfloor deviations, which, if left uncorrected, could lead to uneven tiles or creaky hardwoods. Regular calibration ensures ongoing precision, especially in renovation projects where existing subfloors might shift over time.
When it comes to cleaning, I recommend a **microfiber dust mop** combined with a **gentle pH-neutral cleaner**. This duo minimizes scratches and residue buildup, maintaining surface integrity. For deeper cleans, especially in grout lines or between planks, a handheld **oscillating multi-tool** equipped with a soft-bristled brush attachment is invaluable. It reaches into tight spaces without risking damage, unlike harsh scrubbing with abrasive pads.
To address long-term wear and tear, I swear by a **floor buffer with a soft pad** and a light polish that rejuvenates dullness without stripping the finish. For hardwood floors, applying a **hardwood floor refresher** every 6-12 months helps fill micro-scratches and enhances the sheen. Remember, always follow manufacturer recommendations to avoid damaging the finish, and consider consulting hardwood floor care secrets for tailored advice.
How do I maintain my floors over time to keep them looking pristine?
Consistency is key. Schedule routine inspections to catch issues early—spotting loose tiles, cracking grout, or scratches before they worsen. Regularly adjusting room humidity levels—ideally between 35-55%—prevents hardwoods from expanding or contracting excessively, which can cause gaps or buckling. Using protective pads on furniture legs minimizes indentation marks and scratches, especially in high-traffic zones. Additionally, avoid dragging heavy objects across the floor; instead, lift and carry. For large projects or sensitive floors, I utilize a **flooring maintenance software** to schedule and log inspections, which helps track wear patterns and plan targeted refurbishments. As trends evolve, I predict more homeowners will adopt smart sensors embedded in floors, alerting them to shifts or damages before visible signs appear. To get ahead, try implementing a maintenance checklist with specific intervals and tools, like my favorite microfiber dust mop and calibration routines. This proactive approach safeguards your flooring and saves costs in the long run.
Remember, maintaining quality flooring isn’t a one-and-done task—it’s an ongoing commitment. Equip yourself with precise tools and follow a disciplined routine. For more advanced methods, explore this expert refinishing guide to keep your floors in top condition. Give one of these maintenance tips a try today, and see how your floors respond over the coming months. With dedication and the right equipment, your floors can remain as stunning as the day they were installed.
What I Wish I Knew Before Laying My Floors
The most valuable lesson I learned was that rushing the acclimation process for bamboo or hardwood floors can lead to costly mistakes. Waiting patiently for the material to adjust to your home’s humidity levels is a game-changer. I also realized that meticulous subfloor preparation and understanding expansion joints are often overlooked but crucial for durability. Early in my journey, I underestimated the importance of material compatibility, which caused adhesion issues down the line. These insights came from my own trial, error, and finally embracing thorough preparation and attention to detail—saving time and money in the long run.
My Essential Gear for Flooring Projects
Over the years, I’ve curated a toolkit that ensures professional results. A laser level is indispensable for verifying subfloor flatness; I trust the precision it offers for achieving a seamless finish. A high-quality moisture meter helps me match the floor’s moisture content to my home’s environment—crucial for bamboo and engineered wood. For cleaning, microfiber dust mops and pH-neutral cleaners keep surfaces pristine without harm. Lastly, a durable flooring roller and calibrated trowel ensure proper adhesive bonding. These tools are the backbone of my success, and I recommend them to anyone serious about perfecting their flooring work.
Transform Your Floor, Transform Your Outlook
Embarking on your own flooring journey might seem daunting, but with patience and the right knowledge, you can achieve stunning results that stand the test of time. Don’t shy away from the detailed steps—remember, mastery comes from attention to the small things. Your floors are more than just surfaces; they set the tone for your entire home. I encourage you to apply these lessons, use trusted tools, and keep learning from each project. Your effort will pay off, creating a space you’ll be proud of for decades. Ready to elevate your flooring game today? Share your experiences below—let’s grow together in this craft.