
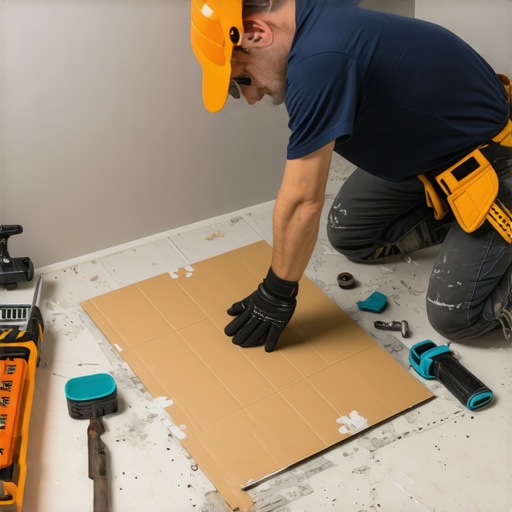
I remember the first time I tackled a tricky corner with uneven tiles and misaligned angles. After hours of frustration, I had this lightbulb moment when I realized that a simple piece of cardboard could save my sanity—and maybe even my friendship with my spouse! That humble tool was my secret weapon for perfect corners and seamless edges. If you’ve ever felt that sinking feeling watching your tiles misalign or noticing tiny gaps at the corners, you’re not alone. Let me tell you: there’s a reliable way to get flawless results, even in the most complex layouts.
Why a Cardboard Template Can Be Your Best Friend in Tile Installation
Corner tiles can be brutal. Complex cuts, tight angles, or uneven walls often leave us questioning whether it’s even worth trying to get everything perfectly aligned. I used to spend ages measuring, re-measuring, and cursing my tape measure. Then I discovered the cardboard template move, and everything changed. Basically, you cut out a piece of cardboard that matches your tile’s shape and use it to transfer angles and cuts directly onto your tiles. It’s like holding a hologram of your perfect final layout in your hand, ready to be cut and placed with confidence.
This method is not just a timesaver; it dramatically improves the precision of your installation, especially in complicated corners. And honestly, once you get the hang of it, you’ll wonder how you ever tiled without it. Plus, it reduces waste—you spend less time re-cutting or adjusting tiles while on the job. For detailed step-by-step guidance, I highly recommend checking out this comprehensive guide. It’s packed with tips on tile layout and cutting, perfect for honing your skills.
Feeling Skeptical? Are These Tricks Worth It?
Honestly, I was dubious when I first heard about using cardboard for tile cuts. I had made my fair share of mistakes early on—from incorrect measurements to uneven cuts—that cost both time and money. My biggest blunder was trusting my eyes alone without checking the actual cut pattern against the wall. Learning to use a cardboard template initially felt like an extra step, but it soon became my go-to strategy, especially for complex corners. If you’re worried about whether this method will work for you, take it from someone who’s been there: it absolutely does. And as you gain experience, you’ll find yourself making fewer adjustments, and your overall project quality will skyrocket. It’s truly worth a try—and can save you heaps of headaches down the line.
So, now that you understand why this little hack is such a game-changer, let’s dive into how you can master it for your next project. Ready to save time and ensure perfect corners? Let’s get started!
Preparing Your Cardboard Template
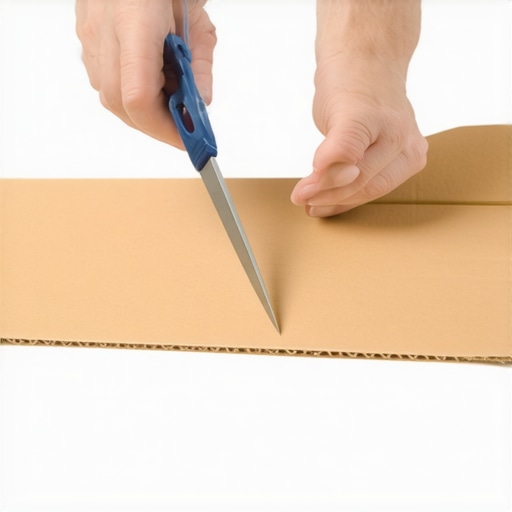
Start by selecting a piece of sturdy cardboard slightly larger than your tile. Place a full tile on the cardboard, and trace around its edges with a marker. Pay extra attention to the angles, especially if they are non-standard or complex. For corners or cuts, mark the cut lines directly onto the cardboard, considering the angle of your wall or tile layout. Once marked, cut out the shape with scissors or a utility knife, ensuring the edges are smooth and accurate. I once underestimated the importance of a clean cut and ended up with a template that didn’t fit perfectly, causing me to re-trace and redo it, but precision from the start saves time in the long run.
Transferring the Template to Your Tile
Place the cardboard template onto your tile, aligning edges carefully to match your layout. Use a pencil or a non-permanent marker to trace the template onto the tile surface. This step is crucial, especially for intricate cuts or tight angles—think of it as copying the blueprint for a building before construction. In one project, I used this method to cut multiple tiles for a curved corner, and the templates ensured a perfect fit each time, eliminating guesswork and reducing waste. Be sure to hold the template steady and double-check alignment before tracing.
Making Precise Cuts
Use a high-quality tile cutter or wet saw for the cuts, following the traced lines meticulously. For detailed or tight angles, a tile nipper or a Dremel tool with a diamond bit can help refine the shape. Like a tailor trimming fabric, small adjustments make a big difference in the final fit. I remember a particularly tricky corner where I used a diamond blade to carefully nibble along the lines, resulting in a clean edge that seamlessly blended into the wall, saving me from the frustration of repeated corrections.
Applying the Tile and Achieving Solid Joints
Position the cut tiles accurately in their designated spots, using spacers to maintain consistent grout lines. Gently tap or press the tiles into place to ensure full contact with the thinset. Once laid, check the alignment against adjacent tiles, and make adjustments immediately before the adhesive sets. I once had a slight misalignment that I corrected by tweaking the tile position within the initial minutes of setting, which proved easier than trying to fix a crooked edge after the fact. Proper placement now lets you enjoy a professional-looking finish that lasts.
Handling Complex and Curved Edges with Templates
For curved or highly irregular edges, create multiple smaller templates that match sections of the curve, then connect the pieces on your tile. This process is similar to piecing together jigsaw segments; each small template guides a precise cut on a section of the tile, and once assembled, it forms an accurate curve. I experimented with this method when tiling a rounded shower niche, and the result was stunning. The key is patience—take your time to make each template as precise as possible, and verify fit repeatedly before cutting the tiles. This approach drastically reduces errors and guarantees a polished look.
Final Tips for Success
Always test your templates on scrap tiles before cutting into your final tiles. This extra step can reveal minor inaccuracies that, if corrected early, save costly mistakes. Keep your tools sharp and clean, and work slowly on intricate cuts—rushing leads to mistakes. Remember, the goal is to transfer your layout onto the tile with minimal distortion, so double-check all measurements and cuts before proceeding. As I once learned the hard way, a small miscalculation can cascade into a frustrating correction later. With careful template making and precise cutting, your tiles will fit perfectly, even in challenging corners or curves.
By mastering this simple yet powerful technique, you’ll boost both your confidence and the quality of your tiling projects. Whether working on a small backsplash or a large floor, a well-made cardboard template is your secret weapon for flawless angles and tight corners. Keep practicing, and soon you’ll find yourself tackling complex layouts with ease and precision, turning a daunting task into a straightforward process.
 Many DIY enthusiasts and even seasoned professionals tend to fall for certain misconceptions about flooring installation that can seriously impact the final result. One prevalent myth is that level subfloors are always necessary for tile and hardwood. While a flat surface is important, this oversimplifies the complexity of the process. According to industry expert David Ochoa, a slight unevenness can be corrected with proper leveling techniques—learn more about mastering floor leveling to avoid unnecessary demolition and expense.
Another common mistake is the assumption that all types of flooring are equally forgiving when it comes to imperfections. Hardwood, for instance, can show flaws like dips or uneven gaps more prominently than tile. This often leads installers to overlook crucial prep work, resulting in a less durable and attractive finish. Advanced installers understand that prep work and precise leveling are fundamental, not optional, steps—discover fundamentals of leveling to get it right.
A subtle but impactful nuance lies in the choice of adhesives and grouts. Many believe that generic products suffice, but the right selection can dramatically influence longevity and appearance. Epoxy grout, for example, offers superior stain resistance and durability, making it ideal for kitchens and bathrooms where moisture is prevalent. For expert tips, check out the ultimate guide to floor leveling.
When examining tile installation, an often-overlooked aspect is the importance of proper mixing and application timing. Self-leveling compounds, if not mixed with the correct ratio or poured within the optimal window, can lead to uneven surfaces and cracks. A study by the Concrete Society emphasizes how critical proper mixing is for achieving a seamless, durable floor—see their research on self-leveling application.
In the realm of hardwood floors, many assume that refinishing can always restore the original beauty. However, several advanced mistakes can hinder this process. Over-sanding can thin the wood excessively, risking damage or even creating weak spots. Also, neglecting to acclimate hardwood planks to the environment before installation can cause warping and gaps later on. For pro insights, review hardwood refinishing tips.
Have you ever fallen into this trap? Let me know in the comments. Remember, understanding these hidden nuances and debunking common myths can elevate your flooring projects from ordinary to professional-quality results.
Maintaining beautiful, durable floors over time requires more than just a good install; it demands the right tools and consistent upkeep. A staple in my arsenal is a high-quality 4-inch angle grinder fitted with a diamond cup wheel. This combo is invaluable for removing stubborn grout haze or surface stains without damaging the tiles or wood beneath. I personally prefer this over chemical cleaners because it offers immediate results and minimizes the use of harsh chemicals, aligning with eco-friendly practices. Upgrading your cleaning regimen with specialized tools ensures your floors look brand new for years.
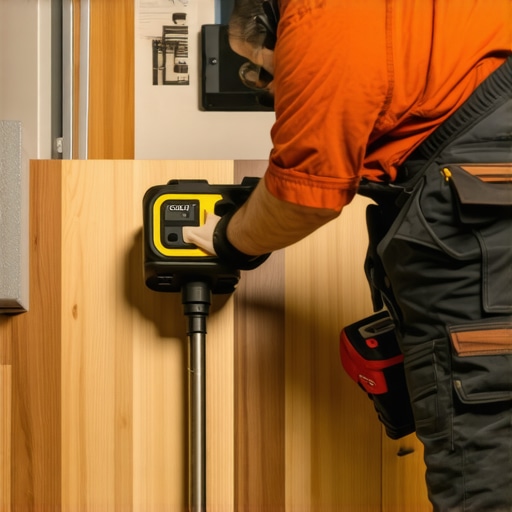
Investing in a precise floor level sensor, like the [Progin Gage](https://tiletrendshop.com/step-by-step-guide-to-flooring-installation-and-leveling-success), allows me to regularly assess the flatness of subfloors before installation or when troubleshooting uneven spots. Maintaining an accurate understanding of the floor’s condition helps prevent future issues such as cracking or squeaking, saving time and money. As technology evolves, digital laser levels are becoming more affordable and provide even greater accuracy, so staying current with these innovations can significantly pay off.
For ongoing maintenance, I rely heavily on a microfiber mop paired with a pH-balanced cleaner specifically formulated for either tile or hardwood. For example, my go-to for hardwoods is the [Hardwood Floor Care Secrets](https://tiletrendshop.com/hardwood-floor-care-secrets-to-longevity-and-shine), which preserves finish integrity while removing dust and grime. Regularly cleaning with the right products prevents the buildup of debris that can cause surface scratches or grout discoloration, ensuring your floors remain stunning over time. Remember, methods matter; always avoid steam mops on engineered wood, as they can cause warping and damage the finish.
For more stubborn spots, I turn to a handheld oscillating tool with a soft-bristle brush attachment. This allows precise removal of embedded dirt in grout lines or textured surfaces without risking surface wear. Proper tools tailored to specific cleaning challenges help avoid the temptation of heavy scrubbing, which can accelerate wear and tear. Pairing proper cleaning tools with routine inspections helps spot issues early—think of it as preventative medicine for your floors.
How do I maintain [Flooring Material] over time?
This depends on the material, but a common theme is consistent, gentle care. Hardwood benefits from periodic refinishing, while tile requires sealing and grout maintenance. Keeping abreast of the latest techniques, such as [floor leveling](https://tiletrendshop.com/flooring-installation-fundamentals-leveling-for-a-seamless-look), ensures your foundation remains intact, preventing costly repairs. Looking forward, advancements like smart sensors that monitor humidity and stress on floors could revolutionize maintenance routines, alerting you before problems become visible. Embracing these tools now can give you a significant edge in floor longevity.
Ready to take your floor care to the next level? Try integrating a digital laser level for proactive assessments or a diamond cup wheel for quick, chemical-free cleaning. These investments are small compared to the savings and peace of mind they offer in the long run. Well-maintained floors don’t just look good—they sustain the test of time, becoming a lasting part of your home’s story.
Creating a maintenance routine centered around the right tools and knowledge sets the stage for long-term flooring success. Regular inspections, proper cleaning techniques, and using advanced equipment at key intervals keep your floors in top condition and stave off costly repairs. Interested in more expert insights? Contact us via the contact page or revisit our detailed guides for step-by-step strategies that work.
What I Wish I Knew Before Tackling Complex Floor Edges
One of the most challenging aspects of flooring installation is achieving seamless transitions between different materials or levels. My earliest attempts often resulted in visible gaps or uneven edges, which frustrated me and sometimes even made me reconsider the entire project. The lightbulb moment came when I realized that meticulous planning, along with creating detailed templates for transitions, could save uncountable hours of correction later. Now, I approach each transition with precision, ensuring a professional finish that lasts.
I’ve learned that investing time upfront in drafting custom templates for tricky edges, especially where tile meets hardwood or uneven subfloors, makes all the difference. It’s like creating a blueprint—once you have the model, your cuts and placements are confident and accurate. This process minimizes waste and keeps your workflow smooth, even when faced with irregular surfaces or unexpected obstacles.
Tools and Resources That Elevated My Flooring Skills
Over the years, I’ve found certain tools and sources invaluable in elevating my flooring projects. A high-quality [self-leveling floor sensor](https://tiletrendshop.com/step-by-step-guide-to-flooring-installation-and-leveling-success) provided me with real-time feedback on subfloor flatness, preventing issues before they started. My trusty [diamond cup wheel](https://tiletrendshop.com/the-heavy-furniture-rule-for-freshly-glued-down-planks) on an angle grinder became my go-to for quick, chemical-free grout cleaning and surface smoothing, saving time and effort.
Additionally, I rely on industry-standard guides like the [ultimate floor leveling manual](https://tiletrendshop.com/the-ultimate-guide-to-floor-leveling-for-a-perfect-finish). They help me understand the nuances of different techniques, from patching old concrete to preparing delicate hardwood surfaces. These resources serve as both inspiration and practical references, making my work more reliable and efficient.
Embracing the Journey of Flooring Mastery
Thinking about embarking on your own flooring adventure? Remember, every project has its lessons—every awkward corner and imperfect cut teaches you something new. Don’t shy away from challenging setups; instead, see them as opportunities to hone your skills. With patience, the right tools, and a desire to learn, you’ll transform your space into something truly remarkable. Flooring is more than a task—it’s an art that rewards persistence and precision. So, take that first step today, and watch your confidence grow along with your craftsmanship.
What’s been your biggest challenge when working on complex flooring edges or transitions? Share your story below—I’d love to hear how you tackled it!