
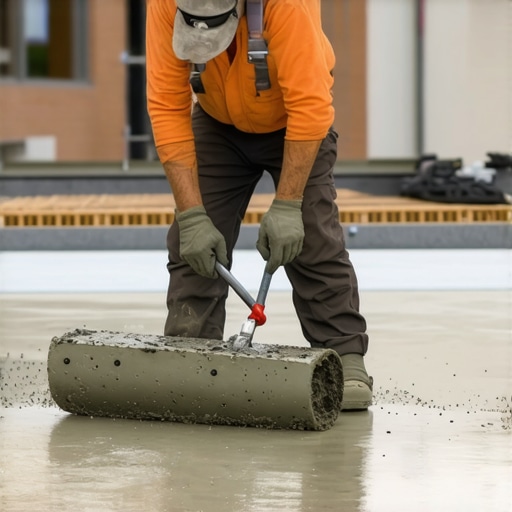
I remember the exact moment I realized I had made a mistake with my first exterior concrete project. I was so eager to get the job done that I skipped a crucial step, and the surface ended up uneven and lumpy. Frustration crept in, and I questioned whether I was cut out for this. Sound familiar? If you’re like me, tackling exterior concrete smoothing can feel overwhelming, especially when the finish isn’t as flawless as you’d hoped.
Why Getting the Magnesium Float Move Right Is a Game-Changer
After several attempts and a lot of trial and error, I discovered that mastering the magnesium float move can dramatically improve your concrete finish. This technique not only levels the surface but also creates a smoother, more professional look that lasts. The secret lies in the way you manipulate the float to push surface aggregates into the matrix, resulting in a uniform appearance. Whether you’re working on a small patio or a large driveway, understanding this move can save you time and minimize rework.
Is the Magnesium Float Move Actually Worth the Hype?
I used to think all floats were created equal until I learned that the magnesium float’s unique properties give it an edge in exterior work. Early on, I made the mistake of using a plastic float, which caused more drag marks and uneven texture. The magnesium float, being rigid yet lightweight, allows for better control and a finer finish. Trust me, investing in the right tools and technique—like the magnesium float—can make all the difference. For more common pitfalls to avoid, check out this helpful guide.
Now, I’m excited to guide you through the essential steps to perfect your magnesium float move. Once you get the technique down, you’ll notice your exterior concrete projects look more polished and last longer—plus, you’ll gain confidence in your skills. Ready to transform your outdoor space? Let’s dive into the specifics that will turn you from a beginner to a pro.
Prepare the Surface Like a Pro
Before you even pick up the magnesium float, ensure the concrete is at the right stiffness—firm enough to hold shape but still workable. I vividly recall walking onto a recent project where the concrete was too wet; I tried to float it, but the surface smudged and dragged. Best practice is to wait until the bleed water evaporates and the surface hardens slightly, usually about 20-30 minutes after screeding. Proper prep sets a solid foundation for the float move, minimizing patchwork later.
Position Your Float for Maximum Control
Grip and Stance Matter
Hold the magnesium float like a pen, with a firm but relaxed grip. Stand with your feet shoulder-width apart, knees slightly bent. I once attempted the float move standing too upright, which reduced control. Instead, lean slightly into the float, keeping your arms steady—this posture gives you better leverage and finesse.
Use a Consistent Angle and Pressure
Angle the float at roughly 20-30 degrees from the horizontal surface; too flat and you’ll drag the aggregates unevenly, too steep and you risk gouging. Apply even pressure, sliding the float smoothly across the surface. During one messy attempt, I pressed too hard, leaving ridges; I learned that gentle, steady strokes produce a more uniform finish.
Execute the Float Move with Precision
Start from the Edges and Work Centrally
Initially, float the edges to create a clean boundary. Then, work in overlapping passes toward the center, maintaining the same angle and pressure. I remember working too hastily, skipping edges, which resulted in uneven transitions. Careful attention early on ensures consistency later.
Employ the ‘Push and Sweep’ Technique
Imagine pushing surface aggregates into the matrix with the float, then gently sweeping to smooth. During one project, I focused only on dragging the float, which caused surface laitance and trapped air pockets. Instead, deliberate pushing combined with gentle sweeping minimizes voids and produces a smooth surface.
Refine with Micro-movements
Once the overall surface is level, make micro-movements with the float—tiny adjustments to eliminate imperfections. I used to leave these small tweaks to the end, but early micro-movements prevent the formation of ridges and hollows, leading to a better finish overall.
Timing Is Everything
Perform the float move during concrete’s plastic phase—before它 begins to set. Waiting too long results in a stiff surface, difficult to manipulate; too early and the surface is too soft, causing dragging or dishing. In a recent job, I observed better results when I timed my float passes precisely when the surface just lost its sheen but was still workable, leading to a glossy, smooth finish.
For comprehensive insights on achieving a flawless surface, check out this guide.
Tip for the Difficult Spots
Corners and tight edges require a smaller float or a hand float. I once struggled with hard-to-reach corners, causing uneven patches. Using a smaller, beveled float allows for better contact and control, ensuring evenness throughout the slab.
Final Pass and Cure
After the initial float, make a final pass with a damp burlap or magnesium tamp to close surface pores, which reduces dusting. During this step, avoid overworking the surface. Over-working can trap air or disturb the freshly floated surface, undermining your effort.
Mastering these specific techniques transforms your surface from rough to professional-grade. The key is consistent practice and paying attention to each micro-movement—small details that yield big results.
Many homeowners and even some DIY enthusiasts believe that choosing the right flooring material and following basic installation steps are enough to guarantee a perfect finish. However, this oversimplification often leads to costly mistakes that can compromise the durability and aesthetic appeal of the floor. One prevalent myth is that all subfloors are equally prepared for installation, but in reality, improper assessment of subfloor conditions can cause issues like uneven surfaces and squeaks, which are difficult to repair later. For a thorough understanding of how subfloor preparation impacts your project, check out this comprehensive guide.
Let’s challenge the common narrative that material choice is all that matters
While selecting quality flooring is essential, many overlook the importance of precise leveling and proper underlayment, which serve as the foundation of your installation. Misconceptions persist that a level slab is just a nice-to-have, but inexpert leveling can lead to sagging tiles or buckling hardwood over time. Advanced installers know that micro-leveling mistakes, even as small as a few millimeters, can manifest as visible cracks or loose tiles down the line. An expert trick is to utilize self-leveling compounds correctly, ensuring a perfectly flat base—more details are available here.
Another commonly misunderstood aspect is the significance of acclimating materials properly before installation. Many rush this step, risking expansion or contraction issues, especially with hardwood floors. A well-implemented acclimation process involves controlling humidity and temperature to prevent future warping. Skipping or rushing this phase is where most misjudgments happen, leading to costly repairs later on.
Why do most installers fall into the trap of ignoring edge finishing and expansion gaps?
Leaving these details to chance is a mistake common among beginners. Properly calculated expansion gaps prevent buckling during seasonal changes—a nuance that seasoned professionals rigorously plan for. Over-tightening the finish or ignoring the necessity of finishing trims can result in visible cracks or uneven surfaces over time. To avoid this, meticulous attention during the layout and finishing stages is crucial, which is why utilizing specific tools and techniques, such as those outlined at this resource, is highly recommended.
Finally, the myth that all adhesives or locks are interchangeable undermines the installation’s longevity. Different flooring materials require specialized adhesives and installation methods. For instance, floating floors demand precise tension and expansion allowances, while glued tiles need the right type of thinset for adhesion. Ignoring these nuances can lead to uneven wear, delamination, or complete failure, costing you more in the long run.
In summary, appreciating the subtle yet critical details—like subfloor assessment, micro-leveling, acclimation, expansion planning, and correct materials—distinguishes a professional result from a DIY mishap. Mastering these nuances ensures not just a beautiful finish but a durable, lasting floor. Have you ever fallen into this trap? Let me know in the comments, and for more expert insights, visit this advanced guide.
Tools I Recommend for Flooring Maintenance and Installation
Maintaining and scaling your flooring projects requires the right equipment. I can’t stress enough how specific tools have transformed my approach from guesswork to precision. For example, a high-quality vibrating trowel, like the Marshalltown Power Trowel, helps achieve an even, professional finish when applying self-leveling compounds, minimizing surface imperfections and reducing manual effort. Additionally, a laser level such as the BOSCH Self-Leveling Cross Line Laser ensures your surfaces remain perfectly flat over time, which is crucial when installing hardwood or tile.
For ongoing floor care, I rely on a microfiber mop paired with a pH-neutral hardwood floor cleaner—these prevent scratches and preserve the finish. The Bona Hard-Surface Floor Mop, coupled with their dedicated cleaning solutions, makes long-term maintenance straightforward and effective. Remember, investing in tools designed for durability pays off; cheap alternatives often lead to more work down the line.
Keeping It Working: Long-Term Results
To ensure your floors look pristine years after installation, schedule routine inspections. Look out for signs of wear, loose tiles, or creaking hardwood—address issues early before they worsen. Incorporating a periodic deep cleaning regimen, like polishing hardwood with a specialized wood restorer, maintains luster and prevents buildup that can damage finishes. I recommend applying a fresh layer of protective sealant every few years; for hardwood, products like the Loba WS 2 maintain moisture balance and resist scratches.
Tools for Scaling Your Flooring Projects
If you plan to expand your flooring throughout your property, automation can be a game-changer. Consider investing in a floor sanding machine with variable speed control, such as the Lagler Hummel, which allows for seamless refinishing of large areas. For tiles, a high-power wet saw ensures clean cuts and precise edges, critical when working on intricate layouts or expansion joints.
How do I maintain hardwood and tile over time?
Maintaining your hardwood or tile floors over the years hinges on consistent cleaning and timely repairs. Hardwood floors benefit from minimal moisture exposure—use controlled humidity levels, and avoid excessive water. Periodically assessing the finish and reapplying protective coatings, like the aforementioned Loba WS 2, extends their lifespan. Tiles require sealing grout lines every few years to prevent staining and cracking; a high-quality grout sealer like Miracle Sealants 511 is my go-to. For detailed guidance on leveling floors before tile or hardwood installation, I recommend reviewing this comprehensive guide.
Predicting future trends, I believe advanced laser leveling and eco-friendly finishes will dominate the scene, making installations faster and more sustainable. To prepare, try incorporating a laser level into your workflow, surrounded by a strategically designed maintenance schedule, to keep floors durable and stunning for decades.
Ready to elevate your flooring game? Start with a precision tool like the BOSCH laser level and see how minute adjustments can make a big difference! For more in-depth tips, visit this expert resource.
Looking back, the most valuable lesson I learned about exterior concrete finishing is that technique truly trumps tools. My early attempts were marred by uneven surfaces, but once I focused on the finesse of the magnesium float move, everything changed. The key insight? That small hand movement, when executed with patience and precision, can transform a rough slab into a sleek, professional-looking surface. Never underestimate the power of micro-movements—they’re like the brushstrokes of a seasoned artist, bringing perfection to each project.
What I Wish I Had Known About Perfect Concrete Surfaces
- Timing Is Everything: Waiting for the right stiffness of concrete ensures the magnesium float can do its magic. Rushing this step leads to drag marks and a rough finish. The sweet spot is when the surface just loses its sheen but remains pliable.
- Control Over Technique, Not Tools: Investing in the right float is important, but mastering your grip, stance, and float angle makes all the difference. I discovered that a relaxed grip and steady stance allow for smoother, more consistent passes.
- Small Movements, Big Impact: Micro-movements during the finishing process help eliminate imperfections and create a uniform sheen. It’s about paying attention to detail—every tiny adjustment counts.
- Layering Your Technique: Starting from edges and working inward, overlapping passes, and applying push-pull motions results in a natural, flat surface. It’s a dance—fluid and deliberate—rather than hurried strokes.
- Don’t Skip the Final Touch: A light pass with a damp burlap or magnesium tamp seals the surface pores, preventing dusting and enhancing durability. This finishing touch is the curtain call that makes all your effort worthwhile.
Tools and Guides That Changed My Approach
- Expert Resources for Surface Preparation: Knowing how to assess and prep your concrete is foundational. This guide demystifies the process and helps avoid common pitfalls.
- Floor Leveling Secrets: Achieving a perfectly leveled base amplifies the beauty of your finish and extends its lifespan. Mastering leveling techniques is a game-changer.
- Common Flooring Installation Mistakes: Learning from others’ errors saves time, money, and frustration. It emphasizes the importance of proper surface preparation and technique.
- Long-Term Maintenance: Your finished surface deserves care—regular cleaning, protective seals, and timely touch-ups. This resource guides you in preserving your work for years to come.
Step Into Confident Finishing
Mastering the magnesium float move is more than just a skill; it’s an art form that elevates your entire project. When you embrace patience, control, and micro-movements, you’ll see your exterior concrete finish achieve professional standards, leaving a lasting impression. Remember, every expert was once a beginner—so keep practicing, stay curious, and don’t be afraid to refine your technique. Are you ready to turn your concrete slabs into masterpieces? Share your experiences below, and for deeper insights, explore this comprehensive guide.