
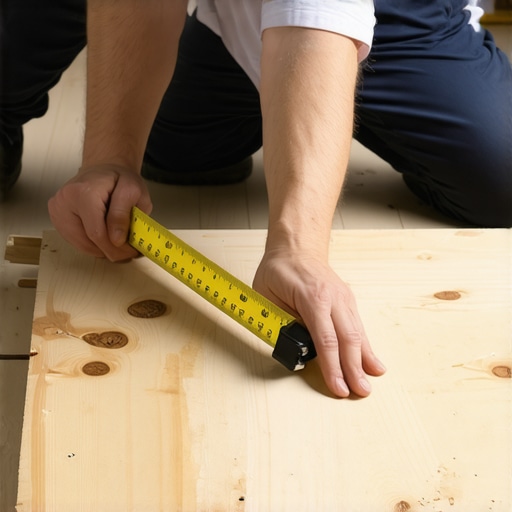
I’ll never forget the moment I realized I had been painstakingly installing my hardwood flooring, only to notice the first row was slightly crooked—just enough to be noticeable but not enough to catch my immediate attention. That small mistake threw off the entire look of my floor, and I knew I had to find a better way. It’s a frustration many DIY enthusiasts face: how to ensure your first row is perfectly squared without expensive tools or guesswork. The good news is, there’s a simple, reliable technique I’ve come to rely on—the 3-4-5 Triangle Method—and today, I want to share how it can save your project from ending up crooked and frustrating.
Why Precision at the Start Matters More Than You Think
The foundation of a flawless flooring installation is the very first row. If it’s even slightly out of square, every subsequent row will follow suit, leading to visible misalignments and gaps. Achieving that perfect square early on isn’t just about aesthetics; it influences the durability and overall professional appearance of your finished floor. I’ve learned the hard way that rushing the initial setup leads to a lot of headaches down the line. According to experts, mistakes in the early stages of installation can be costly and time-consuming to fix, often requiring ripping up sections or redoing work entirely (source). That’s why mastering an easy, foolproof method like the 3-4-5 Triangle Technique is a game changer.
Is the 3-4-5 Triangle Method worth the hype?
Early on in my DIY journey, I underestimated this simple concept. I thought, “How hard can it be?” But I made a common mistake—guessing angles or relying solely on measurements without verifying with a trusty technique. That subtle inaccuracy cost me hours of correction work later. The 3-4-5 Triangle Method is rooted in basic geometry, and it’s surprisingly user-friendly once you grasp it. It allows you to quickly check and set right angles, ensuring your first row—and therefore your entire floor—is perfectly squared. This method doesn’t require fancy tools; all you need are some measuring tapes or a chalk line, and a clear understanding of the 3-4-5 rule. This is a tried-and-true principle that can help prevent costly errors and elevate your DIY game.
Set Your Baseline Accurately
Begin by choosing a reference point at one corner of your room. Use a tape measure to mark a straight line, ensuring it’s perfectly aligned with the wall. Think of this as laying the foundation of a building—precision here determines everything downstream. When I installed my flooring in a tight corner, I made sure this first line was spot-on; otherwise, subsequent rows would drift, leading to major headaches later. Confirm this line with multiple measurements, and snap a chalk line for a visible, straight guide.
Apply the 3-4-5 Triangle Technique
Now, measure out 3 units along your reference line, then 4 units perpendicular to it. Mark these points clearly. From these, draw a diagonal connecting the two marks. The key is to check if this diagonal measures exactly 5 units. If it does, you have a perfect right angle—no need for complex tools. This is the core of the method. During my project, I frequently adjusted the marks until the diagonal confirmed the 3-4-5 ratio, which is a reliable way to ensure a 90-degree corner. Remember, this technique relies on the Pythagorean theorem, providing a simple geometric assurance.
Adjust and Verify
If your diagonal isn’t 5 units, adjust the placement of the 4-unit mark closer or farther along the perpendicular line until it measures correctly. Re-measure the 3-unit line if needed. Once satisfied, use a straightedge or chalk line to connect the points, creating an accurate right-angled corner. Repeating this process across the room ensures your first row is perfectly squared, preventing cascading misalignments. Personally, I double-checked after my initial setup by measuring diagonally from opposite corners—this additional step caught a small discrepancy, saving me from future corrections.
Implementing the Technique in Tall Rooms
For rooms with irregular walls or large open spaces, the 3-4-5 method might need adaptation. Use string lines or laser levels aligned with your measurements to maintain consistency. During my last installation, I found that marking multiple reference points with this method across the room helped maintain overall square, especially when walls weren’t perfectly plumb. This cross-verification is akin to double-checking your compass before a long hike—vital for accurate alignment.
Seal Your Accuracy
Once all corners and edges are confirmed with the 3-4-5 technique, secure your starting row with clamps or spacers. Check again with a tape measure and a square (or a digital angle finder) to confirm the setup. Small discrepancies here can lead to big visible issues later, so patience pays off. After locking in your first row, continue installing flooring, frequently verifying that your rows remain aligned and square. This disciplined approach prevents misalignments from compounding and ensures a professional finish.
Applying the 3-4-5 Triangle Method isn’t just theoretical—it’s a practical, time-tested technique I used during my last hardwood installation, and it made a noticeable difference in the ease and accuracy of my project. Mastering this simple geometric trick enables you to avoid crooked floors and tedious corrections, elevating your DIY skills to professional standards. For more insights on achieving flawless surfaces, check out this comprehensive guide.
Even seasoned professionals often focus on the big picture when installing flooring, but overlooking subtle details can sabotage your results. One common misconception is that ensuring the subfloor is level is enough—many assume that minor imperfections won’t matter. However, as I found out from my own trial and error, precise floor leveling is crucial for creating a flawless surface, especially with hardwood and tile. Small dips or high spots can cause grout cracking, uneven wear, or even tile fracturing over time. The myth that all subfloors are naturally flat is just that—a myth. In reality, professional-level flooring requires meticulous preparation and sometimes self-leveling compounds to correct hidden imperfections, which often go unnoticed by beginners. These nuances matter because they affect not only aesthetics but also the longevity of the installation. Many underestimate the importance of removing residual debris, dust, or old glue from the subfloor, which can lead to adhesion problems and future failures. Always remember, a stable, clean base is your foundation for success. Don’t fall into the trap of rushing over these critical steps, as mistakes here are compounded in the final finish. Incorporate routine checks with a long straightedge and a flashlight to spot ridges or high spots that might be invisible to the naked eye. Ignoring these details might seem harmless at first but can lead to costly repairs down the line. For example, an improper subfloor not only causes uneven surfaces but also contributes to grout failure and tile cracking, as highlighted in studies on tile adhesion failures. Advanced DIYers and professionals alike should pay close attention to these hidden details to elevate the quality of their work. Remember, every inch of your floor tells a story—make sure it’s a story of craftsmanship, not oversight. Want to dive deeper into perfecting your installation? Check out this comprehensive guide on floor leveling techniques. Have you ever fallen into this trap? Let me know in the comments.
Maintaining your flooring over time is crucial to preserve its beauty and functionality. The right tools make this task more manageable and effective. I personally swear by a high-quality microfiber mop paired with a dampening agent like pH-neutral cleaner—this combo ensures surface cleanliness without harming the finish. For hardwood floors, regular vacuuming with a soft-bristled attachment prevents debris from scratching the surface, extending its lifespan. When dealing with tile, a grout brush with stiff bristles is invaluable for deep-cleaning and preventing staining.
How do I maintain my flooring investments over time?
Consistent upkeep involves routine cleaning and periodic inspections. For instance, reapplying a protective finish to hardwood floors every few years can keep the sheen vibrant. I use a floor polisher with gentle buffing pads during these touch-ups, which refreshes the surface without aggressive abrasives. For tile, sealing grout lines every 12-18 months prevents moisture infiltration and discoloration.  Mastering proper maintenance techniques ensures longevity and keeps your investment looking pristine. Regular inspections and timely interventions prevent small issues from turning into costly repairs, saving you money and frustration. The trend towards eco-friendly cleaning products also points to a future where sustainable maintenance becomes commonplace, making regular care both effective and environmentally responsible.
Implementing these tools and routines can seem daunting at first, but once integrated into your weekly schedule, they become second nature. I encourage you to try using a digital moisture meter during your next floor check or experimenting with a steam cleaner for tile surfaces to experience the benefits firsthand. Small consistent efforts today pave the way for stunning, durable floors tomorrow that you’ll enjoy for decades to come.
Lessons That Changed My Flooring Journey
- One unexpected revelation was how minor adjustments with the 3-4-5 Triangle Method could prevent hours of correction later. Small, precise tweaks early on saved me from costly rework.
- I learned that patience during the initial setup pays dividends—rushing to finish can lead to visible flaws that diminish the entire project’s professionalism.
- Overconfidence in subfloor prep was a trap; meticulous cleaning and leveling are the unsung heroes of long-lasting, beautiful floors.
- Collaborating with experienced professionals and studying their techniques revealed nuances I hadn’t considered, boosting my confidence and results.
Tools and Resources That Elevated My Skills
- The comprehensive guide on floor leveling dramatically improved my understanding of subfloor prep and helped me avoid common mistakes.
- The hardwood floor care secrets book provides expert advice on maintenance, extending the life of my investment.
- I rely on quality measuring tapes and a digital angle finder, which make verifying squareness quick and accurate, ensuring my installation holds perfectly over time.
- For routine cleaning, a microfiber mop with pH-neutral cleaner and a grout sealer brush have become staples, keeping my floors looking pristine and preventing stains.
Embark on Your Flooring Adventure Today
Transforming your space with beautiful, durable floors starts with confidence and the right techniques. Remember, every expert was once a beginner. Applying these insider lessons and tools will help you achieve professional results and create a space you’ll be proud of. Don’t wait to elevate your home—your perfect flooring is within reach. Share your experience or questions below, and let’s grow together in this journey toward flawless floors!