
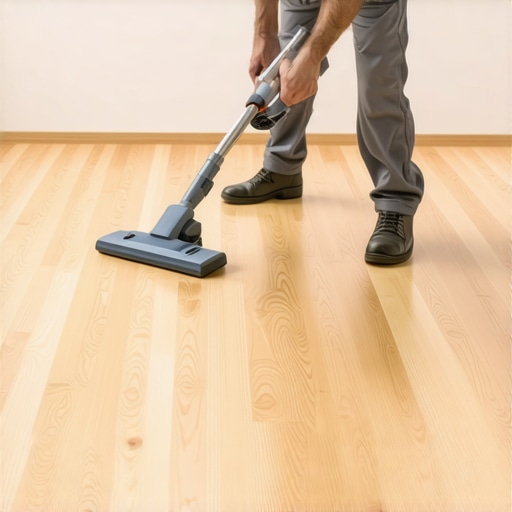
I remember the moment vividly—looking down at my freshly installed hardwood floors, only to notice tiny specks of dust and debris that seemed to have appeared out of nowhere. It was a lightbulb moment that made me realize I had skipped a crucial step: testing my subfloor with a simple vacuum test to see if it was truly clean enough for glue. That mistake almost cost me days of extra work and a lot of frustration.
Why Subfloor Cleanliness Is the Secret to a Perfect Floor
Believe me, the foundation of your flooring project starts way before you lay down your tiles or hardwood planks. If the subfloor isn’t cleaned properly, those tiny particles can cause uneven adhesion, lippage, or even long-term cracks. It’s a sneaky issue—one that’s often overlooked by DIYers eager to get started but ends up creating headaches down the line.
In my early attempts, I thought a quick sweep was enough. Spoiler alert: it wasn’t. I learned that even minuscule dust particles can compromise the bonding process, especially when using adhesives or self-leveling compounds. Experts affirm this—research shows that residual dust and debris are leading causes of flooring failures, and a thorough cleaning can prevent most problems from ever happening. (source: https://tiletrendshop.com/flooring-installation-mistakes-to-avoid-for-lasting-results)
What’s a Vacuum Test, Anyway? And Why It Matters
This simple test involves running a vacuum over the entire subfloor surface and then inspecting the debris collected. If the vacuum picks up a lot of dust and particles, it’s a clear sign that your subfloor isn’t as clean as it should be. This step is quick, inexpensive, and incredibly effective—yet I used to dismiss it as unnecessary. That was a mistake. Skipping this test can lead to compromised adhesion and costly repairs later.
Have you ever faced a flooring issue that seemed to come out of nowhere? If so, it might be due to overlooked dust and debris on your subfloor. Now I always recommend conducting this vacuum test as part of your prep routine. It’s a simple habit that can make all the difference and save you time, money, and heartache.
Next, in the upcoming steps, I’ll show you exactly how to perform this test properly, interpret the results, and ensure your subfloor is primed for success. After all, the key to a beautiful, durable floor starts with a spotless foundation—let’s get it right from the beginning.
Performing the Vacuum Test with Precision
First, clear your workspace and remove all furniture and obstructions. Use a high-quality shop vacuum with a HEPA filter to thoroughly vacuum the entire subfloor surface. Think of it as giving your subfloor a deep clean to reveal hidden debris—this is crucial for adhesion. During my recent project, I paid special attention to corners and seams where dust tends to settle, ensuring no particle was left behind. After vacuuming, inspect the collected debris for large clumps or stubborn dust. If you notice significant dust, repeat the process until the vacuum’s collection bag or canister is nearly empty, indicating cleanliness. This simple yet effective step helps you identify areas needing extra attention and prevents future issues like uneven tile surfaces or squeaky hardwoods.
Spotting High Spots and Irregularities
Next, use a long straightedge or a 4-foot level across the entire subfloor. Place the level at different angles to identify high or low spots. For example, I once used a laser level to detect a slight elevation in the corner of my basement, which could have caused tile lippage or cracked grout. When you find high spots, mark them with a pencil. Adjustments are necessary for a smooth foundation—use a floor grinder or a self-leveling compound for low or uneven areas. This is like leveling a tabletop before laying a delicate mosaic. Don’t rush this step; a flat subfloor sets the stage for flawless installation. For detailed leveling techniques, check out https://tiletrendshop.com/the-ultimate-guide-to-floor-leveling-for-a-perfect-finish, which offers expert tips to achieve perfect surfaces.
Assessing Moisture Content
Moisture is the enemy of flooring longevity. Use a moisture meter to test the subfloor in multiple locations, especially in areas prone to dampness, like basements or crawl spaces. A quick pinch test with a hammer and your thumb can also reveal soft spots—indicators of excess moisture. If moisture levels are above recommended thresholds, address the issue before proceeding. Failing to do so might result in warped hardwood or buckling tiles. For effective moisture management, consider applying a vapor barrier or enhancing ventilation. This step is essential for maintaining adhesion and preventing future repair headaches. For more insights on moisture control, visit https://tiletrendshop.com/4-humidity-proof-tactics-to-save-your-2026-hardwood-install.
Cleaning and Preparing for the Final Check
After leveling and moisture assessment, vacuum once more to remove any residual dust or debris. Use a tack cloth dampened with a mild solution to wipe the surface if necessary. The goal is a pristine, dust-free environment—think of preparing a canvas for a masterpiece. This meticulous cleaning ensures your adhesive or mortar bonds effectively, preventing issues like tile lippage or hardwood gaps. Once satisfied, step back and perform a final visual inspection. Use a flashlight to catch shadows or imperfections that could cause problems later. Remember, this preparation is the foundation of a durable, long-lasting floor. For detailed cleaning routines and common pitfalls, see https://tiletrendshop.com/why-your-floor-leveler-turned-into-a-dusty-mess, which dives into avoiding common prep mistakes.When it comes to flooring, most professionals and DIY enthusiasts focus on major steps—applying the right adhesive, choosing the perfect finish, or ensuring precise cuts. But amid these well-known practices lies a subtle nuance that often goes unnoticed: the importance of subfloor compatibility with your chosen flooring material. Many people assume that leveling and cleaning the subfloor are enough, yet the type of subfloor and its interactions with specific flooring types can make or break your project’s success.
Hardwood floors, tiles, and self-levelers each have unique requirements. For instance, engineered hardwood is sensitive to moisture and temperature fluctuations, making it crucial to verify subfloor conditions beyond standard leveling. Similarly, tiles demand a stable, rigid base; any minor flex can lead to cracking over time. A common myth is that as long as the subfloor is flat and dust-free, it’s suitable for any flooring type. In reality, mismatched subfloor properties can cause long-term issues, such as adhesive failure or uneven surfaces.
Why does subfloor compatibility matter for advanced installations?
Let’s dig a little deeper. According to expert studies, incompatible subfloor materials can accelerate wear, cause gapping, or even create squeaks—problems that aren’t immediately apparent. For example, installing hardwood over a subfloor that’s prone to expanding or contracting without considering its material properties can lead to buckling or gaps. This is akin to building a house on quicksand—the foundation might seem solid initially, but overlooked nuances can cause significant problems later. To navigate this, advanced installers perform moisture mitigation tests and assess the material composition of the subfloor, ensuring long-term durability. Read more about precise leveling techniques to get a feel for how critical this step is.
Another common mistake is neglecting the interaction between subfloor and underlayment. For example, applying tile directly over plywood can lead to cracking unless an uncoupling membrane is used, accommodating movement and preventing transfer of stresses. This extra layer acts as a buffer, alleviating the ‘hidden’ movement that can cause damage. Incorporate these considerations into your planning, and your flooring will stand the test of time without unexpected repairs or replacements. For more detailed insights, visit elegant tile designs to see how proper substrate preparation enhances aesthetics and longevity.
In the end, it’s the attention to these nuanced details—often dismissed as minor—that distinguishes a good installation from a great one. Have you ever fallen into this trap? Let me know in the comments. Your experience might help others avoid costly mistakes and achieve flawless results.
Keeping It Working: Essential Tools for Flooring Projects
Investing in the right tools is crucial for ensuring your flooring remains durable and visually appealing over time. Personally, I swear by a high-quality laser level for precise substrate alignment; it eliminates guesswork when checking for subtle high spots that could cause tile lippage or uneven hardwood surfaces. A moisture meter with pin and pinless functions helps me monitor subfloor conditions continuously, preventing moisture-related issues like buckling or warping. Also, a trusted hand sander with fine-grit discs allows for touch-ups on wood finishes without the need for full refinishing—saving time and money in the long run.
For tile installations, I rely on a rubber grout float and a notched trowel tailored to the tile size. The right trowel size ensures proper thinset coverage, minimizing the risk of cracks or lippage down the line. After setting, I use a damp sponge with a clean, soft cloth to clean residual grout and mortar, which helps maintain the appearance and longevity of your flooring.
Why Does Regular Maintenance Matter for Floors?
Consistent care prolongs the lifespan of your investment. By routinely cleaning with manufacturer-approved products—avoiding harsh chemicals that can degrade finishes—you preserve the integrity of your floors. For hardwoods, applying a quality polish every few months restores shine and adds a layer of protection against scratches. In the case of tiles, sealing grout lines every year prevents staining and freeze-thaw damage, especially in regions with fluctuating temperatures.
To keep your floor level and smooth, periodically inspect for uneven spots or cracks. Small issues can escalate if ignored—think of them as tiny cracks in a foundation that can lead to major structural problems. For example, using a flashlight to spot high spots can help catch uneven surfaces before they cause lippage or squeaks, as detailed in this resource.
How do I maintain my floors for years to come?
The secret lies in a combination of the right tools and a disciplined maintenance routine. Rotating furniture pads, avoiding dragging heavy objects, and cleaning spills immediately are simple yet effective steps. Additionally, scheduling professional inspections every few years guarantees that small problems are caught early, preventing costly repairs later on. Applying protective coatings periodically enhances durability—consider a specialized polyurethane for hardwoods or a sealant for tiles, which can be renewed to restore their original luster and strength.
Looking ahead, emerging smart cleaning systems equipped with sensors and AI-driven maintenance alerts promise to revolutionize floor upkeep. These innovations will enable homeowners to anticipate issues before they become visible, simplifying long-term care.
Ready to take your flooring maintenance up a notch? I recommend trying the laser level for spot-checking substrate flatness—this tool has saved me from costly tile corrections multiple times. For more detailed guidance on achieving professional results, visit this comprehensive guide.
The Hardest Lessons I Learned About Flooring,Hardwood Floors,Floor Leveling,Tile
One of the most impactful revelations in my flooring journey was realizing that skipping the subfloor vacuum test could lead to persistent issues down the line. It’s a tiny step, yet its influence on adhesion makes it a game-changer. Additionally, I discovered that not paying attention to moisture content can cause hardwood to buckle even years post-installation. These lessons underscore the importance of meticulous prep—something I’d gladly emphasize for anyone aiming for flawless results.
Tools and Resources That Turn a Good Job Into an Expert Finish
Over time, I found that certain tools make all the difference—such as a laser level for pinpoint accuracy and a reliable moisture meter for ongoing monitoring. I also rely on resources like this guide for leveling techniques that prevent common lippage problems. Knowing where to find trusted advice and equipment has transformed my approach, saving me from costly rework and frustrations.
Your Turn to Elevate Flooring Confidence
Every flooring project is a chance to learn, refine, and achieve mastery. I encourage you to focus on the small details—like subfloor cleanliness and moisture testing—that lay the groundwork for success. Remember, every high-quality floor begins with a foundation built on attention and care. Are you ready to apply these insider lessons and elevate your installation skills? Share your experiences or questions below—learning is a journey best shared!