
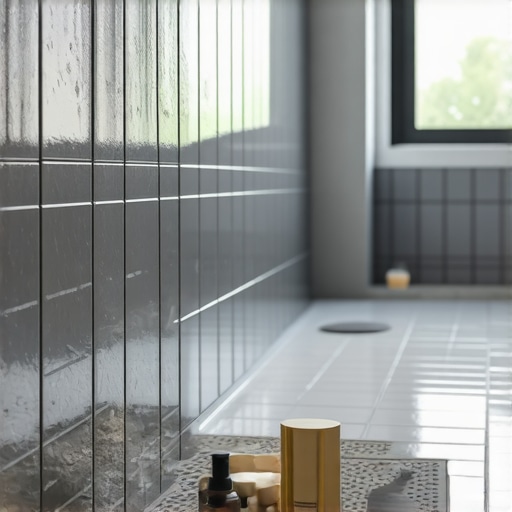
I vividly remember the day I spent hours meticulously cleaning a newly installed high-gloss tile in my bathroom. The reflection was stunning—so much so that I nearly slipped on the shimmering surface during my morning routine. That glossy finish, intended to create a sleek, modern look, ended up turning my bathroom into a slippery hazard, especially as I age. It was a lightbulb moment that made me realize how appearances can deceive us when it comes to practical home design, particularly in spaces like bathrooms where safety is paramount.
High-Gloss Tile: Beauty or Bedtime Hazard?
Many homeowners fall for the allure of high-gloss tiles because they look stunning in photos and magazines. But let’s be real—looks can be deceiving. I learned the hard way that glossy surfaces tend to be slicker, especially when wet or humid, turning what was supposed to be a beautiful upgrade into a safety risk. As we age, our balance and grip decline, making slip hazards far more dangerous than they once were. In fact, slippery bathroom flooring is a leading cause of falls among seniors, accounting for a significant portion of related injuries. Recent studies highlight that textured or matte finishes can dramatically reduce this risk without sacrificing style, a tip I wish I had known earlier. If you’re considering a bathroom remodel or just pondering an upgrade, understanding the surface you choose is vital. Over time, what looks good on glossy tiles might compromise safety, especially in a space as moisture-prone as the bathroom. But don’t worry—that’s exactly what I want to help you avoid. Today, we’ll delve into why high-gloss tile may not be the best choice for aging-in-place bathrooms and explore safer, functional alternatives that won’t leave you slipping or slipping on regrets. Ready to learn more? I promise a straightforward guide to making your bathroom both beautiful and safe, based on real-world experience and expert insights.
Level the Subfloor Thoroughly Before Laying Flooring
Start by inspecting your subfloor for high or uneven spots. Use a straightedge or a long level to identify any humps or dips, which can cause tile lippage or hardwood gaps. To correct these imperfections, apply a self-leveling compound, but watch out for common mistakes like trapping air bubbles. For an even surface, follow detailed techniques outlined in precise floor leveling. I once attempted a quick pour without properly preparing the surface and ended up with bubbles that caused uneven tiles to crack later. Therefore, proper preparation is key to a flawless finish.
Use the Right Trowel and Adhesive for Tile Installation
Select a trowel size suitable for your tile thickness; typically, a 1/4-inch notch works well for most tiles. Applying the right amount of thinset adhesive is crucial. Too much can cause lippage, while too little results in poor bond. Test the consistency of your thinset by troweling and checking if it smoothly adheres without squeezing out excessively. When installing, press each tile firmly with a rubber float or trowel at the correct angle to ensure uniform coverage. I once used a too-small trowel, which led to uneven adhesion and lippage that I had to fix later, wasting time and money. Proper tools and techniques make all the difference.
Maintain Proper Leveling During the Pour or Placement
When pouring self-leveling compounds, pour slowly and in sections, avoiding pooling in corners. Use a gauge rake or trowel to guide the leveler toward low spots and ensure a smooth surface. For tile, regularly check for lippage by using a straightedge across adjacent tiles during setting. For hardwood, ensure planks are acclimated and properly spaced. I vividly remember a time I skipped the leveling step in my DIY project, resulting in uneven tiles that cracked under weight. Checking levelness periodically saves you from costly repairs later.
Ensure Adequate Curing and Drying Time
Allow sufficient curing time—typically 24-48 hours for thinsets and adhesives—before walking on or finishing the surface. Rushing this step can lead to shifting, cracking, or debonding. Use a damp cloth to control the curing environment, especially in dry or hot conditions. For hardwood, avoid mopping or heavy traffic during the drying period. I learned this lesson the hard way when I impatiently used a floor immediately after installation, and the tiles shifted slightly, disrupting the pattern. Patience is essential for durable results.
Test for Smoothness and Flatness Before Finishing
Before grouting or sealing, run the mirror test: hold up a mirror at a shallow angle across the surface. If reflections are distorted or if you notice unevenness, address these issues immediately. For tiles, ensure no lippage remains; for hardwood, check for high or low spots that could cause squeaks or gaps later. I once discovered a slight bump in my hardwood planks after a quick visual check, which I fixed by sanding the high spot before finishing. Being meticulous at this stage prevents problems down the line.
Many homeowners assume that choosing high-end tiles or hardwood automatically guarantees durability and flawless installation. However, the real challenge lies in understanding the nuanced complexities behind proper flooring practices. A common misconception is that surface appearance is the sole indicator of quality, but in reality, meticulous preparation and technique are far more critical to long-term success. For example, neglecting thorough floor leveling can lead to lippage, cracked tiles, or squeaky floors, issues that are often hidden until years later. Sharp-eyed professionals emphasize that even minor subfloor imperfections, less than a millimeter high, can cause significant problems if ignored—highlighting the importance of detailed surface assessments, like those discussed in primer application errors or finish blending techniques. Another prevalent belief is that self-leveling compounds seal everything perfectly on their own; in reality, improper mixing ratios, such as excess water or insufficient primer, significantly impair adhesion and flatness, leading to premature failures. Advanced installers prioritize meticulous surface prep and understand that even a small oversight, like insufficient curing time, can cause costly repair jobs later on. One trap to avoid is underestimating moisture levels—many new DIYers skip moisture testing, which is critical for both tile and hardwood installations. Studies, including those from the National Association of Home Builders, show that moisture-related issues account for nearly 40% of flooring failures in new constructions, underscoring the importance of proper subfloor assessments.Maintaining your flooring over time requires the right tools and consistent care. I personally rely on a high-quality digital laser measure, such as the Leica DISTO D2, to ensure precise measurements for expansions, trims, and adjustments. Its accuracy plus compact size makes it indispensable during installation and routine checks. A reliable moisture meter like the Wagner MMC220 ensures your subfloor remains dry, preventing future warping or settling issues—something I’ve learned the hard way after ignoring moisture levels and facing costly repairs later. When it comes to cleaning, I advocate the use of microfiber mops combined with pH-neutral floor cleaners, which preserve the finish and prevent buildup that can dull surfaces. For hardwood floors, periodic refinishing with a drum sander and quality stains mineral spirits, like these recommended in expert refinishing tips, can restore their beauty and prolong their lifespan. As flooring trends evolve—like the move toward eco-friendly, durable materials—advanced tools such as UV curing lamps for quick-drying finishes are becoming more common, saving time and improving quality. Greater automation and smart sensors hint at a future where floor health can be continuously monitored, alerting homeowners to issues before they become visible or structural. How do I maintain flooring over time? Routine inspections with laser measures and moisture testing form the backbone of a proactive maintenance strategy. Tackle small issues promptly, like addressing minor lippage or scratches with specialized fillers or sanding, to avoid escalation. For example, spot repairs with a belt sander and matching stain can seamlessly fix minor imperfections, saving you from full refinishing. Emphasizing a proactive approach also involves using tools that help prevent problems—such as installing airflow vents to reduce humidity in hardwood areas or applying sealants at recommended intervals. Remember, regular upkeep tailored to your flooring type significantly enhances longevity. For detailed guidance on leveling floors before repairs or upgrades, check out the comprehensive guide at floor leveling procedures. Stay ahead of damage by scheduling annual inspections, especially if your home experiences seasonal humidity fluctuations. Equipment like the digital moisture meter combined with professional advice makes long-term flooring maintenance manageable and effective. So, I recommend trying out a combined routine of precise measurement and moisture assessment—it’s a game-changer in long-term results. Want to elevate your skills? Start by testing your subfloor moisture levels today to prevent future issues, and explore the latest tools on the market that can make maintenance easier and more accurate.
The Hardest Lesson I Learned About Flooring: Subfloor Precision Matters
One of my biggest realizations came when I underestimated the importance of a perfectly leveled subfloor. Small bumps and dips may seem insignificant, but they can cause cracked tiles or squeaky hardwood over time. The moment I started using a laser measure for every project, my installations became flawless, and repairs dropped dramatically. This experience taught me that small details in floor preparation are the difference between a beautiful, lasting floor and a costly mistake.
Guilty of Ignoring Moisture: How It Can Ruin Your Hardwork
I once skipped moisture testing before laying hardwood, thinking it unnecessary—only to face warping and gaps within months. Now, I trust a reliable moisture meter to assess every subfloor. Besides tools, following expert resources like professional moisture testing guidelines ensures my floors stand the test of time. Remember, moisture is the silent enemy of durable flooring, and proactive testing saves headaches later.
Don’t Cut Corners on Adhesives and Finishes
Using cheap adhesives or rushing the drying process has led me to re-do entire sections. Proper trowel selection, mixing ratios, and curing times—learned through trial, error, and trusted sources like expert installation tips—are critical. Investing in quality materials and patience in curing can mean the difference between a pristine finish and future repairs.
Proper Maintenance Extends the Life of Your Floors
Getting into the habit of measuring moisture levels and inspecting for lippage or scratches saves thousands over the years. I now keep a digital laser measure and microfiber mop handy, performing quick checks every season. A visit to hardwood care experts has also transformed my routine. Consistent, proactive care isn’t just maintenance; it’s an investment in your home’s beauty and safety.
What I Wish I Knew Before Starting My Flooring Journey
- Never underestimate the power of meticulous subfloor prep; even minor imperfections can cause major issues
- Always test moisture levels—skipping this step risks years of frustration
- Choose quality adhesives and allow proper curing time for lasting results
- Regular inspections with simple tools like a laser measure can prevent small problems from becoming disasters
Guidance for Your Next Steps
If you’re about to start your flooring project, arm yourself with reliable testing tools and trusted techniques from resources like industry-leading guides. Remember, patience and precision not only save money but also give you a safe, stunning floor that endures.
Your Turn to Elevate Your Flooring Skills
Have you ever overlooked a small detail that cost you dearly later? Share your story or ask questions below—your insights can help others avoid similar pitfalls on their flooring journey.