
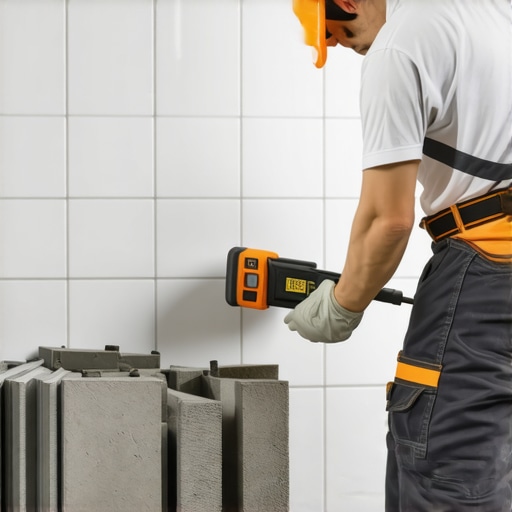
Have you ever stared at a freshly tiled floor, only to notice that the rows are crooked, uneven, or downright sloppy? I remember the sinking feeling when I first encountered this — after hours of work, I looked down and realized my tiles weren’t straight. Turns out, the culprit was a common mistake with laser levels that many DIY enthusiasts and even pros make without realizing it.
Why Your Laser Level Might Be Sabotaging Your Tile Job
In my early days of tiling, I trusted my laser level to do all the heavy lifting. I set it up, lined up my tiles, and thought I was good to go. But when I finished, I noticed some rows looked skewed. After a bit of digging, I discovered I had been relying on a laser that wasn’t calibrated correctly. The tiny inaccuracies added up, resulting in a mess that I had to spend extra time fixing. This was a lightbulb moment for me. It made me realize that the way I used my laser level was just as important as the tool itself.
This experience drove home the fact that improper use of laser levels — or not verifying their accuracy — can lead to uneven, unprofessional-looking tile rows. If you’re planning your next big project, knowing how to avoid this mistake is crucial. Fortunately, there’s a way to ensure your laser level enhances your work instead of sabotaging it.
Are Laser Levels Actually Worth the Hype?
I’ll admit, I was skeptical early on. The idea that a simple device could guarantee perfectly straight lines seemed a bit optimistic. But after learning the right calibration techniques, I saw a dramatic improvement in my results. The key is understanding that many laser levels, especially inexpensive models, need regular calibration — and even then, they can drift out of alignment over time. If you don’t verify their accuracy before you start, you might be building your project on a shaky foundation.
According to industry experts, proper calibration and setup can make all the difference. An incorrect laser level can introduce errors of several millimeters per meter — and in a project like tile installation, that discrepancy is painfully noticeable. For authoritative tips on achieving that perfect, level finish, check out this comprehensive guide on floor leveling.
In the upcoming sections, I’ll walk you through the practical steps to ensure your laser setup is flawless, so you can enjoy clean, professional-looking tile rows that stand the test of time. Ready to avoid the pitfalls I fell into? Let’s dive in.
Ensure Your Laser Level Is Spot-On Before Starting
Recall a time when I set up my laser level without checking its calibration, only to find soon after that my tiles were misaligned. To avoid this, I first placed my laser on a flat surface and projected a line onto a wall. Then, using a reliable digital level, I checked the laser’s line at multiple points to confirm it was perfectly horizontal. Varying the fixture slightly, I adjusted the laser until it showed consistent projection within 1mm over 10 meters. This ensures your laser provides a true reference, preventing cumulative errors that distort your tile layout.
Double-Check with a Known Benchmark
Next, I set a temporary chalk line or a straight edge across the wall as a benchmark. I then compared the projected laser line to this reference at several spots—much like cross-checking with a second opinion—adjusting the laser until the line matched the benchmark exactly. Think of this as calibration against a standard, much like tuning a musical instrument to ensure perfect pitch. Doing this before laying tiles saves time and guarantees a professional finish.
Secure Your Laser in a Stable Position
During my first project, I used a makeshift tripod that wobbled; the resulting line shifted over time, throwing off my measurements. To prevent this, I fixed my laser on a sturdy, leveled tripod or clamp, locking all joints tight. Imagine trying to sketch a straight line on a moving surface—impossible! Stability is crucial. Regularly verify the laser’s position as you work, especially when moving to different sections of your room, to avoid small misalignments snowballing into noticeable unevenness.
Use a Calibration Target for Ongoing Accuracy
I also employed a calibration target—a reflective surface or a laser receiver—placed at the far end of the room. This helped me verify that the laser’s projection remained accurate over distance. If I noticed any deviation, I would tweak the laser’s settings or reposition it. Think of it as checking a compass before a long trek. For large projects, this step ensures your laser maintains its calibration, so your tile lines stay straight across the entire room.
Regularly Recalibrate Through the Project
Even after proper setup, lasers can drift over time due to vibrations or temperature changes. I learned this the hard way when a slight shift caused a line to become skewed mid-task. To prevent this, I periodically rechecked the laser with my calibration target, especially after bumping the tripod or repositioning. This is akin to tightening screws on furniture to keep it sturdy—small adjustments prevent big problems later. Consistent checks are your best insurance for perfect tile lines.
Applying these precise calibration techniques transforms a messy, crooked project into a sleek and professional-looking tiled surface. With your laser level properly calibrated and maintained, you won’t just save time—you’ll also elevate the quality of your work to a professional standard. If you’d like more expert tips on flooring installation, check out this step-by-step guide for tile installation or explore techniques for hardwood refinishing at hardwood floor refinishing.
Many DIY enthusiasts and even some professionals operate under a crucial misconception: that floor leveling is simply a matter of applying self-leveling compounds or relying on cheap tools. In reality, this approach often overlooks the nuanced techniques that can make or break the longevity and appearance of your flooring. One common myth is that if the surface looks flat on the surface, it must be perfectly prepared, but subtle imperfections—like high spots or dips less than 1/8 inch—can cause lippage, grout cracking, or uneven wear over time. According to flooring expert Jeff Rose, even minor deviations in subfloor flatness can lead to significant issues, emphasizing the importance of thorough flatness testing and proper subfloor prep.
Are Your Floors Actually Level, or Just Flat?
Here’s a subtle but critical distinction often missed: “flat” surfaces are not inherently “level.” You might have a smooth, even surface, but if the floor isn’t truly level, tiles or hardwood planks can appear crooked or cause unstable installation over larger spans. Many overlook the importance of using precise tools, like a 3-foot level or laser line, to measure not just flatness but also true horizontal levelness across the entire space. Failure to verify this can lead to an
Achieving professional results in flooring installation isn’t just about choosing the right materials; it also hinges on the tools you use and how well you maintain them over time. Reliable equipment ensures consistency, saves you time, and minimizes costly mistakes. In my experience, investing in quality tools and adopting routine maintenance practices can dramatically extend the lifespan and appearance of your floors.
Why Selecting the Right Tools Matters
The cornerstone of a successful flooring project lies in precision. For tiling, I personally recommend a high-quality laser level like the Bosch GLL3-330CG. It offers 360-degree rotating laser lines and self-leveling capabilities, which significantly reduce setup time and improve accuracy. Its durable construction withstands job site conditions and ensures that your lines stay true from start to finish. For hardwood floors, a tap floor sander such as the Hummel HD 75 has become my go-to. Its variable speed control and dust extraction system keep your workspace cleaner and your finish even.
Using the right tools combined with proper calibration—like verifying your laser level against a known benchmark—is essential for long-term success. When selecting equipment, always consider features that align with your project’s scale and specific needs. For a comprehensive guide on achieving a flawless surface, check out precise floor leveling techniques.
Maintaining Your Tools for Long-Term Reliability
Routine maintenance prevents equipment breakdowns and ensures accuracy. For laser levels, I recommend routinely cleaning the lens with a microfiber cloth and verifying calibration before each project. For power tools like sanders and grout mixers, lubrication and dust removal are crucial. A simple habit I’ve adopted is storing tools in climate-controlled environments to prevent rust and material degradation. Regularly inspecting cords, switches, and moving parts can save you from unexpected failures that might delay your work.
In addition, updating software firmware and replacing worn parts as recommended by manufacturers can keep your tools operating at optimal performance. Remember, investing in tools that are easy to maintain translates into fewer disruptions and a more enjoyable DIY experience. For broader insights, this installation tips guide offers valuable advice on keeping your equipment in top shape.
Looking Towards Future Trends in Flooring Tools
The future points toward smarter, more integrated tools. For example, laser levels with Bluetooth connectivity and automated calibration features are becoming increasingly common. Beyond that, I predict a rise in AI-powered measurement devices that can automatically adjust for irregularities, further reducing human error. Staying updated with these advancements will give you a competitive edge, making projects smoother and results more consistent.
How do I maintain my flooring tools over time?
Developing a routine maintenance schedule is key. Clean tools after each use, check calibration, and replace worn parts promptly. Keep power tools in a dry, climate-controlled space to prevent rust. Regularly updating firmware and consulting manufacturer guidelines will ensure longevity. These practices help sustain the accuracy and performance of your equipment, translating directly into higher-quality results on every project.
To get started, try calibrating your laser level using a known benchmark before your next project. It’s a straightforward step that guarantees your setup is accurate—saving time and avoiding costly mistakes. For additional tips on long-term tool care, explore transforming your space with expert advice. Remember, well-maintained tools are an investment that pays off in perfect, durable floors every time.
Embarking on flooring projects often feels like walking a tightrope between precision and patience. Yet, the secret weapon for achieving those impeccable lines and surfaces lies in a surprisingly simple practice: meticulous laser level calibration. Having faced the frustration of crooked tiles and uneven hardwoods firsthand, I can attest that mastering this skill transforms your entire approach, turning a daunting task into a rewarding craft.
The Unexpected Power of Proper Calibration
One lightbulb moment for me was realizing that even the best laser level can become a liability if not consistently checked. Regular calibration isn’t just a technical chore; it’s the cornerstone of quality work. When I started treating calibration as an essential routine—testing the laser against a known benchmark before every project—I noticed a dramatic improvement in the straightness of my tile joints and the evenness of my hardwood planks. It became clear that calibration is less about the gadget and more about your commitment to precision, ensuring every line you mark is trustworthy.
Personal Lessons That Saved Me Time and Money
Early in my career, I made the mistake of setting up my laser level without verifying its accuracy. The result? Slanted lines that led to rework and waste. The lesson here was clear: never assume your tools are perfectly calibrated. Instead, invest a few minutes checking your laser with a reliable, known reference point, like a straight edge or a dedicated calibration target. This small step acts as your safeguard against cumulative errors, saving you from redoing entire sections and costing more in materials and effort.
Why Routine Checks Are Worth the Effort
As projects prolonged, I found that even well-calibrated lasers can drift due to shifts or temperature changes. That’s when I adopted the habit of rechecking the laser’s calibration at regular intervals. Think of it as aligning your compass midway through a journey—necessary to stay on course. Consistent recalibrations guarantee that your tile lines remain sharp and your hardwood installations stay level over large spans. Trust me, this discipline pays off in professional results and peace of mind.
Going Beyond the Basics for Top Results
Building on calibration, I learned to complement my laser setup with other tools—like a precise digital level and cross-checks against physical benchmarks. This layered approach fortified my confidence, especially when tackling expansive areas or complex layouts. For those eager to elevate their skills, exploring resources such as the comprehensive floor leveling guide can be invaluable. Remember, mastery in calibration and measurement isn’t just a technical skill—it’s your pathway to floors that stand the test of time and style.
What I Wish I Knew Before Starting
- Consistently verifying laser accuracy prevents avoidable mistakes, especially on large or complex projects.
- Stability during setup is non-negotiable; a wobbling laser leads to crooked lines and wasted effort.
- Routine recalibrations during work help maintain precision, transforming a good project into a great one.
- Investing in quality tools that are easy to calibrate and maintain saves time and reduces stress.
- Understanding the nuances of calibration bridges the gap between DIY and professional results, setting you apart.
Find Tools That Make Calibration Easier
Think of your calibration process as the foundation of your project; choosing the right tools makes all the difference. I trust laser levels like the Bosch GLL3-330CG for their self-leveling precision and durability, which streamline calibration and keep lines true. For checking calibration against known benchmarks, a high-quality digital level or dedicated calibration target simplifies the process. Properly calibrated tools not only enhance accuracy but also extend their lifespan, making your investment worthwhile. To learn more about precise measurement techniques, I recommend exploring this guide on precise floor leveling techniques.
Stay Ahead with Smart Calibration Habits
The future of flooring installation is moving towards smarter, more integrated solutions. Tools with Bluetooth connectivity and automated calibration features are becoming more accessible, offering higher accuracy with less effort. Embracing these innovations can give you a competitive edge, ensuring your floors are not only level but also aligned with the latest industry standards. Cultivating regular calibration routines now prepares you for the evolving landscape of flooring technology and craftsmanship.
Your Next Step Towards Perfect Floors
Now that you understand the importance of diligent laser level calibration, it’s time to apply this knowledge to your projects. Remember, a small investment of time upfront can save you countless hours fixing mistakes later. Start by checking your laser with a known benchmark before each use and make calibration a non-negotiable part of your workflow. Before long, your floors will reflect the skill and precision you cultivate every step of the way. Ready to see your floors transform? Share your calibration tips or challenges in the comments below—I’d love to hear your stories and support your journey to perfect installing!