
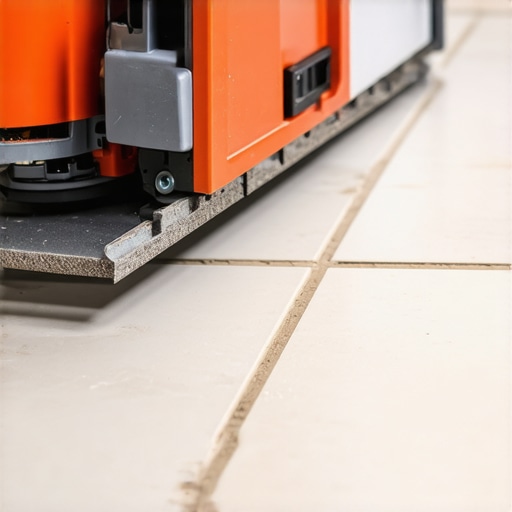
Have you ever started a tile installation only to be greeted by chips, cracks, or unsightly edges that undo all your hard work? I remember the exact moment I realized my mistake—that tiny oversight in choosing the right blade could make or break my entire project. It was a frustrating experience that taught me the hard way how critical tool selection is, especially when working with delicate materials like porcelain tile.
How a Simple Mistake Turned My Dream Floor into a Headache
In my early days of DIY flooring, I didn’t think much about the blades I used for cutting tiles. I just grabbed whatever was available. But after seeing chips along the edges of my freshly cut porcelain tiles, I knew I’d missed something crucial. That’s when I discovered that not all diamond blades are created equal—particularly for porcelain, which is renowned for its hardness and durability. Using the wrong blade turned my smooth, clean cuts into jagged nightmares, forcing me to redo sections and spend more money than I anticipated. It was a lightbulb moment—the kind that makes you realize how small details have huge impacts.
Since then, I’ve become a firm believer that selecting the right diamond blade isn’t just a minor detail; it’s an essential step that can save your time, money, and sanity. In fact, experts over at Tile Trend Shop emphasize that using the appropriate diamond blade specifically designed for porcelain can prevent chipping and ensure a flawless cut every time.
What We’ll Cover Today
If you’ve ever fretted about chips, cracks, or uneven edges ruining your tile project, don’t worry. Today, I’ll walk you through why a specialized diamond blade is your best friend when working with porcelain tile. We’ll discuss the common mistakes beginners make, how to recognize the right blade for your needs, and practical tips for cutting with precision. Trust me—once you understand the importance of choosing the correct diamond blade, you’ll be able to cut your tiles confidently, achieving the professional finish you desire.
Is the Hype About Specialized Diamond Blades Justified?
Early in my journey, I made the mistake of thinking any diamond blade would do the job, which only led to more problems. It’s tempting to assume that all blades are equal, but I learned the hard way that not investing in a blade designed specifically for porcelain can be a costly oversight. If you’ve faced similar issues or want to avoid the same pitfalls, keep reading—I’ll guide you through everything you need to know to make an informed choice and keep your project on track.
Ready to dive into the details? Let’s explore why this small investment in the right blade can dramatically improve your tile-cutting experience and results.
,
Choose the Right Tool for the Job
Using a diamond blade designed specifically for porcelain is crucial. I once tried using a standard blade, which led to chips and uneven edges. To avoid this, invest in a quality segmented diamond blade labeled for porcelain. When I first used one on a project, the cuts were smoother, and the edges pristine, saving me time and frustration. For additional guidance on selecting the best blade, visit our contact page.
Prep Your Workspace and Materials
Ensure your work area is clean and well-lit. Measure and mark your cuts accurately using a chalk line or pencil. I remember a time I rushed marking, resulting in a crooked cut; marking carefully upfront prevents this. Use painter’s tape along the mark to reduce the risk of chipping during cutting. Also, soak the porcelain tiles in water for about 10 minutes before cutting to minimize dust and heat, which can cause cracks.
Set Up Your Saw Correctly
Secure the wet saw or angle grinder on a stable surface. If you’re using a wet saw, fill it with clean water and ensure the blade is installed correctly, running smoothly without wobbling. I once neglected to tighten the blade properly, which caused significant vibrations and imperfect cuts. Always wear safety goggles and a mask, especially when cutting porcelain, as it produces fine dust. For detailed setup procedures, refer to this installation guide.
Create Accurate Cut Lines
Use a straightedge or a tile squaring tool to draw cut lines. For curves or complex cuts, drill small holes on the marked areas and connect them using a tile nipper. I once needed a circular cut for a pipe opening; drilling holes beforehand made the process cleaner and more precise. Generous marking with a pencil ensures you have clear guides, especially for intricate cuts. If you’re unsure about your measurements, double-check before cutting to prevent costly mistakes.
Execute the Cut with Steady Hands
Guide the tile smoothly through the blade, applying steady, even pressure. Do not force the blade, as this can cause chipping or blade wear. I found that letting the saw do the work results in cleaner edges. Keep the tile steady and aligned with the cut line, and avoid twisting or applying lateral pressure. For larger tiles, support the edges to prevent movement during cutting. Remember, patience is key—rushes lead to errors and rework.
Finishing Touches and Cleanup
After cutting, smooth any rough or sharp edges with a diamond hand file or a rubbing stone. This prevents future chipping during installation. Inspect the cuts for any minor chips; if present, gently smooth them out. Clean the blades and tools after use to prolong their lifespan. When I finished my project, the clean cuts made the installation process seamless and professional-looking, highlighting the importance of attention to detail at every step. For more tips on floor preparation and tile handling, check this leveling techniques guide.
While many believe that following basic installation steps guarantees a perfect floor, the reality is far more nuanced. A frequent misconception is that leveling your subfloor is merely about surface flatness, but advanced floor leveling involves understanding subfloor material behavior under different environmental conditions. For example, wood subfloors can expand or contract, causing cracks or unevenness if not properly acclimated, a detail overlooked by many DIYers. Experts like Tile Trend Shop highlight that thorough preparation, including moisture testing and proper acclimation, is key to long-lasting results.
One myth that often trips people up is the assumption that concrete slabs are always perfectly stable, but in reality, moisture emission can cause tiles to lift or crack over time if not correctly treated. This is especially true in basement installations, where moisture levels fluctuate seasonally. The solution? Implementing a moisture barrier and diligent subfloor inspection can save you from costly repairs later. It’s worth consulting resources like The Ultimate Guide to Floor Leveling to understand subtle movement factors that influence floor longevity.
Are Professional Techniques Necessary for the Perfect Finish?
Many assume that advanced tools or professional training are prerequisites for a flawless floor, but with the right knowledge, even DIYers can achieve excellent results. However, one trap to avoid is neglecting the importance of the right adhesive or mortar consistency, which can impact how well tiles bond and how level they remain over time. Using a self-leveling compound correctly is an art; too thick and it traps air bubbles, too thin and it won’t support the tile properly. For in-depth tips, check out this article on leveling techniques.
Have you ever fallen into this trap? Let me know in the comments.
Another layer of complexity comes from the choice of materials. For instance, choosing the wrong hardwood species for your climate can result in gaps or buckling—read this guide on hardwood species to learn more. Similarly, in tile installation, the misconception that any grout will do can lead to premature deterioration; selecting a high-quality, flexible grout designed for your environment enhances durability. As this resource illustrates, attention to detail in material selection is crucial for lasting results. Don’t overlook these advanced nuances—they make the difference between a floor that endures and one that needs frequent repairs.
Invest in the Right Power Tools for Consistent Results
When it comes to maintaining high-quality flooring installations, the importance of durable and precise tools cannot be overstated. I personally swear by a high-torque angle grinder equipped with a continuous rim diamond blade, specifically designed for porcelain. This setup not only provides clean, chip-free cuts but also reduces tool fatigue during extended use. For floor leveling tasks, I rely on a quality self-leveling compound applicator with a variable speed mixer, which ensures an even, bubble-free pour. These tools help me maintain consistent results across multiple projects, saving time and minimizing material waste.
Keep Equipment Well-Maintained to Extend Its Life
Regular maintenance is vital to keep your tools performing at their best. For power tools, I recommend cleaning dust and debris after each use and checking for worn bearings or blades before starting a new project. Lubricate moving parts periodically using manufacturer-approved oils. Portable wet saws should have their water reservoirs cleaned and the blades examined for dullness or damage. Proper storage in a dry, organized space also prevents rust and accidental damage. Following these routines ensures your equipment remains reliable, ultimately giving you professional-grade results every time.
Adopt a Systematic Approach to Floor Leveling
Long-term success in flooring projects depends heavily on precise floor leveling. I use a laser-guided leveling system that provides real-time feedback on uneven surfaces, allowing me to take corrective action before laying tiles or hardwood. Applying a high-quality primer on the subfloor and pre-wetting porous surfaces minimizes moisture absorption and improves adhesion. After pouring self-leveling compounds, I utilize a spiked roller to eliminate air bubbles, ensuring a smooth, durable surface. You can explore detailed techniques at this resource—it’s a game-changer for enduring results.
Scaling Your Flooring Setup for Larger Spaces
As projects grow in size, so does the need for scalable tools and methods. For expansive areas, I prefer using automated leveling systems with multiple laser points to accelerate the process while maintaining accuracy. Modular wet saws with extendable rails facilitate precise cuts over large sections. Additionally, implementing modular drying and curing tents for compounds can significantly reduce project timelines. Planning ahead with these scalable tools not only boosts efficiency but also enhances the quality and uniformity of the finished floor. Anticipating future projects, I believe advancements in smart tools with integrated sensors will further streamline workflows and improve precision over time.
Maintaining Flooring Materials Over Extended Use
Long-term upkeep begins with selecting the right cleaning regimen and protective finishes. Hardwood floors benefit from regular dusting and periodic polishing with recommended products like specialized hardwood polishes, which reinforce the finish and restore shine. For tile, a sealed grout line prevents staining and microbial buildup. Ensuring proper ventilation reduces humidity-related issues that can lead to warping or cracking. Scheduling routine inspections allows for early detection of wear or damage, making repairs manageable. Remember, consistent maintenance not only prolongs the lifespan of your flooring but also preserves its visual appeal.
How do I maintain my flooring tools over time?
To keep your tools in top shape, establish a regular maintenance routine: clean blades and bits after each use, lubricate moving parts, and store equipment in a dry, organized space. Investing in protective cases and covers prevents accidental damage and dust accumulation. Also, replace worn components promptly to prevent further issues. Over time, these habits will help you avoid costly repairs or replacements, ensuring your tools serve you reliably for years to come. For detailed maintenance schedules tailored to specific equipment, check out our contact page.
Next time you tackle a flooring project, try incorporating a professional-grade laser level and a dedicated tool maintenance checklist. These small adjustments can make a substantial difference in achieving smooth, long-lasting results that stand the test of time. Remember, diligent care and proper scaling are key to sustainable success in flooring installation—and that initial investment pays off manifold in the end.
Lessons That Never Made the Manual
One of the most impactful lessons I learned is that patience beats speed every time. Rushing through measurements or skipping safety checks leads to costly mistakes, especially when working with delicate materials like porcelain or hardwood. I also discovered that trusting your intuition isn’t enough—consistent testing, like the laser-guided level checks, can save you from hidden errors. A surprising insight was that beginners often underestimate the importance of material acclimation; letting hardwood or tiles sit in the space for recommended periods prevents warping and cracking down the line. Lastly, I realized that investing in quality tools and maintaining them properly pays dividends, ensuring precise cuts and lasting results without constant replacements.