
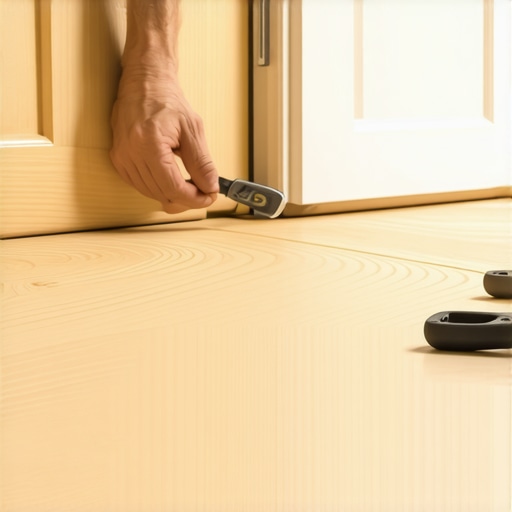
Ever spent hours laying beautiful hardwood floors only to realize that the planks won’t slide under the door frames without forcing or trimming? I’ve been there. It’s a frustrating moment when your perfect floor suddenly feels like it’s fighting back. I vividly remember the day I pushed the last plank into place and heard that dreaded creak from the door jamb. It was a lightbulb moment for me — there had to be a better way.
The Trick That Changed My Flooring Game
Let me tell you, the key to a seamless fit isn’t just about cutting more or forcing the boards. It’s about understanding and applying the *shimming trick*. This simple technique transformed how I approach fitting those stubborn planks underneath door frames. Instead of battling the boards or risking damage, I learned to create just enough space with carefully placed shims, allowing the planks to slide effortlessly into their perfect position. Now, I want to share this practical, cost-effective trick with you, so your flooring project doesn’t turn into a headache.
Concerned About Bad Habits or Mistakes?
Early on, I made the mistake of not accounting for the slight elevation changes caused by subfloor irregularities, which made fitting planks even trickier. Trust me, skipping that step cost me extra time and frustration. That’s why I emphasize the importance of a solid understanding of shimming and subfloor prep. For more tips on achieving perfect levelness before tile or hardwood installation, check out this guide. It’s a game-changer, especially when dealing with uneven surfaces.
If you’ve ever faced these challenges — do you find it tough to get those last few planks under the door frame without warping or damage? If so, don’t worry; this technique is simple, effective, and can be a real time-saver. Let’s dive into how you can master it and make your flooring look flawless from wall to wall.
Positioning the Door Frames Correctly
Start by removing the door from its frame or prop it open. Measure the clearance gap between the top of the plank and the door frame to determine how much you need to adjust. Use a level or straightedge to assess unevenness in the subfloor directly beneath the door jamb. I vividly recall a project where I noticed the gap varied along the length of the door frame, indicating an uneven subfloor—this step is crucial to avoid future fitting issues.
Preparing and Placing Shims Precisely
Choose thin, sturdy shims—wooden or plastic—around 1/16 to 1/8 inch thick. For my last installation, I cut a few shims from scrap hardwood to ensure durability. Place the shims behind the door jamb, starting at the hinge side and moving toward the strike plate, aligning with the measured gaps. Incrementally add or remove shims to achieve a flush fit, much like adjusting a picture frame for perfect straightness. Gently tap the shims with a hammer to seat them firmly without damaging the frame. This step was a game-changer in my workflow, especially when dealing with warped jambs.
Securing the Shim Placement
Once satisfied with the shim positions, secure the jamb temporarily with clamps or braces to prevent movement during flooring installation. I remember using scrap pieces of wood clamped to the jamb, which kept everything stable as I worked. Verify the fit again by placing the plank underneath to ensure it slides in smoothly without force. A quick test with a scrap plank confirmed perfect alignment—saving me hours of grinding or trimming later.
Cutting and Adjusting the Hardwood Planks
Measure the space beneath the shimmed door frame to determine the length of the plank that needs trimming. Use a accurate saw—preferably a miter saw—for clean cuts. When faced with tight spaces, I use a multi-tool or oscillating tool to get precise, flush cuts around irregularities. Remember, the goal is to have the plank slide comfortably under the door jamb without forcing. If the board still doesn’t fit, gently sand the edge or add a slight bevel with a sanding block for better maneuverability. Think of this process as fine-tuning a guitar: small adjustments make all the difference in achieving harmony.
Testing and Final Adjustments
After installation, place a plank under the door to check the clearance. If resistance persists, re-evaluate your shimming and cutting. Sometimes, a minor tweak with a hand planer or fine grit sandpaper is all it takes to perfect the fit. I once had a stubborn board that required a gentle shave along one edge—the satisfaction of seeing it slide seamlessly was priceless. This iterative process ensures a professional finish and prevents damage over time.
Maintaining Levelness and Stability
Remember, the underlying subfloor must be flat. If high spots persist, consider using a self-leveling compound before flooring installation. Addressing these issues early on makes fitting hardwood planks near door frames much easier. For detailed techniques on achieving total floor flatness, visit this comprehensive guide. Proper preparation minimizes the need for aggressive trimming or force, preserving the integrity of your hardwood.
Summary of Best Practices
Use precise measurements, quality shims, and gentle adjustments. Avoid rushing the process—each step builds on the previous one for a seamless finish. Applying these methods consistently turns a tricky installation into a straightforward task, saving time and reducing material waste. Incorporate these techniques into your workflow, and you’ll find fitting those last planks becomes almost effortless—just like it did for me on my latest project.
Many homeowners and even some pros fall for misconceptions that can complicate flooring projects. One prevalent myth is that leveling the subfloor is always optional. In reality, even minor unevenness can cause gaps, squeaks, and damage over time. According to flooring expert Mike Holmes, ensuring a flat, stable base is crucial for a long-lasting finish. Skipping this step might save time upfront but often leads to costly repairs later. Another misconception revolves around the use of adhesives versus nails or staples. While adhesives can provide a cleaner look, relying solely on them without proper surface prep can result in shifting or delamination, especially in high-traffic areas. aperture-shifting adhesives require meticulous cleaning and primer application, as discussed in [this guide](https://tiletrendshop.com/flooring-installation-mistakes-to-avoid-for-lasting-results).Once you’ve completed your flooring installation, the journey doesn’t end. Proper maintenance and the right tools are essential to keep your hardwood floors and tiles looking pristine over the years. I recommend investing in a high-quality microfiber dust mop like the Unger Microfiber Pan and Handle because it effectively traps dust without scratching delicate surfaces, making daily cleaning effortless. Additionally, a vacuum with adjustable height settings and soft bristle brushes, such as the Miele Complete C3, helps you remove debris from grout lines and crevices without damaging the finish. For deep cleaning, I prefer a pH-neutral cleaner like Bona Hardwood Floor Cleaner, which preserves the finish and enhances longevity. As trends evolve, automated robotic vacuums equipped with multi-surface brushes are becoming popular, offering consistent upkeep with minimal effort, especially for large spaces. Keep an eye on advancements in floor sealing and protective coatings; modern polyurethane formulations are now more durable, resisting scratches and wear far better than older options.
How do I maintain my flooring over time?
Regular inspections and prompt attention to minor issues prevent costly repairs later. Use soft pads under furniture legs to avoid dents, and always clean up spills immediately to prevent water damage or staining. When considering long-term results, it’s worth exploring periodic professional refinishing for hardwood floors or resealing tiles to restore their original luster. Incorporating tools like a handheld multi-tool with a soft brush attachment can help reach tight spots and grout lines, ensuring your entire surface stays in top condition. Looking ahead, the integration of smart sensors that monitor humidity and detect early signs of wear is poised to revolutionize floor maintenance, providing real-time alerts and tips. For a comprehensive approach, check out this resource on hardwood floor care secrets. I urge you to try using a microfiber pad for your next cleaning session—it’s a simple upgrade that can dramatically extend the lifespan of your floors and tiles. Regular maintenance, coupled with the right tools, guarantees that your beautiful flooring remains a stunning feature of your home for years to come.
The Hidden Lessons That Changed My Approach to Flooring
One of the most impactful lessons I learned was the importance of patience and precise measurement. Rushing through the fitting process, especially near door frames, often led to costly mistakes and rework. Taking a moment to double-check every measurement and patiently shim the jambs transformed my results from just adequate to professional-grade. Additionally, I discovered that understanding the subtle quirks of different subfloors—like slight dips or high spots—saved me hours of frustration and material waste. These insights weren’t taught in any manual but came from personal trial, error, and the desire to do better with each project.
Another lightbulb moment involved the power of small adjustments. Gently sanding or beveling a plank edge for that perfect slide is more effective than forcing or trimming excessively. This delicate approach preserves the integrity of the materials and results in a seamless finish. Lastly, I realized the value of thorough prep work—taking the time to level the subfloor and secure jambs beforehand prevents innumerable headaches later, solidifying the foundation for a truly flawless installation.
Your Next Step with Confidence and Precision
Armed with these insights, I encourage you to embrace patience, meticulous measurements, and gentle adjustments. Trust your tools and don’t underestimate the power of minor tweaks—they often make all the difference. Remember, each project is an opportunity to refine your skills and build lasting beauty in your home. For more advanced tips on achieving perfect floor leveling before tile or hardwood installation, consider this comprehensive guide. Keep pushing your boundaries, and your floors will thank you for it.
What Will You Achieve in Your Next Flooring Adventure?
If you’re ready to take your flooring projects to new heights, I’d love to hear your plans or challenges. Have you ever struggled with fitting planks under door frames? Share your experiences below, and let’s learn together! Remember, every challenge is just another opportunity to learn a new trick—like the one I shared here—to make your flooring journey smoother and more rewarding.