
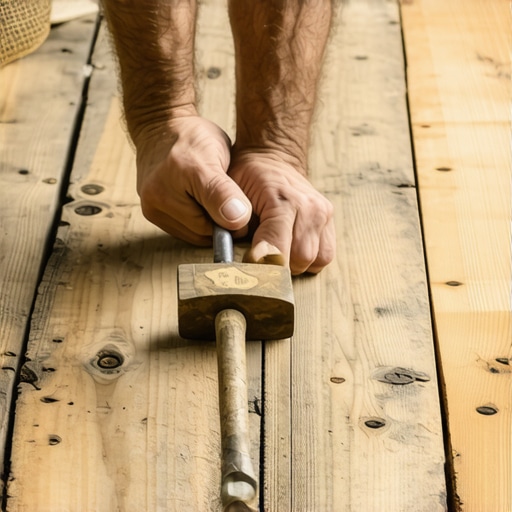
It was a morning like any other in my home renovation journey, but then I stepped onto my old wood floor and realized something was off. That familiar creak, a slight sag underfoot, and then—bam!—a noticeable gap between two planks that I swore just a day ago looked perfectly aligned. It hit me: no matter how careful I was, the gaps in my hardwood flooring were sneaking in, and I was at my wit’s end trying to fix them. If you’ve ever struggled with uneven gaps, you know what I mean—it’s like trying to tame a wild beast that keeps bucking back.
Why Gaps in Wood Floors Keep Popping Up and Frustrate Homeowners
Gaps in old wood floors are more than just unsightly; they can lead to more serious issues like creaking, moisture damage, and even structural weaknesses if left unaddressed. The frustrating part? Many times, these gaps appear unexpectedly, especially after installation or during seasonal humidity shifts. I learned through experience—and a bit of trail and error—that traditional methods often fall short unless you know the right approach.
What’s even more enlightening is that the solution isn’t as complicated as some make it out to be. With the right technique, like the classic Hammer-and-Block move I’ll walk you through today, you can close those gaps effectively and restore your hardwood floors’ beauty and integrity.
Before diving into the nitty-gritty, let me share a quick mistake I made early on—thinking that simply nailing down loose planks would solve the gap problem. Spoiler: that only made things worse, causing additional splitting and unevenness. Trust me, I’ve learned the hard way that some methods don’t address the root causes.
If you’re tired of looking at those unsightly gaps or hearing the squeaks that come with them, don’t worry. We’re going to fix this step-by-step, and I’ll share my seasoned tips along the way. But first, let’s tackle a common concern I hear from many homeowners: “Is this hammer-and-block technique actually worth the hype?” Right after this, I’ll reveal why in my experience, it’s a game-changer for restoring old wood floors efficiently and with minimal fuss.
Are those stubborn gaps giving you sleepless nights? Stick around, because I believe you’ll find this method both practical and rewarding. And if you want to get ahead of potential floor leveling issues, check out this comprehensive guide on [floor leveling](https://tiletrendshop.com/the-ultimate-guide-to-floor-leveling-for-a-perfect-finish) — it’s packed with pro secrets to perfect your installation.
Identify and Prepare the Gaps
Begin by thoroughly inspecting your hardwood floor to pinpoint all gaps. Use a moisture meter if seasonal changes might have caused expansion or contraction. Clear the area of debris and loose particles to ensure a clean workspace. This preparation is crucial for an effective fix, much like preparing a canvas before painting.
Gather Your Tools and Materials
You’ll need a reliable hammer, a wood block or a piece of scrap hardwood, a wood filler or hardwood patching compound, and possibly some glue. For larger gaps, certain wood fillers might be insufficient; in such cases, consider using hardwood shims or custom cut wood plugs. Having everything ready avoids interruptions mid-process, similar to a chef prepping ingredients before cooking.
Apply the Hammer-and-Block Method
Position the wood block firmly against the edge of the plank that needs adjustment. Gently tap the block with your hammer, encouraging the wood to shift slightly and close the gap. Think of it as nudging puzzle pieces together—precision is key to prevent over-adjustment. During my first attempt, I accidentally hammered too hard, causing a small split; experience taught me to tap gently, observing the movement carefully.
Tip: Use Controlled Strikes
Instead of heavy blows, use controlled, light taps to move the plank gradually. This minimizes the risk of splitting or damaging the wood. Remember, patience often produces better results than brute force. I once rushed this step and ended up needing to replace a plank—lessons learned in real-time reinforce the importance of patience.
Secure and Finish the Repair
Once the gap is closed as much as possible, apply wood filler into any remaining small gaps. Tap or press the filler to avoid air pockets, mimicking the way you might gently press icing into a cake to ensure even distribution. After curing, sand the area smoothly to level with the surrounding surface. In my experience, a quick pass with fine-grit sandpaper restores the natural look, making the repair virtually invisible.
Address Persistent or Larger Gaps
If gaps remain stubborn, consider inserting hardwood shims or plugs, especially in areas prone to seasonal movement. Cut the shims to fit tightly into the gap, then glue and clamp them in place. This method acts like filling a void with custom-fit puzzle pieces, ensuring stability and aesthetic harmony. For best practices, refer to comprehensive techniques in professional floor leveling.
Prevent Future Gaps
Control indoor humidity levels using a humidifier or dehumidifier as needed. Maintaining a consistent environment minimizes wood movement, saving you from further repairs. Think of it like regulating temperature in a delicate wine cellar—small adjustments make a big difference. Regular inspections can catch emerging gaps early, allowing for minor fixes before they become major issues.
Many homeowners and even some contractors fall into traps due to misconceptions about flooring installation, tile laying, and floor leveling. One widespread myth is that using a quick-set adhesive guarantees a hassle-free job. In reality, rushing the adhesive curing process can lead to uneven surfaces and future tiles or planks loosening. As highlighted in expert guides, proper curing time and adhesion techniques are crucial for long-lasting results.
Why Do Some Floor Leveling Methods Fail Over Time
Contrary to popular belief, thin layers of self-leveling compounds aren’t always reliable on uneven or composite subfloors. They can crack or delaminate if the substrate isn’t properly prepared or if the underlying issues aren’t addressed first. For instance, inadequate moisture testing before applying leveling products can trap vapor beneath, causing lifting or bubbles down the line. This mistake is often overlooked but has costly consequences, as discussed in flooring technical articles. An important nuance many overlook is that every subfloor has unique characteristics requiring tailored preparation—using the wrong mix or technique can defeat the purpose of leveling altogether. As per industry studies, comprehensive testing and preparation reduce subsequent problems significantly. To get ahead, learn more about surface preparation and correct application methods in our detailed floor leveling guides.
Another nuance involves tile layout planning—many believe that simply snapping chalk lines ensures straight installations. But without accounting for tile size variations, grout joints, and expansion gaps, the result can be skewed patterns and uneven joints. Professional installers use more sophisticated approaches, including measuring base points carefully and adjusting for material tolerances. This subtlety greatly impacts the visual harmony of your finished floor. For a comprehensive overview, check our tips on professional tile installation.
Surprisingly, another common error is neglecting seasonal humidity fluctuations, which can cause wood floors to gap or buckle even after proper installation. Many assume that a well-installed floor remains stable, but wood’s sensitivity to moisture makes year-round climate control essential. Experts emphasize maintaining consistent indoor humidity—ideally between 35-55%—to minimize wood movement. Failure to do so is a silent culprit behind many early-floor failures. For advanced insights, consider exploring our resource on floor leveling and moisture management.
By digging into these nuanced aspects—adhesion curing, substrate preparation, precise layout, and climate control—you’ll significantly improve your flooring outcomes. Don’t fall prey to oversimplified advice; instead, adopt a meticulous, informed approach rooted in industry best practices. Have you ever fallen into this trap? Let me know in the comments.Maintaining your hardwood and tile floors isn’t just about addressing immediate fixes; it requires the right tools and consistent upkeep to ensure durability and aesthetic appeal over time. As someone deeply immersed in flooring installation and repair, I can confidently say that having a dedicated set of high-quality equipment makes all the difference. One tool I personally swear by is a precision moisture meter, which helps me monitor environmental conditions—especially humidity levels—to prevent wood expansion or contraction that leads to gaps or buckling. Regularly checking the subfloor with a reliable straightedge or laser level ensures that any unevenness is caught early, preventing costly repairs down the line. Using a high-grade, vibration-reducing sander, specifically designed for hardwood refinishing, allows me to refresh surfaces periodically without risking damage, ensuring long-term shine and integrity. For tile, investing in a professional-grade grout float makes cleanup easy, preserving the neat lines that define a polished installation.
Looking ahead, I predict that automation and smart tools will increasingly influence flooring maintenance. Devices connected via smartphones could soon alert homeowners to environmental shifts that threaten floor stability, enabling proactive intervention. For example, some companies are developing moisture sensors that integrate with home automation systems, providing real-time data and recommendations.
So, how do I maintain flooring over time? The key is routine inspection combined with targeted cleaning and climate control. I recommend regularly using a microfiber mop and pH-neutral cleaners for tiles, and a soft-bristled broom with specialized wood floor sweeps for hardwoods. Additionally, sealing grout lines periodically with a high-quality penetrating sealant prevents water ingress and staining, thus extending the lifespan of tiled surfaces. For more advanced maintenance tips, check out our in-depth guide on floor leveling and long-term fixing techniques.
Don’t forget that tools like a piece of scrap hardwood or a small hand sander are invaluable for minor touch-ups, saving you from calling in professionals each time a small issue arises. I encourage you to try maintaining your floor with a digital moisture monitor—it’s a game-changer that prevents many common problems and extends the life of your investment. Remember, proactive care rooted in the right tools not only preserves your floors but also saves money over time, keeping your space looking beautiful effortlessly.
What I Wish I Never Overlooked When Fixing Gaps
One of the most valuable lessons I learned is that patience trumps brute force. Rushing through the hammer-and-block technique often led to splitting or uneven adjustments, reminding me that slow, controlled taps produce the best results. Additionally, I underestimated the importance of environmental stability; maintaining consistent humidity and temperature significantly minimized future gaps and movement. Lastly, I realized early on that proper surface preparation—cleaning, testing moisture, and leveling—is the foundation of a lasting repair, not just a quick fix.
Tools and Resources That Elevated My Flooring Game
Over time, I found that investing in quality tools like a reliable moisture meter and a precision sander transformed my approach. The moisture meter provides real-time data that prevents future issues, while a professional-grade sander ensures smooth, even surfaces. For comprehensive guidance, I turn to resources like expert floor leveling guides which demystify complex techniques. Books on advanced hardwood refinishing also expanded my understanding of material behaviors, helping me anticipate and prevent problems rather than just react to them.
Embrace the Craft and Transform Your Space
Remember, mastering flooring installation and repair is a journey that rewards patience, knowledge, and the right tools. With each project, you build confidence and a deeper connection to your home. Don’t shy away from experimenting and learning—each challenge is an opportunity for growth. Take the advice shared here, equip yourself wisely, and turn your flooring dreams into reality. What’s one flooring challenge you’re eager to tackle next? Share below and let’s learn together!
,