
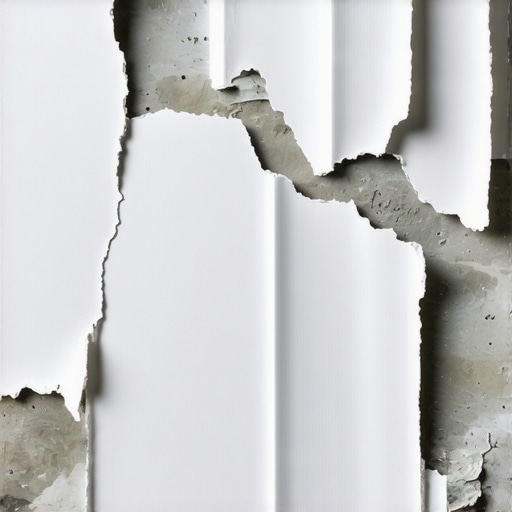
I’ll never forget the day I laid down a fresh layer of self-leveling compound, feeling confident that I was about to achieve a smooth, perfect surface for my new tile installation. But hours later, I walk into the room and see it—massive sheets of the leveler peeling up like soggy cardboard. Frustration washed over me. I had followed everything I thought was right, yet I was stuck with a surface worse than when I started.
Confronting the Peeling Nightmare
If you’ve experienced this, you know how disheartening it can be. You invest time, money, and effort into preparing your subfloor, only to discover that the self-leveler you’ve trusted is coming loose in large, unsightly sheets. This problem can derail your entire project, forcing expensive corrections and delaying your renovation. But here’s the good news: you’re not alone, and with some understanding and adjustments, you can prevent this from happening again.
Is the Peeling Just a Fluke or a Sign of Bigger Trouble?
Early on, I mistakenly thought that peeling was due to a bad batch or a freak accident. Turns out, it’s often related to more common issues—like improper surface preparation or using the wrong type of primer. One thing I overlooked was the importance of ensuring the subfloor was clean, dry, and free of contaminants before applying the leveling compound. In fact, research shows that surface preparation is responsible for the majority of leveling failures. To learn more about common pitfalls, check out these top installation mistakes.
My mistake early on was skimping on the cleaning process, assuming that a quick sweep would suffice. That small oversight created a weak bond, leading to the sheets peeling away over time. Trust me, paying attention to surface prep is your best defense against peeling issues.
Now, let’s dive into how to get your self-leveling projects right the first time, ensuring a durable, flawless surface you’ll be proud of. Ready to become a leveling expert? Then keep reading—your perfect floor is within reach.
Prepare Your Surface Meticulously
Start by clearing the area completely. Use a vacuum and tack cloth to remove dust, debris, and any grease spots. Think of it as cleaning a mirror before applying a new coat of paint—nothing should interfere with adhesion. I once skipped thorough cleaning, assuming a quick sweep was enough, which led to peel-offs within days. To prevent this, ensure the subfloor is spotless and dry. For stubborn contaminants, use a degreaser or denatured alcohol as recommended in priming tips.
Seal the Subfloor Properly
Applying an appropriate primer is crucial. Use a primer designed for your subfloor material, such as concrete or plywood. This step creates a bond that acts like a glue between the surface and the leveling compound. I learned this by experience when a rushed application resulted in bubbling and peeling. Wait until the primer is fully dry, usually 2-4 hours, to avoid trapping moisture. Proper priming, as detailed in leveling techniques, greatly improves adhesion.
Choose the Right Self-Leveling Compound
Select a product compatible with your subfloor and project needs. For thicker repairs, opt for a high-build formula. For layer thinness in finishing, use a self-leveling underlayment with self-smoothing properties. I once used a cheap 5-gallon batch for a large kitchen remodel; it was too thin and cracked under foot. Reading the manufacturer’s instructions and the expert sealing guide helps ensure the right mix and application thickness.
Master the Mixing Technique
Mix the compound slowly to avoid introducing air bubbles, which can cause cracks or weak spots. Use a paddle attached to a drill at a slow speed until uniform. I experienced this first-hand when my mixture was lumpy, leading to uneven drying. Use a five-gallon bucket and pour the powder gradually into the water, not vice versa, to promote proper hydration. Refer to the mixing tips for detailed guidance.
Apply with Precision and Speed
Pour the mixture in one corner and spread it across the surface using a long trowel or squeegee. Use the “rake” method—dragging a wide notched trowel to distribute evenly. Work quickly but carefully to prevent the compound from setting before smoothing. I once delayed spreading, which caused the edges to cure prematurely, resulting in lippage. Use a leveling laser or a straightedge to verify flatness immediately after application. You can also make use of leveling techniques for accuracy.
Sand and Smooth Out Imperfections
Once the compound is set but still pliable, use a pole sander with fine-grit paper to eliminate high spots and rough patches. This step is like sanding wood before finishing—essential for a flawless surface. Avoid over-sanding, which can create dips. After smoothing, vacuum the dust thoroughly. For stubborn ridges, a damp sponge can help level out uneven spots, as discussed in sanding guides. Proper finishing ensures your surface will withstand the weight of tiles or hardwood without cracking or peeling.
Allow Proper Curing Time
Patience is vital. Follow the manufacturer’s instructions regarding curing duration, typically 24-48 hours. During this period, avoid foot traffic or placement of heavy objects. Rushing the process is like walking on wet paint—destroys the job. Once fully cured, test the surface for firmness; a soft spot indicates incomplete curing or improper mixing. Proper curing guarantees a durable, level foundation, setting the stage for a perfect installation. For detailed curing techniques, see leveling success stories.Many homeowners and even some professionals tend to believe that proper surface preparation is merely a matter of sweeping and priming, but in my experience, this overlooks the critical nuances that determine the longevity of your floors. A common myth is that as long as the surface looks clean, it will bond well with the adhesive or leveling compound. However, studies in material science indicate that microscopic contaminants like efflorescence, residual grease, or old adhesive residues can drastically weaken adhesion, leading to issues like cracking or peeling over time. Carefully cleaning with degreasers and performing moisture tests as discussed in priming tips can save headaches later. Moreover, many people underestimate the importance of moisture barriers beneath tiles or hardwoods, especially in areas prone to high humidity or slab movement. Without these, you risk expansion, contraction, and eventual failure, which many consider an avoidable but common oversight according to industry surveys.
Advanced Question: How does uneven subflooring affect the adhesive bond and what sophisticated techniques can remedy this before installation?
In complex scenarios, even slight irregularities in the subfloor can compromise the entire flooring system. Advanced installers utilize self-leveling compound systems and laser-guided surface scans to identify high and low spots with pinpoint accuracy, a step often skipped in DIY projects. These subtle imperfections can cause tile lippage, uneven grout lines, or squeaky wood floors. Relying solely on traditional methods like straightedges misses the broader picture; integrating technology ensures a truly level surface, which is vital for high-end finishes. For a detailed guide on mastering these techniques, check out mastering floor leveling secrets. It’s always worth investing extra effort into proper surface prep because, as research shows, the initial step in installation has a ripple effect on durability and aesthetic appeal. Don’t fall into the trap of rushing this phase—your future self will thank you. Have you ever fallen into this trap? Let me know in the comments.
Keeping Your Floors in Top Shape with the Right Tools
Ensuring your flooring job stands the test of time requires more than just good technique—it hinges on using the right equipment. Over the years, I’ve found that investing in specific tools makes all the difference, especially when it comes to maintenance, troubleshooting, and scaling your projects. For example, having a high-quality laser level, like the Bosch GLL 3-80, helps maintain perfect floor flatness over large areas, reducing lippage and uneven spots that can lead to future cracks. This tool’s accuracy is vital when doing floor leveling or installing large-format tiles, as it ensures a uniform surface for years to come.
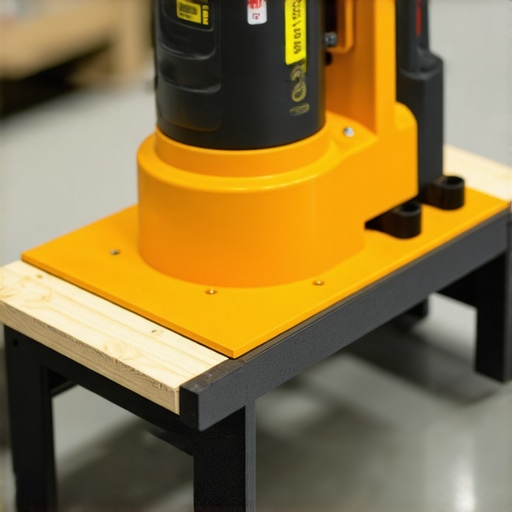
Similarly, a durable, versatile mortar mixer such as the Rubimix-9 saves time and guarantees consistent mixing, avoiding lumps or weak spots in your self-leveling compounds. The key is slow, steady blending—something I personally emphasize after numerous attempts with cheap units that broke down quickly. Accurate mixing influences the bonding strength and longevity of your floor, which is why I recommend investing in professional-grade equipment.
For ongoing maintenance, a hardwood floor buffer like the Koblenz 36850 helps remove scratches and restore shine without damaging the surface, extending your flooring’s life. Regular inspection with a moisture meter, such as the Extech MO55, can also highlight potential issues like trapped moisture or uneven subfloor movement before they escalate into major problems. These tools, combined with good technique, can significantly prolong your investment.
How do I maintain my flooring tools over time?
Proper care involves cleaning tools promptly after each use, lubricating moving parts, and calibrating electronic equipment regularly. Keeping storage in a dry, temperature-controlled environment prevents rust and degradation. For example, maintaining your laser level with periodic alignment checks ensures longevity and accuracy. Also, refer to the manufacturer’s maintenance instructions for specific care routines—this simple step can save you costly replacements in the long run.
Looking ahead, I predict that smart tools incorporating IoT technology, such as laser levels with Bluetooth connectivity, will become mainstream. They can provide real-time feedback, help with data logging, and improve precision even further—future-proofing your projects. Starting with current reliable equipment today, like high-quality mixers and measuring devices, sets a solid foundation for embracing these innovations tomorrow.
If you’re ready to elevate your flooring game, I suggest trying out a laser level with adjustable beam accuracy and the ability to project across large surfaces. It’s a game-changer for achieving flawlessly level floors and preventing costly mistakes down the line. Remember, investing in quality tools is an investment in your project’s long-term success, ensuring durable, beautiful results that last generations.
For more detailed insights into tools that streamline your installation process, visit this comprehensive guide.
Throughout my journey of perfecting flooring installations, one truth became abundantly clear: even the most skilled professionals can falter if surface preparation isn’t meticulous. The most common mistake I’ve seen—and made myself—is underestimating the power of thorough cleaning and priming. They might seem trivial, but they set the foundation for everything that follows. And when ignored, the aftermath can be peeling, cracks, and costly repairs that could have been avoided. Remember, a flawless finish starts long before the first tile is laid; it begins with the details we often overlook.
What the Experts Don’t Tell You About Flooring Success
- Subfloor secrets matter more than you think: Even a slight bump or soft spot in the concrete or wood can compromise the entire project. Using laser-guided levelers and moisture testing tools, just like seasoned pros do, ensures a truly flat surface. In my experience, investing in precision tools dramatically reduces callback fixes and elevates quality.
- Patience is your best ally: Rushing curing times or skipping steps in surface prep might seem like saving time, but it’s a false economy. Allow your self-leveling compound to cure fully, respecting manufacturer guidelines, and you’ll thank yourself with a resilient, beautiful floor that endures years of use.
- Small details prevent big headaches: From eliminating dust with tack cloths to carefully choosing primers, every step influences adhesion and longevity. My lightbulb moment was realizing that a clean subfloor acts like a magnet for proper bonding—skip it, and peeling or cracking can follow.
Tools That Turn Challenges into Triumphs
Having the right tools can mean the difference between a job well done and a costly mistake. My top recommendations include a reliable laser level—like the Bosch GLL 3-80—for ensuring flatness over large areas; a durable mortar mixer such as the Rubimix-9 for consistent mixes; and a moisture meter like the Extech MO55 to monitor subfloor conditions. These tools empower you to approach flooring projects with confidence and precision, ensuring results that stand the test of time. Remember, quality equipment not only improves outcomes but also makes the process more enjoyable.
Ignite Your Flooring Confidence Today
Mastering the art of surface preparation and leveling is more than just technique—it’s about cultivating a mindset of care and precision. Your floors are the canvas of your home; with diligent prep, the final result will be a masterpiece that adds value and warmth for years to come. Don’t let frustration deter you—embrace the learning curve, invest in good tools, and pay attention to every small step. Your future self will thank you for it.
What’s Your Next Step?
Have you ever encountered peeling or leveling issues during a flooring project? What tips or tools helped you overcome those hurdles? Share your experiences below and join a community dedicated to perfecting flooring craftsmanship!