
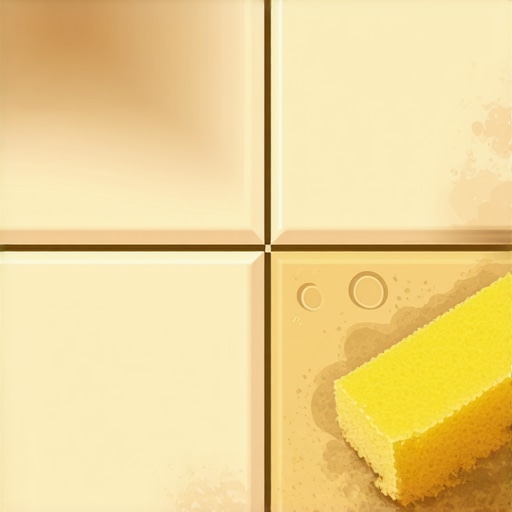
Picture this: I was elbow-deep in a tile installation project, excitement bubbling as I stepped back to admire my work. But then, I spotted it—a dull, uneven, weirdly discolored patch on my freshly grouted surface. Turns out, I had made a rookie mistake: using a damp sponge incorrectly. That little error, innocent as it looked, ended up ruining my grout’s perfect color.
Why a Simple Sponge Waste Could Cost You Your Perfect Tile Finish
The damp sponge is a tool I thought was foolproof, a safe go-to for smoothing out excess grout. However, I learned the hard way that the way you handle this small accessory can make or break your project’s look. Too much water, and the grout’s color can fade or become blotchy. Too little, and grout haze can stick around, dulling the overall effect. This revelation was my lightbulb moment—something so basic, yet so vital to a flawless finish.
Is Your Tile Project at Risk from a Damp Sponge?
Early in my journey, I mistakenly believed that dampening the sponge thoroughly was the key. I didn’t realize that excess water not only weakens grout but also causes uneven coloring or even staining. If you’ve ever wrestled with stubborn grout haze or unsightly patches, this could be your culprit. The good news? Once I discovered the correct method, my results improved dramatically, and I was able to achieve that professional look I craved. For more in-depth insights, check out this guide on tile design and learn how small tricks can elevate your entire space.
So, have you faced issues with grout discoloration or haze? If yes, stay tuned. I’ll show you exactly how to handle your sponge like a pro, ensuring that your grout stays vibrant and flawless every time.
Use a Consistent, Damp Sponge for Optimal Grout Finish
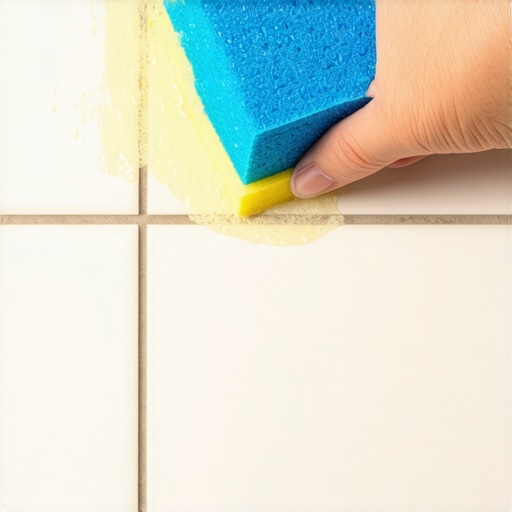
One of my most effective techniques, learned through trial and error, is preparing a sponge that remains consistently damp but not saturated. During a project where I wanted a sleek, uniform grout line, I kept a bucket of clean water nearby. I dampened the sponge by squeezing it until excess water dripped out, then wiped the grout lines in a gentle, circular motion. This method prevented excessive water from seeping into the grout, avoiding discoloration or patchiness.
Choose the Right Sponge Size and Texture
I discovered that a medium-sized, mild-textured sponge offers the best control. A sponge too small made it difficult to cover larger areas evenly, while a rough sponge could scratch the tile surface. I used a synthetic cellulose sponge, which absorbed just enough moisture and allowed me to wipe the grout smoothly without disturbing the setting process.
Master the Wiping Technique
Instead of pressing hard, I used light, consistent pressure to wipe across the grout lines. Starting from one end, I moved in straight strokes, ensuring the excess grout was cleaned while the lines remained even and filled. Applying too much pressure or wiping in circular motions could pull out grout from the joints or leave streaks, so controlled movements are key.
Clean the Sponge Frequently
In my experience, rinsing the sponge every few strokes prevents dirt and grout residue from smearing back onto the tiles. I kept a separate bucket filled with clean water and rinsed the sponge thoroughly, wringing out excess moisture before reapplying it to the work area. This practice ensured a clean finish and prevented muddy streaks.
Wrap Up the Process with a Final Wipe
Once the grout lines looked even and clean, I did a final pass with a well-wrung, damp sponge to remove any remaining haze. This step is crucial—wait until the grout has just begun to set, so the haze is softer and easier to buff away without disturbing the grout’s depth or color.
Remember, timing is everything. Waiting too long or too little before the final wipe can result in difficulty removing haze or disturbing the grout. I recommend testing on a small area first to gauge the right moment—usually within 10-15 minutes after applying the grout.
Prevent Future Discoloration and Haze
Consistent sponge use isn’t just about aesthetics; it also protects your grout from common issues like fading, staining, or haze. Proper sponge technique enhances durability and visual appeal, ensuring your tile surface remains pristine for years. For more pointers on perfect tile installation and maintenance, visit this step-by-step flooring guide and elevate your craftsmanship.
 Many DIY enthusiasts and even seasoned contractors hold onto misconceptions about tile, hardwood floors, and floor leveling that can lead to costly mistakes. One pervasive myth is that all subfloors are ready for flooring without proper preparation. The truth is, subfloor conditions vary significantly, and neglecting proper assessment can cause warping, uneven surfaces, or tile cracking over time. For example, relying solely on visual inspection isn’t enough; professional grade moisture testing and load assessments are crucial steps often overlooked. This oversight can result in tiles lifting or hardwood gaps forming, issues that are almost impossible to fix after installation. If you’re tackling a flooring project, don’t assume that a subfloor that looks okay visually is actually suitable. For a reliable foundation, consult definitive guides like this comprehensive guide on floor leveling to avoid common pitfalls.
Another misconception revolves around floor leveling techniques. Many believe that DAGGING an uneven floor is an instant fix, but in reality, improper application of self-leveling compounds can create new problems. For instance, pouring thick layers without proper mixing and curing can lead to cracks, bubbling, or inconsistencies that throw off your entire plan. Advanced installers understand the importance of multiple, thin layers and proper substrate preparation, which is detailed in this expert-level article. Don’t fall into the trap of rushing the process; patience and precision are your best tools.
In terms of tile installation, there’s a common myth that using super-adhesive thinset guarantees a quick, durable bond. However, this ignores the nuances of surface porosity, substrate compatibility, and environmental conditions. Using the wrong adhesive or mismatched materials can result in grout failure, tile lippage, or long-term damage. For instance, installing porcelain tiles over a highly flexible substrate without proper reinforcement almost always leads to cracks. The key is understanding material compatibility, which is covered extensively in this professional guide. Want to avoid these costly mistakes? Dive deep into the science of adhesives and preparation techniques.
Advanced readers ask: How can I predict floor behavior over decades, especially in variable climates? Environmental factors like humidity fluctuations dramatically affect materials, causing expansion, contraction, or delamination. Experts recommend installing control joints and using materials with compatible coefficients of thermal expansion. According to recent research published in the Journal of Building Engineering, understanding these nuances can increase the lifespan of your flooring by decades. For specifics on managing environmental impacts, explore this masterclass on advanced flooring techniques.
Remember, truly mastering flooring isn’t just about following basic steps; it requires understanding the intricacies, myths, and potential pitfalls that can turn a renovation from a success to a costly lesson. Have you ever fallen into any of these traps? Let me know in the comments and share your experiences.
Successfully maintaining floors and ensuring their longevity requires more than just routine cleaning; it involves investing in the right tools and understanding proper upkeep techniques. One indispensable tool I rely on is a high-quality, adjustable floor scraper. Unlike generic scrapers, my trusted model features tungsten carbide blades, allowing me to remove old finishes or stubborn residues without scratching the surface. Regularly using this tool prevents buildup that can cause uneven wear and maintains the aesthetic appeal over years.
Why Proper Maintenance Equipment Matters
Using the appropriate tools doesn’t just make tasks easier—it significantly impacts the long-term performance of your flooring. For hardwood floors, a microfiber dust mop combined with a damp microfiber cloth ensures trapped dirt and debris are eliminated without scratching or dulling the finish. For tile installations, a grout cleaning brush with stiff bristles keeps joints pristine, preventing dirt infiltration that could compromise the adhesion over time.
Moreover, employing a laser level for ongoing inspections helps detect subtle shifts or uneven spots that could develop into major problems later. Investing in a top-tier laser level like the Laser Level Move allows for precise assessments, guiding repairs or adjustments proactively. Regular checks prevent issues like lippage or uneven grout lines, which are costly and time-consuming to fix after setting.
Tools I Recommend for Floor Care and Maintenance
One tool I hold essential is a steam mop designed specifically for engineered hardwood. Avoid generic steam cleaners, which can cause warping or damage the finish. My preferred model features adjustable heat settings and a sealed water reservoir, ensuring safe, streak-free cleaning without excess moisture. This extends the life of the protective polyurethane coating and maintains the floor’s shine. For tougher stains or deep-seated dirt, I use a soft-bristled scrub brush with gentle, pH-balanced cleaning solutions, preserving the integrity of the finish.
Another important device is a moisture meter tailored for flooring substrates. This device helps monitor moisture levels in concrete or wood subfloors, which is critical before and after refinishing or installing new floors. Accurate moisture readings prevent problems like warping, buckling, or mold over time. For example, inspecting subfloor moisture aligns with the guidance found in the Mastering Floor Leveling guide and ensures your foundation remains stable and level.
Future of Floor Maintenance and Scaling
As technology advances, I predict the integration of smart sensors into flooring systems—that monitor moisture, temperature, and surface wear—will become standard. This real-time data could alert homeowners or contractors of emerging issues before visible signs occur. Additionally, automated cleaning robots tailored for specific flooring types will simplify upkeep, reducing manual labor while extending the lifespan of your investment.
How do I Keep My Floors in Top Shape over Time?
Implement a regular maintenance routine that combines using the right tools with proactive inspections. For hardwood floors, schedule bi-annual refinishing using quality equipment and consult expert tips on hardwood floor care to preserve their finish. For tile or laminate, focus on grout cleaning and joint stabilization, employing tools designed for gentle, effective results. Remember, maintaining a detailed log of all maintenance activities helps track wear and plan future interventions, ensuring your floors remain stunning for decades.
Ready to elevate your maintenance game? Try investing in a moisture meter or upgrading to a laser level for ongoing assessments. These tools can be game-changers in identifying issues early and avoiding costly repairs down the line.
< >
>
The Hardest Lesson I Learned About tile,hardwood floors,flooring installation,floor leveling
Throughout my journey, I discovered that even the most straightforward tools and techniques can bite back if not handled with care. The damp sponge, seemingly simple, turned out to be a sneaky culprit behind uneven discoloration and haze, teaching me the importance of control and patience. Also, rushing through subfloor assessments often led me to expensive repairs later, proving that preparation outweighs speed in flooring success. These lessons underscored that mastery is built on humility and attention to detail, not shortcuts.
My Essential Toolkit for Flooring Success
Over time, I found that investing in quality tools like a tungsten carbide floor scraper and a reliable laser level transformed my workflow. These tools provide precision and ease, ensuring consistent results and early detection of issues. For instance, my moisture meter helps me verify substrate conditions before installing hardwood or tile, preventing problems down the line. Trusted resources like this comprehensive guide offer invaluable insights into proper leveling techniques that I wholeheartedly recommend for everyone aiming for flawless floors.
Your Turn to Embrace the Learning Curve
Transforming your space with beautiful, durable floors starts with embracing these lessons and tools. Whether you’re laying tile, installing hardwood, or leveling uneven surfaces, remember that patience, preparation, and quality equipment make all the difference. The journey might have its hurdles, but the satisfaction of a perfectly finished floor is worth every effort. Dive into resources, ask questions, and don’t shy away from experimenting—you’re building skills that last a lifetime.
What’s been your biggest flooring challenge so far? Share your story below, and let’s learn from each other’s experiences!