
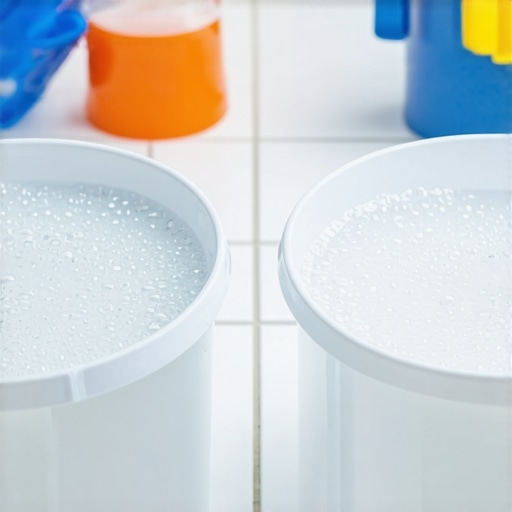
I remember the first time I dove into tile cleaning after a renovation. The water in my bucket turned murky faster than I could blink. It was frustrating—especially when I realized I was just spreading dirt around, not cleaning effectively. Suddenly, I had a lightbulb moment: I needed a better approach, something more efficient and less messy. That’s when I discovered the Two-Bucket Strategy. It transformed my cleaning routine and kept my grout water crystal clear, making my tiles gleam like new.
Why Keeping Grout Water Crystal Clear Matters More Than You Think
Have you ever spent hours scrubbing your tiles only to find the water in your bucket darkening after just a few minutes? It’s a common, yet surprisingly overlooked issue. Dirty water can spread grime and bacteria, reducing the effectiveness of your cleaning efforts and leading to dull, stained grout. Plus, if you’re like me, constantly replacing water feels wasteful and time-consuming. The good news is, there’s a simple solution I wholeheartedly recommend: the Two-Bucket Strategy. This method helps you maintain clean water throughout your cleaning session, saving you time, money, and energy.
Is the Two-Bucket Method Actually Worth the Hype?
Early on, I made the mistake of thinking that rinsing my sponge or mop in the same water would suffice. Spoiler alert: it doesn’t. The moment I realized that dirty water just spread dirt and bacteria, I understood I needed a better method. The two-bucket approach—one for clean water and one for rinsing—ensures your mop or sponge stays clean, making every swipe more effective and hygienic. Trust me, consistent cleaning with this simple tweak will give your tile grout a long-lasting, sparkling appearance.
This technique is more than just about appearance; it’s about health and preserving your hard work. Clean water extends the life of your grout and tiles, and it helps prevent mold and bacterial buildup, which can be a health hazard. If you’ve faced the frustration of dull, stained grout despite hours of scrubbing, chances are, a small change like using two buckets could make all the difference. Have you ever struggled with keeping your cleaning water clear? Let me know—I’d love to hear your stories and help you troubleshoot!
Now that I’ve shared my personal breakthrough, let’s dive into how to set this method up properly and maximize its benefits for your next cleaning project.
,
Set Up Your Tools and Environment
Before starting, gather a clean, dedicated bucket for clean water and another for rinsing. Use high-quality sponges and microfiber cloths to prevent debris from scratching your tiles. Clear the area of furniture and rugs to avoid obstructions. This preparation ensures efficiency and reduces the chance of spreading dirt around.
Implement the Two-Bucket Technique
Fill one bucket with clean, warm water and a mild cleaning solution suitable for your floor type. Keep the second bucket empty for rinsing your mop or sponge. Periodically, dip your cleaning tool into the clean water, wring out excess moisture thoroughly, then use it on the floor. After several passes, rinse it in the rinsing bucket, then wring out again before resuming. This cycle prevents dirt from redepositing on your surface, much like how a painter avoids muddying their colors by rinsing brushes regularly.
Focus on Proper Floor Preparation
For tiles or hardwood floors, ensure the surface is free of dust and debris. Use a soft broom or vacuum designed for delicate flooring. For uneven surfaces, consult resources such as floor leveling challenges to correct imperfections, aiming for a level, smooth finish that prevents water pooling and uneven cleaning.
Adopt Correct Technique for Deep Cleaning
Work in small sections, overlapping slightly to avoid missed spots. Use gentle, circular motions to lift dirt without scratching. For grout lines, apply extra attention and use a small brush or toothbrush. Consistent pressure and pattern minimize streaks and streaking—think of it like polishing a gemstone to achieve maximum shine.
Manage Water and Cleaning Residue Effectively
Regularly change the rinse water to prevent recontamination. After cleaning, go over the floor with a clean, damp cloth to remove soap residue, which can attract dirt over time. Make sure to dry the surface with a microfiber cloth or a dry mop to prevent water spots or damage, especially on hardwoods. Proper moisture control is key—think of it like baking; too much water distorts the final product.
Protect Your Floors During and After Cleaning
Post-cleaning, avoid heavy movement or dragging furniture across the freshly cleaned surface. Use furniture pads or lift items when possible. For ongoing maintenance, develop a regular schedule to prevent buildup, referencing tips from hardwood floor care secrets to preserve your investment over time. Adopting these practices ensures your floors stay pristine and damage-free for years to come.
By following these actionable steps, you create an effective, eco-friendly, and long-lasting cleaning routine. Applying the right techniques—like the two-bucket method—mirrors principles from professional flooring installation, emphasizing precise preparation and care for optimal results. Mastery of these methods transforms a mundane chore into a rewarding process that keeps your floors looking their best daily.
Many homeowners and even some professionals fall into the trap of oversimplifying flooring projects, believing that techniques suitable for one situation will work universally. One prevalent misconception is that all hardwood floors respond equally to refinishing procedures; in reality, the type of wood, finish, and age significantly influence results. For example, using standard sanding methods on reclaimed oak can cause uneven results or damage if you’re unaware of its unique grain structure. It’s crucial to understand these nuances, as detailed in expert sources like hardwood floor care secrets. Many assume that if a floor appears flat, it’s properly leveled, but subtle imperfections can cause issues during tile installation or cause uneven wear over time. The importance of meticulous prep can’t be overstated; overlooking small high spots or humps in the subfloor can lead to cracked tiles or squeaky flooring later on. Not addressing these issues beforehand is like building on a shaky foundation—inevitably leading to more costly repairs. One common myth is that floor leveling is as simple as pouring self-leveling compound and waiting for it to set. However, improper application or using the wrong product can result in adhesion problems or incomplete leveling, especially over complex substrates. For a seamless, durable finish, understanding the floor leveling fundamentals is essential. Advanced flooring projects also require awareness of the difference between conventional and modern materials. For instance, some believe vinyl can be installed directly over old tiles without preparation, but this often traps moisture or debris, causing future failures. Proper surface prep, including cleaning and leveling, is critical for longevity. Additionally, the biggest trap I see is underestimating the complexity of transitions between different flooring types; a poorly done transition strip can be an eyesore and cause damage over time. Always account for expansion gaps and substrate differences to ensure smooth, safe transitions. Remember, flooring installation is not just about aesthetics but about creating a safe, durable, and easy-to-maintain surface. To avoid these pitfalls, invest time in learning about the nuances that can make or break your project—details that seasoned professionals master through experience and continuous education. For further insights, explore the comprehensive guide on flooring installation fundamentals. Have you ever fallen into this trap or overlooked a critical step? Let me know in the comments and share your experience! Step beyond beginner mistakes and master the subtle intricacies that guarantee a flawless, lasting floor.
When it comes to maintaining beautiful floors over the years, having the right tools and a disciplined approach can make all the difference. I personally swear by a few key pieces of equipment that have consistently delivered professional results, time after time. For leveling subfloors, a high-precision laser level ensures accuracy down to fractions of an inch—an essential when prepping for tile or hardwood installation. I rely on the Bosch GLL 3-80 laser level because it projects multiple planes, providing comprehensive visibility of unevenness and helping me catch high spots or dips that could compromise the final finish.
In the realm of floor leveling, I recommend investing in a quality self-leveling compound, paired with a raking tool. This simplifies spreading the compound evenly across the surface, saving hours of manual work. I prefer the Saks SuperAdept trowel for its stability and precise edge control—attributes that prevent over-application and ensure a true, flat surface. Regularly, I use a Dewalt rotary grinder fitted with a polishing pad for smoothing out rough patches or high spots on existing floors before starting repairs or installation.
Another tool I find indispensable is a moisture meter, such as the Protimeter Aquant. Excess moisture hampers adhesion and long-term durability, so testing the subfloor thoroughly prevents future issues like de-lamination or cracking. Consistent use of a moisture meter aligns with the guidance from subfloor preparation best practices, ensuring a dry, stable foundation for your project.
Looking Ahead: Future Trends in Flooring Maintenance Tools
Advancements in digital technology and smart sensors suggest a future where monitoring flooring conditions could be automated. Imagine a system that constantly tracks humidity, temperature, and surface integrity, alerting you via an app when intervention is needed. This proactive approach could drastically extend the lifespan of your floors and reduce costly repairs. For now, though, investing in trusted, precise tools, and mastering their proper use, remains the cornerstone of enduring results.
Wondering How to Keep Your Floors Looking New Over Time?
One actionable tip I recommend is regularly recalibrating your laser level and moisture meter—small routines that pay big dividends in quality and long-term durability. Don’t forget, consistent maintenance is key. For comprehensive flooring care, check out hardwood floor care secrets. Whether you’re leveling a subfloor or performing ongoing upkeep, these tools help you catch issues early, saving you money and preserving your investment. Try integrating these high-precision gadgets into your next project and notice how they elevate your results from good to professional standard. Remember, the right tools aren’t just accessories—they’re your partners in creating floors that last a lifetime.
Lessons the Flooring World Doesn’t Tell You
- One of the biggest mistakes I made was assuming all hardwood is the same; understanding wood grain and finish types saved me from costly refinishing. Making a small effort to research your specific flooring ensures longevity and beauty.
- I once overlooked the importance of moisture testing before installing tile, which led to future cracks and bonds failing. Trusting modern tools like moisture meters can prevent such setbacks and extend your floors’ lifespan.
- Counting on quick fixes like hurried leveling compounds might seem tempting, but taking the time to properly prepare the subfloor creates a foundation that resists cracks and shifts over time, saving money and frustration later.
- Admitting that I underestimated transition strips led to accidental damage and unsightly gaps. Proper planning for transitions—considering expansion gaps and materials—makes a noticeable difference in overall aesthetics and durability.
- Learning that maintenance routines—like regular cleaning and recalibration of tools—are just as important as installation techniques transformed my approach from reactive to proactive, ensuring my floors stay pristine for years.
My Go-To Resources for Flooring Success
- For precise subfloor leveling, I rely on the Ultimate Guide to Floor Leveling. It offers comprehensive insights, avoiding common pitfalls like improper application that can cause uneven surfaces.
- The Step-by-Step Flooring Installation Guide has been invaluable, especially with detailed visuals and tips that improve efficiency and results for both DIYers and professionals.
- My toolkit includes the Bosch GLL laser level, which I trust for its accuracy and ease of use. It’s essential for ensuring perfect alignment, especially in large or intricate projects.
- Finally, regular consultation of Hardwood Floor Care Secrets helps me develop a maintenance routine that preserves the beauty and integrity of my floors beyond installation.
This Is Your Invitation to Elevate Your Flooring Experience
Embarking on a flooring project is more than just laying tiles or sanding hardwood—it’s about creating a space that endures and reflects your care. With the right knowledge, tools, and habits, you can transform ordinary spaces into extraordinary ones. Every step you take toward mastering these techniques adds confidence and ensures your floors will impress for years to come. So, are you ready to turn your flooring dreams into reality and avoid common pitfalls? Share your plans or questions below—I’d love to hear how you’re planning to elevate your space!