
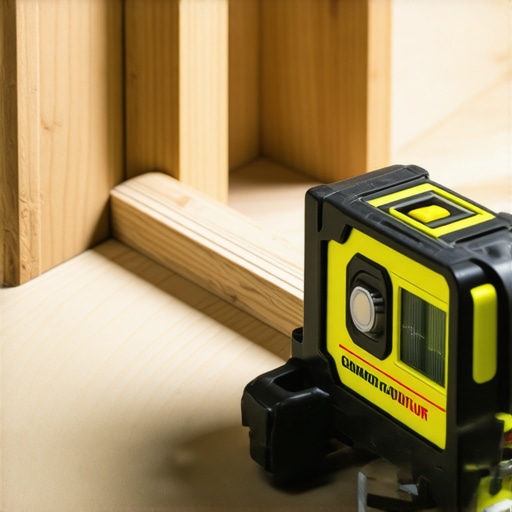
I’ll never forget the sound of my favorite marble rolling slowly, then quickly, right off the edge of my brand-new island. I had spent three weeks picking out the perfect quartz, only to realize the floor beneath it was shaped like a shallow soup bowl. It was a visceral gut-punch of a realization. I thought I could just ‘eye it’ or maybe fill the gaps with a little extra adhesive later. I was wrong. That early failure taught me that if you don’t respect the subfloor, your expensive cabinets will never respect you. I ended up with a kitchen that looked beautiful from afar but felt like a funhouse once you stood at the sink. Today, I’m going to share the exact method I used to fix that mess without ripping the whole house down to the joists. We are going into the nitty-gritty of the shimming hack—a way to create a rock-solid, dead-level foundation using nothing but scraps and patience.
Get Your Subfloor Flat Without Tearing the House Down
I remember my first big mistake vividly: I tried to use a liquid self-leveler on a leaky plywood subfloor without sealing the seams first. It was a disaster that ended with me scraping hardened grey goop off my basement ceiling. Before you even think about cabinets, you need to know exactly where your floor is lying to you. I always start with the 3-foot level test for checking subfloor flatness to find those sneaky dips. Most people think they need to pour hundreds of dollars of compound to fix a slope, but that often adds unnecessary weight and mess. Instead, we can use a combination of shims and thin plywood layers to build up the low spots. This is especially crucial because if your base isn’t right, you’ll see flooring installation mistakes popping up months later, like buckled planks or separated seams. I’ve learned the hard way that you have to check for subfloor flex before you put a heavy cabinet on top; otherwise, all your leveling work is just for show once the weight of the dishes hits. You want a surface that doesn’t just look flat—it needs to stay flat under pressure.
Does This Hack Actually Support the Weight of Heavy Countertops?
I hear the skepticism already: ‘Isn’t sticking bits of wood under my floor going to make it squeak or collapse?’ It’s a fair fear. However, when you learn how to level a plywood subfloor with shims and plywood scraps correctly, you aren’t just creating a hollow bridge; you are creating a tiered, solid support system. According to the National Kitchen & Bath Association (NKBA), a standard run of base cabinets can support hundreds of pounds of countertop material, which means your subfloor prep is the most vital structural element of your kitchen. If you skip this, your granite could actually crack under its own weight because of the uneven support. Have you ever tried to install cabinets only to realize your floor was doing its best impression of a mountain range? I’d love to hear your horror stories in the comments below. By using the shimming hack, we’re going to bypass the typical 7 mistakes that ruin your installation and jump straight to a professional-grade finish that won’t sag or squeak. Let’s get into the actual mechanics of the build-up.
Map Your Subfloor Peaks and Valleys
The first step to a flat floor isn’t reaching for a bag of compound; it is understanding the topography you are working with. Think of your subfloor like a topographical map where every eighth of an inch matters. I once spent three hours chasing a ‘high spot’ only to realize I was actually standing in a massive low spot that made everything else look elevated. To avoid this, you need to find the highest point in the room and make it your North Star. Everything else will be brought up to meet that level.
Use the Flashlight Trick for Instant Results
Before you start cutting wood, you need to see the invisible. I swear by the flashlight test for checking floor flatness. Lay a long straightedge—at least 6 feet—across the floor and shine a bright LED light behind it. The light that leaks through the gaps reveals exactly where your low spots are. In a kitchen remodel last year, I found a half-inch dip near the dishwasher that would have caused the granite to snap. By using this light technique, I could mark the floor with a pencil, drawing ‘contour lines’ just like a hiker’s map. This visual guide tells you exactly where your shims need to go.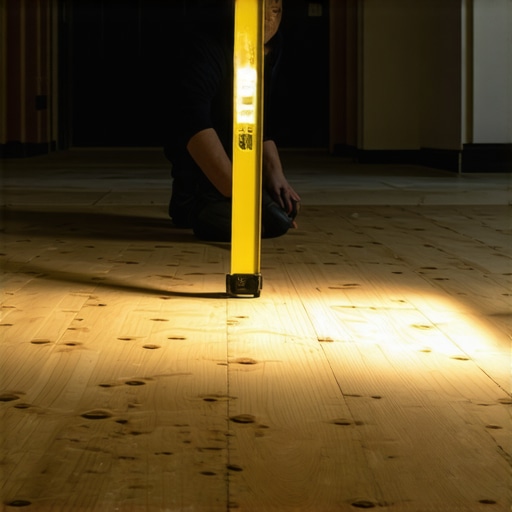
Pick the Right Layering Materials
Once you have your map, you need the right material to fill the gaps. Most people think they need self-leveling compound, but I prefer the precision of how to level a plywood subfloor without adding weight. If you are working in an old house with questionable joists, the last thing you want is 500 pounds of wet concrete sitting in the middle of your floor. Instead, I use a combination of cedar shims, roofing felt, and 1/8-inch luan plywood. These ‘skins’ allow you to build up the height in increments as thin as a piece of paper. This is one of the 7 tools you actually need for a pro result—a variety of thin wood scraps and a sharp utility knife to taper them.
Build Your Solid Support Sandwich
Now for the actual hack: instead of just shoving a shim under a cabinet, you are going to create a tiered platform. Start by laying your thickest plywood layer in the deepest part of the dip. Secure it with construction adhesive and screws. Then, feather the edges with thinner materials like roofing felt or cedar shims. I remember a specific job in a 1920s bungalow where the floor looked like the hull of a ship. I spent a whole afternoon creating a ‘sandwich’ of materials, meticulously checking each layer with a level. It felt tedious at the time, but when I slid the heavy oak cabinets into place, they sat dead-level without a single wobble. You are essentially building a custom-shaped pedestal for your flooring.
Address the Squeaks Before the Cabinets Go In
The most common mistake is forgetting that a flat floor can still be a noisy one. While you are down there shimming, you must how to fix a squeaky subfloor by driving screws into the joists. If you build a level platform on top of a loose joist, the whole thing will still move. I always perform the simple test to see if your subfloor is strong enough by having someone heavy jump near the area while I watch the level. If the bubble moves, you need more screws. This follows the flooring installation fundamentals that ensure your hard work doesn’t start groaning every time you walk to the fridge.
While shimming is the ultimate ‘surgical’ fix for specific dips, we need to address the elephant in the room: the ‘level vs. flat’ debate. Most DIYers—and honestly, quite a few pros—obsess over the bubble in their spirit level. They think if the floor is perfectly horizontal, the job is done. This is a massive misconception that often leads to cracked grout and ‘lippage’ where one tile edge sits higher than the next. In reality, for a successful flooring installation and leveling success, flatness is far more important than levelness. You can have a floor that slopes slightly toward a drain but is dead-flat. Conversely, you can have a level floor that looks like a calm ocean—full of tiny, invisible waves. The Tile Council of North America (TCNA) specifies that for tiles with any edge 15 inches or longer, the subfloor must be flat within 1/8 inch over a 10-foot span. If you miss this detail, you’ll inevitably face floor leveling challenges and common mistakes once you start thinsetting.

Why Does Even the Best Self-Leveler Crack Over Plywood?
People often ask if they can just dump leveler over a wood subfloor to avoid the manual shimming process. The answer is technically yes, but the failure rate is astronomical. Plywood expands and contracts at a different rate than cementitious compounds. If you don’t use a specific latex-modified leveler and a high-quality primer, the bond will snap the first time your HVAC kicks on in the winter. It’s a classic advanced error that results in why your self-leveling compound is cracking like a dry lake bed. If you see why your self-leveler is peeling off the concrete in sheets, it’s usually because the subfloor was too thirsty and sucked the moisture out of the mix before it could bond. Have you ever fallen into this trap? Let me know in the comments below.
Stop Trusting the Liquid to Do Your Job
Another nuance that experts know: ‘self-leveling’ is a marketing term, not a physical law. If you just pour it and walk away, it will likely hump up in some areas and leave voids in others. You have to actively manage the pour with a spike roller or a gauge rake to ensure flawless floor leveling before tile laying. Furthermore, don’t assume the leveler fixes a weak subfloor. If there is flex, the leveler will just crack. You must ensure the structure is solid by following flooring installation fundamentals. If you’re working with wood, sometimes you even need to check for subfloor flex before you lay rigid tile because all the compound in the world won’t stop a bouncy joist from ruining your finish. Mastering precise floor leveling techniques means understanding that the liquid is just one tool in your kit, not a magic wand.
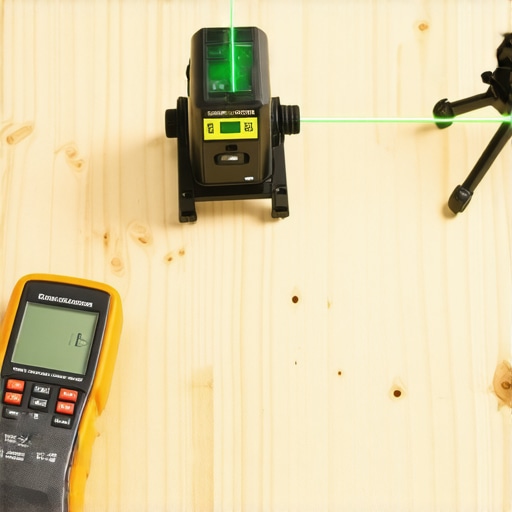
If the liquid isn’t the magic wand, then what is? Over the years, I’ve realized that the ‘secret sauce’ isn’t a single product but a specific combination of precision instruments that tell you the truth when your eyes are trying to deceive you. When I finally stopped guessing and started investing in the 7 tools you actually need for a professional install, my stress levels plummeted. The first thing I tell anyone standing in the middle of a gutted room is to put down the cheap plastic level and buy a high-quality rotary laser. A laser level doesn’t just show you a spot; it paints a 360-degree line of truth across the entire room, allowing you to see exactly how your kitchen floor relates to the hallway and the dining room simultaneously.
Invest in Tools That Don’t Lie to You
Beyond the laser, the most underrated tool in my bag is a high-quality moisture meter. I cannot stress this enough: the National Wood Flooring Association (NWFA) technical guidelines state that the moisture content between a wood subfloor and the hardwood flooring should not exceed a 3% difference for wide-plank flooring. If you ignore this, all your precise floor leveling techniques will be for nothing when the wood begins to cup or crown. I personally use a pinless meter because I hate poking holes in my expensive new materials, but whatever you choose, use it religiously before you even think about opening a bucket of adhesive.
How do I ensure my floor stays flat as the house settles?
Maintenance is where most people drop the ball. You’ve spent a week getting the subfloor perfect, but houses are living, breathing things that move with the seasons. To keep that foundation solid, you have to control the environment. This means maintaining a consistent relative humidity in your home. I always recommend a whole-house humidifier or dehumidifier depending on your climate to prevent the subfloor from expanding and pushing against your leveling work. When it comes to surface care, you must follow hardwood floor care secrets that avoid excessive water. For example, I’ve seen beautiful leveling jobs ruined because someone used a soaking wet mop, which caused the plywood underneath to swell and pop the leveler. Instead, learn the best way to clean a new hardwood floor using microfiber and specialized cleaners that won’t penetrate the seams.
The Future of Flooring is Digital Mapping
Looking ahead, I see the DIY world moving toward augmented reality (AR) for floor prep. We are already seeing apps that can map the topography of a room using your smartphone’s LIDAR sensor, creating a digital ‘heat map’ of low spots. While it’s not as accurate as a rotary laser yet, the trend is clearly moving toward high-tech visualization that removes the guesswork for homeowners. In the next few years, I expect we’ll see self-leveling compounds that are even more flexible, designed specifically to mimic the movement of wood to solve the cracking issues we see today. If you want to stay ahead of the curve and ensure your project stands the time, I highly recommend you perform the bucket test to check for moisture one last time before you seal the floor. It’s a simple, low-tech insurance policy for a high-stakes job. Go grab a moisture meter this weekend and test three different spots in your room; you might be surprised by what the floor is trying to tell you.
Hard Truths from the Subfloor Trenches
After years of fixing floors that looked like the surface of the moon, I’ve realized that the shimming hack is more about mindset than material. One of the biggest floor leveling challenges is accepting that you cannot rush physics. If you leave a 1/16-inch gap under your cabinet, the weight of the granite will eventually find it and cause a failure. Here are the lightbulb moments that changed my approach to prep work:
- Precision over speed: I used to think I was saving time by ‘eyeballing’ the shim placement, but I ended up spending double that time fixing flooring installation mistakes once the planks started to buckle.
- The ‘Spongy’ Test: If you step on a shimmed area and feel even a hint of movement, it’s not finished. Use construction adhesive between every layer of your plywood ‘sandwich’ to prevent future squeaks and ensure structural integrity.
- Moisture is the silent killer: No amount of shimming can save a floor if the wood is saturated. Always perform the moisture test you must do before gluing to ensure your subfloor is stable enough for the final finish.
The Gear That Keeps My Floors From Cracking
You don’t need a truckload of expensive machinery, but you do need tools that don’t lie. These are the four items I reach for on every single flooring installation and leveling success journey:
- Rotary Laser Level: A 360-degree laser is the only way to ensure your kitchen connects perfectly to the rest of the house. It’s the secret to mastering floor leveling in large, open-concept spaces where a spirit level simply isn’t long enough.
- Cedar Shims and Luan: Forget the plastic shims; real cedar shims and 1/8-inch luan scraps allow for the organic, tapered layering needed for how to level a plywood subfloor with shims and plywood scraps without creating abrupt bumps.
- Pinless Moisture Meter: This tool tells you if your plywood is ready for the finish floor. It’s a mandatory step for maintaining hardwood floor care secrets and preventing wood cupping.
- Quality Construction Adhesive: Never rely on gravity alone. A high-quality subfloor glue turns your individual layers into a monolithic support block that won’t shift over time.
Your Kitchen Deserves a Foundation That Doesn’t Give Up
Tackling a subfloor can feel like the least ‘glamorous’ part of a renovation, but it is the part that dictates how long your home feels brand new. When you take the time to master precise floor leveling techniques, you aren’t just installing cabinets; you are building peace of mind for the next twenty years. #IMAGE_PLACEHOLDER_E# Every time you roll a marble across your counter and it stays exactly where you put it, you’ll remember the afternoon you spent with shims and a flashlight. Don’t be afraid to get down on your knees and get the floor right—your future self will thank you for the extra effort in your next floor leveling project. Have you ever found a surprise dip in your floor halfway through an installation? Let me know your ‘oh no’ moments in the comments below!