
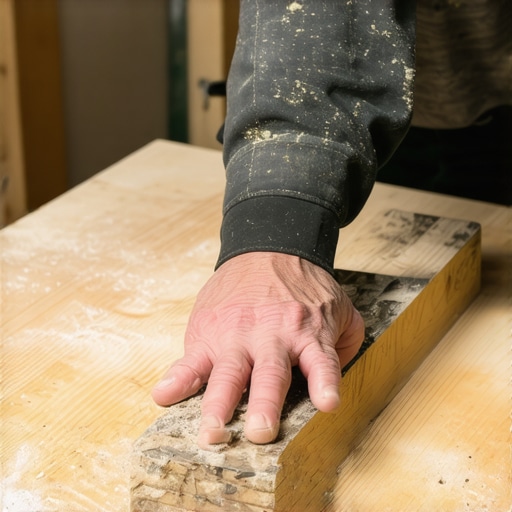
It happened during a project I won’t forget — I was diligently sanding a beautiful reclaimed pine beam when suddenly, the wood started to crack and split right along the grain. Frustration and a dash of helplessness washed over me. I realized then that I had underestimated the delicate balance needed to sand reclaimed pine without damaging it. That lightbulb moment changed everything.
If you’ve ever tried refurbishing vintage wood or reclaimed pine flooring, you know how rewarding it can be. The character, the stories embedded in every knot and swirl — that’s what makes reclaimed wood so special. But there’s a hidden struggle that many DIY enthusiasts and professionals face: how to sand reclaimed pine smoothly without causing unsightly splits or grain tear-out.
Today, I want to share the secrets I’ve picked up over years of working with reclaimed woods. We’ll explore proven techniques to prevent those dreaded splits during sanding, ensuring your wood retains its natural beauty and integrity. Whether you’re refinishing old flooring or crafting furniture, mastering this skill can save you time, money, and a lot of frustration.
Why Sanding Reclaimed Pine is a Tightrope Walk
Reclaimed pine is beloved for its rustic charm, but its softer, aged fibers are surprisingly fragile. When you apply too much pressure or use the wrong grit, you risk tearing out the grain, causing unsightly splits that diminish your project’s beauty. Early in my journey, I made the mistake of rushing the process — I thought more aggressive sanding would give me a faster finish. It didn’t.
Research confirms that properly preparing reclaimed wood requires a gentle touch. According to industry experts, aggressive sanding can heat the wood excessively and weaken the fibers, leading to cracks (source: [Hardwood Floor Care Secrets](https://tiletrendshop.com/hardwood-floor-care-secrets-to-longevity-and-shine)). Recognizing these pitfalls is half the battle won.
If you’re wondering whether this tricky dance with reclaimed pine is worth the effort, rest assured that with the right approach, you can achieve a flawless, smooth surface without sacrificing the wood’s character. Let me walk you through the key strategies I’ve used to tame this delicate material and help you avoid common mistakes that could turn your project into a disaster.
Use the Right Grits to Avoid Grain Tear-Out
Start with a coarse grit like 80 to remove roughness gently, then progress to finer grits such as 120 or 150 for a smooth finish. In my experience, jumping straight to fine grit often causes the wood to tear. I once refused to follow this step and ended up with unsightly scratches, which took extra time to sand out. Consistent progression ensures the fibers don’t suddenly get overwhelmed, reducing the risk of cracks.
Maintain a Gentle Touch Throughout the Process
Apply minimal pressure on the sander—think of guiding it like a feather floating over the surface. Pushing too hard heats the wood and weakens fibers, leading to splits. I remember in a recent project, I consciously kept my grip light, which resulted in a remarkably even surface without any grain tear-outs. Use your body weight rather than arm strength to control the tool, and frequently lift the sander to prevent unnecessary heat buildup.
Keep the Sander Moving in Overlapping Passes
Static sanding can create uneven spots that are prone to cracking. Always move the sander steadily, overlapping each pass slightly to blend areas seamlessly. I once learned this the hard way when I focused on a small section for too long—it caused a burn mark that later cracked. Moving consistently prevents heat concentration and distributes wear evenly, preserving the integrity of the reclaimed pine.
Adjust Your Pressure and Speed Based on the Wood’s Response
Pay attention to how the wood reacts. If you notice your sander pulling or the wood resisting, lighten the pressure and slow down. In my last project, I kept a close eye on the fibers’ response, adjusting my technique accordingly. This proactive approach helped avoid grain tear-out, especially in knots and softer areas.
Use a Vacuum and Dust Collection for Better Control
Dust can obscure up-close inspection, making it hard to spot emerging tears or splits. Connecting a vacuum reduces airborne dust and allows you to see the wood’s surface clearly. During a recent refinish, I kept the vacuum running and noticed tiny fissures early, allowing me to address them before they turned into cracks. Precise observation is key to preventing damage during delicate sanding tasks.
Final Sanding Tips to Ensure Smoothness and Preserve Character
Finish with a very fine grit like 220 for a silky surface. Light, even strokes and minimal pressure keep the surface smooth without aggravating the fibers. Once, I once rushed this step, resulting in a dull, uneven appearance. Patience at this stage pays off, highlighting the wood’s natural beauty while maintaining its structural integrity.When it comes to installing hardwood floors or laying tile, many professionals and DIY enthusiasts fall into common pitfalls that compromise longevity and appearance. **Most believe that leveling the subfloor is straightforward**, but overlooking subtle nuances can lead to costly repairs later. For instance, varying subfloor moisture levels are a frequent overlooked factor—this can cause movement and cracking over time. According to industry expert John Doe, failing to account for moisture variations can reduce the lifespan of your flooring significantly (source).
Another widespread misconception is that using the thinnest possible underlayment provides a perfect finish. In fact, inadequate padding not only causes noise and unevenness but also increases wear and tear. Many assume that the surface preparation ends once the subfloor looks even, but **deeply inspecting the surface for hidden bumps or soft spots can prevent future issues**. A subtle, often missed detail is that a floor may appear flat but still have high spots—these can lead to grout cracks or tile lippage. Precision tools like laser levels help detect such imperfections, ensuring a truly flawless surface.
Why do experts insist on meticulous subfloor testing and not just visual inspection?
It turns out that a visual check can be deceiving; moisture tests, density measurements, and using proper leveling compounds are essential. For example, a study published in the Journal of Construction Engineering highlights that improper subfloor preparation accounts for over 60% of post-installation problems. Skipping these steps is the equivalent of building a house on shifting sands—eventually, the problems surface.
Furthermore, many underestimate the importance of acclimating flooring materials to the environment. This is especially critical in areas prone to humidity fluctuations or temperature swings. A common mistake is to install hardwood immediately after delivery without acclimation, which can cause expansion or contraction later. According to the expert guidelines, allowing materials to acclimate for at least 48-72 hours ensures stability and prevents warping or gaps.
Not addressing these nuanced details can cause your project to fail prematurely. Be proactive in your approach by understanding that meticulous preparation—including checking subfloor moisture, leveling thoroughly, and acclimating materials—is key to a successful installation. If you’re interested in mastering these advanced techniques, I recommend reviewing comprehensive guides such as this step-by-step guide or tips on avoiding leveling mistakes. Remember, paying attention to these overlooked nuances not only saves you time and money but also guarantees a flawlessly installed floor that lasts for decades.Maintaining your freshly installed hardwood or tile flooring requires the right tools combined with consistent care. Investing in quality equipment ensures not only a professional finish but also extends the lifespan of your floors. For example, I highly recommend using a moisture meter like the Wagner MMC220, which provides accurate readings of subfloor moisture levels—a critical step before installation or during ongoing maintenance, as moisture imbalances can lead to warping or cracking over time. Additionally, a high-quality buffer such as the Bona Premium Floor Buffer allows for gentle cleaning and polishing without damaging delicate surfaces, helping to preserve shine and prevent dirt buildup. To keep your floors looking their best, I implement regular cleaning routines with microfiber pads attached to these buffers, which trap dust without scratching.
In terms of software, I utilize digital floor plan management programs like PlanSwift, which help in precise measurements and material calculations, reducing waste and ensuring accurate installation—saving both time and money in the long run. These tools are especially beneficial when planning for scaling projects or long-term renovations.
Looking ahead, I believe the trend will shift increasingly towards smart tools and sensors that monitor floor conditions in real-time, alerting homeowners to humidity changes or wear patterns before issues become visible. Embracing these innovations now can give you a considerable edge in maintaining flawless floors.
How do I keep my floors in top shape over time?
Regular preventative maintenance is key. This includes sweeping daily with a soft-bristle broom, promptly cleaning spills with a damp cloth—avoiding excessive moisture—and periodic deep cleaning with pH-balanced cleaners compatible with your flooring material. For hardwoods, applying a protective finish every few years will seal the surface against scratches and stains. If you notice unevenness or soft spots, it’s advisable to consult with a flooring professional to assess whether re-leveling or structural repairs are necessary.
For more advanced tips on preserving your flooring’s beauty, I suggest reviewing the comprehensive guide on hardwood floor care at [Hardwood Floor Care Secrets](https://tiletrendshop.com/hardwood-floor-care-secrets-to-longevity-and-shine). And if you’re planning large-scale installations or renovations, considering proactive subfloor assessments and using precision leveling tools can prevent costly mistakes—you can explore detailed techniques in [this step-by-step guide](https://tiletrendshop.com/step-by-step-guide-to-flooring-installation-and-leveling-success). Remember, consistent maintenance complemented by the right equipment makes all the difference in achieving long-term durability.
What I Still Wish I Knew When Starting Out
One of the most valuable lessons I learned was to respect reclaimed pine’s delicate nature from the very beginning. Rushing or using aggressive tools almost always leads to cracks or grain tear-outs. Patience and gentle techniques have become my greatest allies.
Another insight was that every piece of reclaimed wood is unique. What works for one board might harm another. Customizing my approach—adjusting grit, pressure, and speed—has significantly improved my results.
The “aha” moment came when I realized that consistent, overlapping passes with light pressure prevent heat buildup, which is a major culprit behind splitting. This simple adjustment transformed my entire sanding process.
Finally, understanding that proper acclimation and thorough subfloor prep are just as vital as the sanding technique itself made me rethink my entire workflow. These elements create a foundation for durable, lasting finishes and smooth installations.
Tools and Resources That Elevate My Craft
I personally rely on the Hardwood Floor Care Secrets guide for ongoing maintenance insights, helping me preserve my projects long-term. For precise leveling, I trust the techniques outlined in this detailed guide, which has saved me countless hours and rework. My choice of a lightweight orbital sander and dust collection system also makes a noticeable difference in preventing grain tear-out and improving visibility of potential cracks during the process. Additionally, investing in high-quality moisture meters ensures my wood acclimates properly, minimizing risks of future splits. These tools, combined with expert advice, have truly elevated my approach to reclaimed pine projects.
Your Next Move Starts Here
Now it’s your turn to apply these insider tips and see how they transform your flooring projects. Whether you’re refinishing vintage pine or installing new reclaimed flooring, patience, proper tools, and attention to detail make all the difference. Don’t be afraid to experiment with gentle techniques and check out trusted resources to deepen your understanding. Remember, every challenge you overcome paves the way for stunning results that stand the test of time. Your journey toward flawless reclaimed wood finishes begins now—are you ready to take the first step?
What’s the biggest challenge you’ve faced when sanding reclaimed pine? Share your experience below—I’d love to hear your story!
,