
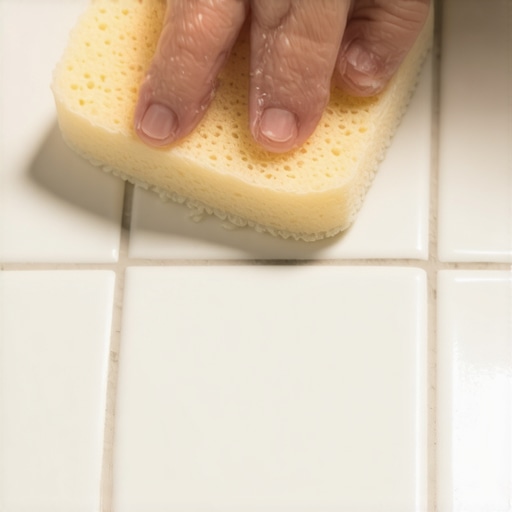
I vividly remember the day I decided to tackle my bathroom tile project. Enthusiastic, I kept thinking, “How hard can this be?” But halfway through, I noticed a dull haze forming on the grout lines. It was like a cloudy cloud simmering over my pristine tiles. Turns out, I had missed a crucial step that would have saved me hours of scrubbing—and a good chunk of my patience. That was my “aha!” moment.
The Hidden Danger of Grout Haze and Why Wet Sponge Is Your Best Friend
Many DIY enthusiasts, even experienced homeowners, overlook the importance of controlling grout haze during installation. When grout dries too quickly or is left unmanaged, tiny particles can settle on the tile surface, creating that unsightly haze that’s tough to remove later. I learned this the hard way. The haze wasn’t just a cosmetic issue; it could also hinder the adhesion of sealers and make your whole project look sloppy.
Promise me this—if you’re about to dive into a tile job, you won’t repeat my mistake. Today, I’ll share my personal experience and reveal the simple, yet often ignored, trick that can prevent grout haze before it even begins: the Wet Sponge Rule.
Is the Wet Sponge Rule Overhyped or Seriously Effective?
I used to think that wiping down grout with a damp cloth was enough, but early on, I made the mistake of using a sponge that was too dry or waited until the grout had started to haze—resulting in stubborn patches I couldn’t clean. It’s easy to get skeptical about yet another tip, but I can tell you from experience that mastering this simple step saved me countless hours of scrubbing and rework. According to experts, timely grout cleanup with a wet sponge helps maintain the cleanliness and appearance of your finish, and it’s a tip backed by professionals in flooring installation.
If you’ve faced this problem or are anxious about making the same mistake, keep reading. The upcoming steps will show you exactly how to implement the Wet Sponge Rule effectively for flawless results, no matter your skill level.
Prepare Your Tools and Workspace
Before you start, gather a clean, damp sponge, a bucket of clean water, and a microfiber cloth. Keep the sponge moist but not dripping—think of it as the Goldilocks zone for moisture, not too dry, not too wet. Clear the area of obstructions to move freely as you work, and wear gloves to protect your skin from grout and cleaning agents.
Timing Is Everything: When to Wipe the Grout
As soon as you finish applying grout, wait about 10 to 15 minutes, or until it begins to stiffen but is still workable. Imagine the grout as fresh cement—being proactive prevents setting haze, similar to watering a garden before it dries out completely. I recall a time I waited an extra five minutes and faced stubborn haze, wasting time on vigorous scrubbing. That taught me the importance of timely cleanup.
Keep Your Sponge Moist
Dip the sponge into your bucket of clean water and squeeze out excess moisture until it’s damp but not dripping. Think of the sponge as a gentle eraser—too dry and it drags, too wet and it floods. Regularly rinse the sponge to avoid spreading dirt or grout residue across the tile surface. Remember, persistent residue is the enemy of a smooth finish.
Use a Gentle, Overlapping Motion
Begin wiping the grout lines with the damp sponge, applying light pressure. Use overlapping strokes to ensure even coverage, much like a painter applying a fresh coat. Work systematically across a section, keeping the sponge clean and moist. I once tried to wipe everything at once, which caused smudging, so I recommend tackling small areas at a time for maximum control.
Addressing Difficult Spots and Residue
If stubborn haze remains, change your water and rinse the sponge thoroughly. For challenging patches, a second pass with a fresh sponge can make a huge difference. Remember, patience beats brute force—scrubbing aggressively can damage the surface or spread haze further. I learned this when I tried to scrub off dried haze with a scouring pad, which scratched the tiles. Instead, a fresh damp sponge gently lifted the residue.
Final Cleanup for a Showroom Finish
After wiping down all grout lines, use a clean microfiber cloth to buff the tiles, removing any remaining moisture or haze. This step adds a polished look, akin to polishing a car after washing. It also helps reveal any missed spots for a second pass. If you notice a faint film lingering, dampen your sponge slightly more or switch to a new one for that extra clarity. Regular cleaning during this process ensures no grout haze or dirt is left behind, setting your project apart with a professional finish.
Prevent Future Grout Haze with Proper Cure
Once your tiles are clean, allow the grout to cure fully before sealing—typically 48 to 72 hours. This patience prevents re-emergence of haze and ensures durability. During curing, avoid getting the grout wet or crowded with foot traffic. This attentiveness to timing keeps your masterpiece looking pristine and reduces cleanup efforts down the line.
When it comes to hardwood floors, tile installation, or floor leveling, many homeowners and even experienced DIYers often overlook nuanced details that can make or break a project. A common myth is that choosing the right material is all that matters. However, factors like substrate preparation and precise leveling are equally critical. For instance, improper floor leveling can lead to a host of problems, including cracks, uneven surfaces, and premature wear, despite using premium materials. To avoid these pitfalls, investing in understanding the intricacies of floor preparation and installation techniques is essential. Experts emphasize that meticulous substrate assessment and correct leveling are the backbone of a durable, flawless finish (see common leveling mistakes). Don’t assume that a perfectly selected material compensates for poor execution; instead, prioritize proper surface prep to ensure longevity and aesthetic appeal. Recognize that rushing through the leveling process can trap you into costly and time-consuming fixes later. Many forget that floor unevenness isn’t always immediately visible but can cause significant issues once the weight of furniture or foot traffic is added. An advanced tip is employing laser-guided leveling tools, which provide a higher degree of accuracy than traditional methods, preventing subtle lippage that can ruin your layout. According to flooring specialists, neglecting these details can result in a project that appears finished but exhibits issues within months. So, next time, challenge the misconception that material selection alone guarantees success. For a comprehensive understanding of proper leveling techniques, explore these expert strategies. The more you learn about the nuances, the better your chance of achieving a truly professional result. Have you ever fallen into this trap? Let me know in the comments.Maintaining high-quality hardwood floors and ensuring flawless installation require not just skill but also the right tools and ongoing care. One of my personal favorites is using a **laminate floor scraper**—not the cheap plastic types, but a professional-grade metal scraper equipped with a fine edge. I personally rely on the **Norton Multi-Purpose Scraper** because its sturdy construction and precision blade allow me to remove stubborn adhesive residue without risking damage to the finish or wood. This tool is essential when dealing with residual glue after large flooring projects, as it saves time and prevents costly re-sanding sessions. Additionally, a **laser level** has become indispensable for large-scale or multi-room installs. Unlike traditional bubble levels, a laser level provides a 360-degree reference point, ensuring your floors stay perfectly level across vast areas. I prefer the **DeWalt DW089LG** because its durability and accuracy dramatically reduce issues caused by uneven subfloors, which can lead to squeaks or uneven wear over time. For ongoing maintenance, I incorporate a **hardwood floor cleaner** like **Bona Hardwood Floor Cleaner**—this specific formulation is pH-neutral, non-toxic, and leaves no residue, preserving the wood’s natural beauty and prolonging its lifespan. As we look into the future, I predict a shift toward smart flooring systems that integrate sensors to monitor humidity, temperature, and even wear levels, enabling proactive maintenance. Innovators are already developing IoT-enabled coatings that can alert homeowners to issues before damage occurs. To ensure your floors stand the test of time, consider adopting these advanced tools and routine practices. How do I maintain hardwood floors over time? Regularly inspect for scratches and dents, and promptly address them with proper buffs or touch-up kits. Scheduling annual professional deep cleanings and using protective pads under furniture can prevent deep gouges. For installers, integrating **self-leveling compounds** like those detailed in the article here guarantees a seamless surface that resists future issues. Don’t underestimate the importance of meticulous substrate preparation—it’s the foundation of durable, beautiful flooring. Try incorporating a **magnet-based screw locator** to identify hidden fasteners during remediation projects; this tip has saved me hours during subfloor repairs. Remember, consistent maintenance paired with the right tools makes all the difference in preserving your investment for years to come.
Unspoken Lessons That Changed My Flooring Journey
One of the most impactful lessons I learned was the importance of meticulous substrate preparation; skipping this step often led to costly repairs down the line. Additionally, I’ve found that patience during curing processes, like grout setting and epoxy bonding, yields professional results that last. Lastly, understanding the nuances of tool selection—like choosing the right trowel notch size—can make the difference between a smooth finish and a frustrating mess.
Tools and Resources That Elevate My Craft
I’ve come to rely heavily on precision tools such as laser levels like the DeWalt DW089LG for ensuring absolute accuracy during installation. The expert floor leveling techniques guide has been invaluable for avoiding common pitfalls. For maintaining hardwood floors, I trust professional-grade refinishing tips that prolong the beauty and durability of my work. And for quick diagnostics, the magnet-based screw locator saves me hours during repairs.
Embrace Your Power to Transform Spaces
Remember, every expert was once a beginner. With the right knowledge, tools, and patience, your flooring initiatives can become impressive showcases of craftsmanship. Don’t be afraid to start, especially knowing that mastery comes with experience and continuous learning. Your space deserves your best effort—so go ahead and give it your personal touch with confidence.
What was the most surprising thing you learned when working on your floors? Share your story below, and let’s learn together!
,