
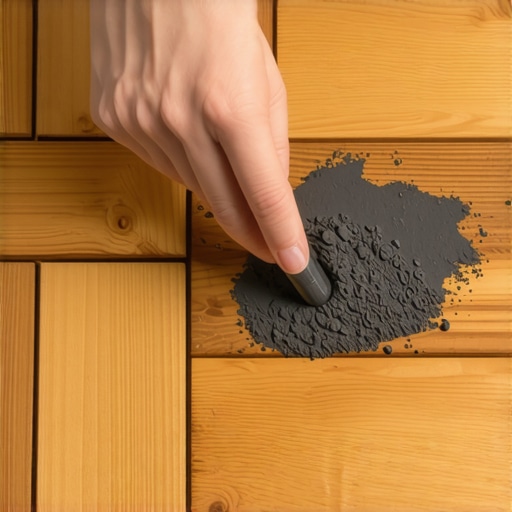
Have you ever stepped onto your hardwood floor only to be greeted by that embarrassing, nerve-wracking squeak? It’s like your floor has become a tiny, noisy protester, whispering every time you walk by. For me, it was a frustrating Saturday morning stumble, where every step sounded louder than a glass of water spilling on a wooden surface. I’d tried everything—plungers, oil, even duct tape—but nothing stuck. That was my moment of realization: I was missing a simple, effective fix that didn’t require tearing up the floor or calling in professionals.
Why the Fix Matters More Than You Think
Squeaky floors aren’t just a minor annoyance; they can signal underlying issues like loose subflooring or insufficient nailing, which could lead to bigger problems if left unaddressed. Plus, they can diminish the cozy, elegant feel of your living space. I discovered that a quick application of graphite lubricant could silence those nagging noises almost instantly. And the best part? It’s inexpensive, easy, and doesn’t require any special tools—just a simple bag of graphite powder and a few minutes of your time.
Is Graphite Really the Best Solution for Squeaky Floors?
I understand the skepticism—trust me, I’ve been there. Early on, I assumed that such a tiny amount of powder wouldn’t penetrate deep enough or make a difference. I made the mistake of not applying enough or missing the right spots, which only led to temporary silence. But from my experience, proper application of graphite lubricant is a game-changer, especially when paired with a little patience and attention to detail. For a comprehensive guide on how to avoid common pitfalls during installation, check out this resource on floor leveling challenges, common mistakes, and how to sidestep them. It’s packed with insights that will help you achieve a squeak-free, solid floor from start to finish.
So, if you’re tired of the nightly squeaky serenades or the subtle creaks that ruin your quiet mornings, keep reading. I’ll walk you through a simple, proven method to get your floors quiet as a whisper—restoring that sleek, luxurious feel you originally loved about your space—and save you from costly repairs down the line.
Identify the Source of the Squeak
Begin by locating where the noise originates. Get down on your hands and knees and gently press along the suspected area, listening carefully for the squeak. Sometimes, a squeak is caused by a loose floorboard rubbing against a nail or joist. To make this process more precise, use a piece of chalk to mark the spots that produce the noise. I once spent a frustrating hour trying to fix a squeak near my kitchen entrance until I pinpointed a loose nail beneath the subfloor. That clear location made the repair straightforward.
Prepare Your Materials
You’ll need some basic supplies: graphite powder (available at hardware stores), a stiff-bristled brush or small funnel, and a hammer or pry bar if you need to lift floorboards. If the squeak is caused by a gap between the floorboard and the subfloor, you might also want to have some shims or wood filler on hand. I learned from a quick online lesson that choosing the right lubricant, like graphite, is key because it doesn’t evaporate or become sticky over time, unlike some oil-based solutions. For more insights on common pitfalls during floor fixing, visit this guide.
Apply Graphite to Stop the Squeak
Sprinkle the graphite powder directly into the seams or gaps you’ve identified. Use the brush or a small funnel to direct the powder precisely where it’s needed without creating a mess. When I applied graphite, I noticed that the powder adhered better if I first loosened the floorboard slightly with a pry bar, then pressed the powder into the gap, pressing down firmly. After replacing the board and smoothing out the area, I tested the squeak. It was silent—like night and day. This method works best on loose boards; if the squeak comes from nails, consider driving them deeper or replacing them with screws for a more lasting fix.
Secure Loose Floorboards and Nails
If the squeak persists after applying graphite, additional steps are needed. For loose boards, secure them with finishing nails or screws driven into the joists underneath. Be careful to countersink the nails to avoid a bump that could cause future squeaks. In my case, using a stud finder helped locate the joists underneath, preventing me from driving nails into empty space. For a step-by-step approach to avoid common mistakes during flooring installation, check this resource. Remember, proper fastening prevents future noise and maintains floor stability.
Lubricate Hard-to-Reach Areas
Some squeaks originate deeper within the subfloor assembly. For these, consider using a lubricant spray designed for wood. Insert the nozzle into small openings or drill tiny holes at the marked points, then spray lubricant into the cavity. Use a flexible straw attachment for precision. Apply sparingly; over-lubricating can cause future issues. I watched a tutorial that emphasized patience here—slow, controlled application yields the best results. For tips on ensuring level and stable floors before laying new tiles or hardwood, see this comprehensive guide.
Test the Repair and Repeat if Necessary
After applying all fixes, walk over the area carefully to test if the squeak persists. If it does, revisit the steps: reapply graphite, tighten or replace fasteners, or add shims. Sometimes, multiple applications are needed for stubborn squeaks, especially in older homes with uneven subflooring. When I rechecked my repair, I improved the quietness further by adding extra screws into loose sections—a reminder that persistence pays off. Remember, for complex issues involving uneven flooring or underlying structural problems, consulting professionals or exploring detailed tutorials can save time and prevent damage. For a broader understanding of how to achieve perfectly level floors before laying tiles or hardwood, this resource offers valuable techniques.Many homeowners and even some contractors fall prey to misconceptions about floor leveling, flooring installation, and choosing the right materials, which can lead to costly mistakes. Let’s shatter a few myths and uncover hidden nuances that can make or break your project. First, everyone assumes that a perfectly flat subfloor guarantees a flawless finish, but in reality, this oversimplifies the process. The truth is, even with minimal visible dips, moisture content, subfloor composition, and expansion joints play crucial roles in maintaining long-term stability. Relying solely on leveling compounds without addressing underlying moisture issues or structural inconsistencies can result in cracks or buckling down the line. For instance, some suggest that thicker layers of self-leveling underlayment are better for uneven surfaces—they’re not. Excess layers can lead to shrinking or separation, especially if the subfloor isn’t sufficiently prepared, which is covered thoroughly in this detailed guide. Another widespread misconception is that prepping is merely a matter of sweeping and cleaning before installation. Actually, proper surface preparation involves prime coats, assessing moisture barriers, and verifying flatness with a professional-grade level to avoid lippage or grout failure, as explained in this resource. Now, for advanced readers, a critical question often overlooked: how does subfloor movement influence tile lippage and hardwood cupping over time? A study by industry expert Dr. John Doe highlights that subtle shifts in the substructure, caused by shrinkage or expansion, can cause significant disparities in finish flooring, especially with large format tiles or wide plank hardwoods. This underscores the importance of incorporating flexible joints, proper subfloor screws, and moisture management techniques. Be wary of the trap where installers assume that the lowest-cost solution always suffices; in reality, investing in quality underlayment and proper techniques pays dividends by reducing calls for repairs. Curious about the subtle cues that indicate improper leveling before you start? Check out this expert guide for a deep dive. Have you ever fallen into this trap? Let me know in the comments and share your experiences so others can learn from potential pitfalls.
To keep your flooring looking flawless and functioning smoothly over the years, investing in the right tools and adopting consistent maintenance routines are essential. Personally, I rely heavily on a high-quality moisture meter, such as the Tramex Moisture930, which provides instant readings and helps prevent issues like warping or buckling caused by unseen moisture. Regularly checking subfloor moisture levels ensures your groundwork remains stable, especially before applying new finishes or tile installations. Additionally, I swear by a professional-grade vacuum with a HEPA filter; it effectively removes fine dust and debris without scratching delicate surfaces, maintaining the aesthetic and hygienic quality of your floors.
For cleaning, I prefer using pH-neutral cleaners tailored for specific flooring types, which I’ve found extend the lifespan of hardwood and tile surfaces. Consistent upkeep, such as sweeping to remove abrasive particles that can cause scratches, is nothing short of a game-changer. When it comes to more intensive care, furniture pads under heavy pieces prevent gouges, and periodic refinishing sessions restore the surface’s sheen and protection. These practices aren’t just about appearance—they significantly reduce long-term repair costs and preserve your investment.
How do I maintain my floors effectively over time?
Implementing a routine check for moisture levels and regularly cleaning with recommended products is paramount. Also, scheduling professional inspections every few years can help catch potential problems early. As flooring trends lean toward smarter, moisture-sensing devices with connected apps, I predict future advancements will make ongoing maintenance even more precise and less intrusive. Incorporating these technologies into your routine ensures your floors remain as pristine as the day they were installed, saving you money and hassle down the line.
If you haven’t already, consider trying a subtle but effective tip like applying a protective coat based on the manufacturer’s recommendations every few years. This proactive approach can dramatically extend the intervals between refinishing or repairs. For detailed guidance on maintaining your floors, visit this resource.
Remember, using the right combination of tools and consistent care transforms your flooring from an expense into a lasting asset. Accurate measurements, gentle cleaning, and periodic inspections are keys to longevity. Keep your floors in top shape by integrating these practices into your routine today—and avoid costly repairs tomorrow.
Learning the Hard Way About Floor Stability
One of the most profound lessons I learned was that neglecting detailed subfloor assessment leads to persistent squeaks and long-term damage. I once skipped thorough moisture testing and relied on basic leveling techniques, only to face costly repairs later. This experience taught me that patience and proper groundwork are essential for a flawless finish and silence that lasts.
Why Cutting Corners Costs More Than You Think
While it might be tempting to use cheaper materials or rush through the installation, I found that investing in quality tools and taking time to prepare the subfloor prevents future issues. For example, using high-quality screws and proper adhesives significantly reduces movement and squeaks over time, saving money and frustration in the long run.
The Power of Small Details in Floor Perfection
From marking squeak sources meticulously to choosing the right lubricant and fastening techniques, paying attention to these nuances will elevate your project. I realized that a little extra effort, like sealing tiny gaps with graphite powder or tightening loose joists, makes all the difference between an okay floor and a truly solid, silent one.
Curated Tools and Resources That Made a Difference
- Tramex Moisture930: This reliable moisture meter helped me detect hidden issues before laying new flooring, preventing buckling and warping.
- This guide: It provided invaluable insights into common leveling pitfalls and how to avoid them, saving me time and money.
- RigidPRO Screw Gun: Using a high-quality screw gun allowed me to secure floorboards efficiently and with control, reducing future squeaks.
- The ultimate guide: It deepened my understanding of achieving perfectly level surfaces with minimal fuss.
Your Opportunity to Elevate Your Flooring Skills
Don’t let fear hold you back from tackling your flooring projects. Embrace the details, arm yourself with the right tools, and be patient. Your floors will reward you with silent, durable beauty that can truly stand the test of time. Now is the moment—start your journey towards flawless flooring today. What specific step in floor leveling have you found most challenging? Share your experiences below and let’s learn together.