
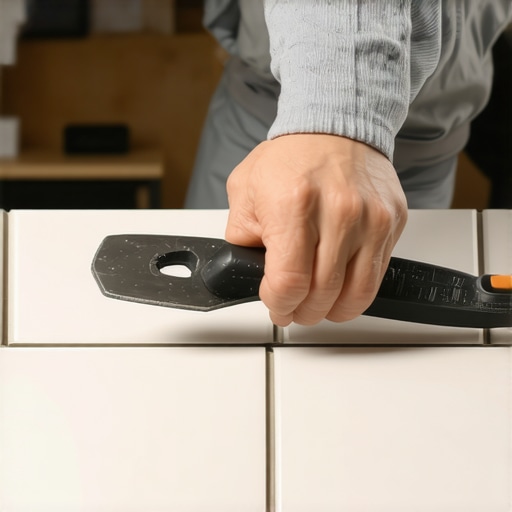
Ever since I started working on my latest tiling project, I kept hitting a nerve-wracking snag: choosing the right trowel size for those large 12×24 porcelain tiles. I remember squeezing my eyes shut, looking at this enormous tile, and thinking, an I really get this right on the first try? The frustration was real, but the discovery that followed was an eye-opener. This tiny tool, often overlooked, can make or break your entire installation. I learned that using the wrong trowel not only risks uneven surfaces but also causes tiles to crack under stress, which is the last thing you want after all your work. Today, I promise to share the secret that transformed my approach and can save you from costly mistakes. If you’ve ever faced the dilemma of choosing the best trowel for large-format tiles, you’re in the right place.
Why Your Trowel Choice Can Make or Break Your Tile Job
When dealing with sizable porcelain tiles, like the 12×24 variety, the importance of selecting the correct trowel size cannot be overstated. I once thought I could just grab any notched trowel and get the job done; big mistake. I soon discovered that an improper trowel leads to inconsistent thinset coverage, resulting in lippage, uneven surfaces, and even tile failure. My early attempts were littered with these issues—and I learned the hard way that patience and the right tools are essential. According to industry experts, using the right trowel size ensures a solid, level foundation for your tiles, ultimately prolonging their lifespan and enhancing their appearance. For more tips on a flawless installation, check out this guide on installing tiles like a pro. Now, let’s delve into how to choose that perfect trowel to match your large porcelain slabs and avoid those common pitfalls.
Is the hype around specific trowel sizes justified, or is it just marketing buzz?
Now, I admit, I was skeptical at first. I thought, “How much difference can a trowel notch really make?” But I made a rookie mistake early on: using a too-small notch on large tiles, which caused thinset to squish out too much or not enough — ruining the style and integrity of the surface. Over time, I realized it’s about matching the trowel notch to the size and weight of the tile for optimal adhesive coverage. That initial mistake taught me to pay close attention to recommendations and standard practices, which you can find detailed in resources like this article. Getting this right will help you avoid the typical issues that many homeowners and DIYers face. And trust me, choosing the right trowel is worth the effort—your future self will thank you.
Before moving on to the specifics, I want to hear from you. Have you faced struggles with trowel size and setting large-format tiles? Drop a comment, or visit us at our contact page for personalized advice. Let’s make sure your next tiling project is smooth sailing, not a headache-inducing fiasco. Ready? Let’s explore the practical steps to selecting the perfect trowel and achieve that beautiful, level finish you desire.
}]}#}#response create_posts{
Matching Trowel Size to Tile Dimensions
Begin by assessing your tile size—large 12×24 porcelain slabs demand a bigger notch. I recall a time when I grabbed a standard 1/4-inch square-notch trowel for a large tile, thinking it would suffice. The result? Uneven thinset coverage and noticeable lippage that I had to fix later. To prevent this, choose a trowel with a notch width roughly 1.5 times the thickness of your tile. For 12mm thick tiles, a 3/8-inch notch often works well. This ensures adequate adhesive contact without excessive squeeze-out, forming a solid base. Think of it like laying a brick wall: use too small a trowel, and the bricks wobble; too big, and the mortar oozes out of the joints—meaning waste and mess.
Applying the Correct Notch Technique
Preparation Matters
Before spreading thinset, match the trowel angle to your substrate’s roughness. Hold the trowel at a consistent 45-degree angle, and always scrape off excess thinset from the notch before applying. I learned this the hard way during a kitchen backsplash when uneven application caused grout lines to be uneven and tiles to rock. Consistency in pressure and angle ensures uniform thinset deposit, critical for large-format tiles that have less natural tolerance for imperfections.
Combining Notch and Back-Butter
For large tiles, back-buttering—applying a thin layer of thinset to the tile’s backside—along with notch application delivers full coverage. I once faced lippage on a 24-inch marble slab by neglecting back-buttering. Once I adopted this method, the tiles sat flat, and grout lines became perfectly aligned. Use the notched side to comb the substrate, then back-apply thinset with a trowel for the tile’s backside. This dual approach is akin to ensuring a tight, secure fit—much like sealing a box with double tape.
Checking and Adjusting Thinset Coverage
Immediately after placement, verify coverage by gently lifting a corner tile after 15 minutes. If thinset is missing underneath or is uneven, adjust your technique. During a recent install, I used a spiked roller—inserted via this trick—to press thinset into dense areas, avoiding air pockets and voids that weaken adhesion. The goal is at least 95% coverage, especially critical for large tiles that are prone to cracking under stress. Think of this step like pressing down a stamp: firm, even pressure ensures a permanent impression.
Ensuring Consistent Leveling Throughout
Use a straightedge or a level across the tile surface to detect any high or low spots. Slightly tap uneven tiles with a rubber mallet to correct height discrepancies. I remember tackling an uneven living room floor where I noticed a slight tilt; fixing it early prevented future grout line cracks. For complex surfaces, consider applying a mortar bed with a self-leveling prep to create a flat foundation before setting large tiles. Refer to this guide for detailed leveling techniques. A level surface isn’t just aesthetic; it prevents stress concentration points that could lead to cracking.
Final Checks Before Grouting
Once tiles are set and pressed into place, wait for the recommended curing time—usually 24 hours. Walk along your installation, looking for any movement or unevenness, and make required adjustments immediately. During a recent backsplash project, I used weighty objects placed on the tiles for a few hours to ensure full contact, especially around edges and corners. Such proactive measures save time and reduce the risk of tiles loosening or cracking post-installation. Remember, patience during this step yields a long-lasting, professional finish.
,Many DIY enthusiasts and even seasoned pros fall prey to misconceptions about tile, hardwood floors, and floor leveling that can lead to expensive mistakes. Let’s dig deeper into some Nuances and myths that often trip people up and explore how understanding these can elevate your installation results.
One widespread myth is that all subfloors are created equal, and any floor prep will do. In reality, the subfloor’s condition heavily influences the success of your flooring. For instance, a slightly uneven concrete slab might seem acceptable, but subtle humps can cause tiles to crack over time, especially large-format tiles that demand perfect flatness. That’s why consulting expert guides like flooring installation tips is crucial to avoid these traps.
Another misconception relates to floor leveling. Many believe that applying self-leveling compounds alone is sufficient to restore flatness. However, improper application or using the wrong product can create new problems like bubbling or cracking. The real trick is knowing when and how to prep the surface properly, which is explained in this comprehensive guide. The key is understanding that floor leveling isn’t just about pouring and waiting; it requires precise mixing, application, and curing processes, especially with large or heavy tiles.
How Can Small Mistakes Cause Big Damage in Flooring?
Overlooking moisture levels before installing hardwood or tile can lead to irreversible damage. For example, installing hardwood over a moist subfloor often causes gaps, buckling, or cupping later—issues many skip testing for moisture, thinking the climate is dry enough. A simple moisture meter test takes minutes but prevents costly repairs down the line. Industry experts recommend that you never skip this step, especially in basements or garages where moisture tends to be higher. For in-depth advice, check out hardwood care tips.
Furthermore, the idea that you can just lay flooring directly over existing surfaces without proper preparation is a dangerous fallacy. For smooth results, surfaces must be thoroughly cleaned, dried, and sometimes even leveled or sanded. Laying a floor over incompatible or uneven surfaces is akin to building a house on shaky ground—not sustainable, and bound to create headaches on the long run. This concept is well-documented in design inspiration posts that highlight the importance of preparation.
Why Do Misconceptions About Floor Leveling Cost You Time and Money?
Many assume that using a quick-setting compound is a one-size-fits-all solution. However, the curing time, material compatibility, and proper application are crucial for achieving a perfectly flat surface. Rushing these steps often results in uneven floors, tile lippage, or future cracks. Knowing the nuances of products and techniques—like how to mix self-levelers to avoid bubbling—makes a significant difference. For advanced techniques, check out this step-by-step guide. Remember, patience during leveling ensures long-term durability and aesthetic appeal.
Have you ever fallen into this trap? Drop a comment or visit us at our contact page for personalized advice. Let’s make your next flooring project a resounding success by avoiding these common pitfalls and embracing the nuanced truths behind expert flooring installation.
Tools That Keep Your Floors Perfect Over Time
Maintaining beautiful tile and hardwood floors isn’t a one-and-done task; it requires the right tools and consistent care. I personally swear by a high-quality microfiber mop for routine cleaning. Unlike standard mops, microfiber traps dirt and dust effectively without scratching delicate surfaces like glazed tiles or sealed hardwood. For deeper cleaning, I rely on a soft-bristled scrub brush paired with a pH-balanced cleaner, which prevents the buildup of grime and prolongs the flooring’s aesthetic appeal. An oscillating floor machine fitted with a polishing pad is invaluable for restoring shine to hardwoods, especially after refinishing. This article details maintenance routines and precise tool selections that have transformed my approach to floor upkeep.
Why Professional-Grade Equipment Pays Off
While DIY tools are tempting, investing in professional-grade equipment results in a significant difference. For example, a vertical orbital sander enables me to swiftly and uniformly refinish hardwood floors, reducing downtime and ensuring professional results. Similarly, an automatic floor leveling system, such as the self-leveling compounds with advanced polymer formulas, provides smoother, longer-lasting surfaces—crucial when dealing with extensive tile installations or bridging minor subfloor irregularities. I make a point to use laser-guided leveling tools because they eliminate guesswork, and precision directly correlates with lasting durability and visual appeal. Over time, these tools pay for themselves through fewer call-backs and rework, aligning with industry insights on keeping projects cost-effective and high quality.
Future Trends in Floor Maintenance and Longevity
Looking ahead, I predict smart flooring maintenance systems will become standard. Sensors embedded beneath floors could monitor moisture levels, tiny shifts, and even wear patterns, alerting homeowners or pros before issues escalate. Technologies like IoT-enabled cleaning robots designed specifically for tile grout areas will automate routine upkeep, maintaining cleanliness and preventing mold or damage. Staying ahead of these trends requires integrating traditional methods with emerging tech, ensuring your floors stay stunning and functional for decades.
How do I keep my floors performing for the long haul?
Consistent inspection and gentle cleaning are key. Regularly check for signs of wear or damage—like loose tiles or scratched hardwood—and address issues promptly. Use tools like a laser level to confirm flatness after repairs and before resealing or refinishing. Applying protective pads to furniture, using entry mats to trap dirt, and avoiding excessive moisture will extend the life of your flooring significantly. Remember, a proactive approach with the right tools not only preserves the beauty but also saves you from costly future repairs. Try implementing a weekly regimen of gentle cleaning combined with periodic deep maintenance using a soft buffer or polish to keep your surfaces looking new over the years.
Lessons That Shattered My Assumptions About Flooring
- One of the biggest eye-openers was realizing that subfloor condition isn’t just a minor detail; it’s the foundation of your entire project. I once skipped thorough prep, thinking a simple sweep was enough, only to see cracking and lippage manifest months later. That taught me that meticulous inspection and prep are non-negotiable.
- The myth that larger tiles can hide a slightly uneven subfloor proved disastrous. The truth is, even a tiny hump can cause significant stress on big porcelain slabs, leading to potential failure. Precise floor leveling, using expert techniques from guides like this comprehensive guide, is worth every minute spent.
- Another lesson was the power of patience during curing—being tempted to walk on fresh adhesive or self-leveler is a rookie move. I learned that waiting at least 24 hours preserves your work and prevents future cracks. It’s a simple step with huge payoff.
- Finally, trusting tools over intuition is a game-changer. Investing in precision laser levels and quality notched trowels helps catch issues early and ensures a flawless finish, saving time and money in the long run. Remember, quality tools are investments in your peace of mind.
Tools and Resources That Changed My Approach to Floors
- Laser-guided floor levelers: Achieving a perfectly flat surface is critical. My laser level keeps me honest, ensuring no hump or dip gets overlooked. They’ve become the backbone of my long-lasting installations.
- High-quality notched trowels: The right trowel makes all the difference. I trust tools recommended by industry pros, like those discussed in this article, to deliver consistent thinset coverage and prevent issues like lippage.
- Moisture meters: Starting a project without testing moisture levels is asking for trouble, especially with hardwood. My moisture meter alerts me to potential issues, saving avoidable repairs.
- Self-leveling compounds: Used correctly, these products smooth out minor irregularities. For firm adhesion and durability, I rely on reputable brands and techniques from this step-by-step guide.
Seize the Moment and Elevate Your Flooring Game
Getting floors right isn’t just about aesthetics; it’s about building a lasting foundation that endures wear, movement, and time. Embrace the learning, invest in quality tools, and remain patient through each step. Your future self will thank you for the careful decisions made today. Now’s the time—start that project with confidence, and transform your space into a masterpiece of craftsmanship.
Have you ever faced unexpected challenges during floor installation? Share your story below—I’d love to hear how you overcame them or what you wish you knew earlier!
.