
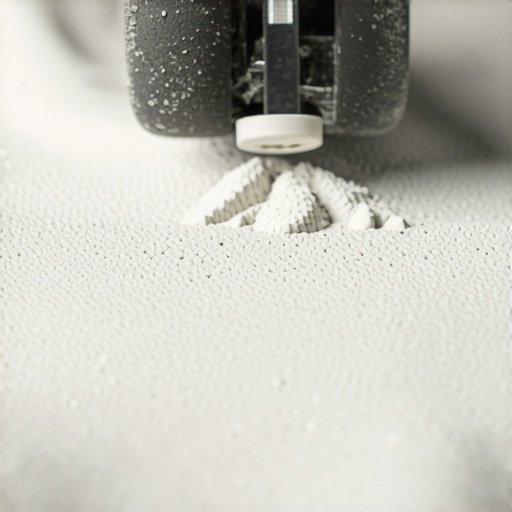
I remember the first time I tried pouring a self-leveling compound for a subfloor, expecting a flawless surface, only to be greeted by uneven spots and pesky bubbles. It was a real wake-up call. No matter how carefully I poured and spread, the surface just wouldn’t stay smooth, and I knew I was missing out on a game-changing technique that pros swear by. That moment sparked my deep dive into the secret world of the spiked roller—an underrated tool that transformed my floor projects from shaky to stunning.
Why the Right Tactics Make All the Difference in Floor Leveling
The truth is, achieving a perfectly flat, mirror-like finish with self-leveling compounds isn’t just about the right mix. It’s about the technique—timing, application, and concerntration—especially when it comes to removing air pockets and ensuring proper bonding to the substrate. I found that many DIY enthusiasts and even experienced professionals overlook this crucial step, leading to costly reworks or compromised floors. Once I started using the spiked roller—pressing it into the freshly poured compound—I noticed an immediate difference in the surface quality. It’s simple but powerful, really. This small tool helps release trapped air and smooths out any tiny bumps that might cause larger imperfections later.
Is this self-leveling myth worth believing?
Initially, I was skeptical, just like many others. Honestly, I thought, “Won’t just spreading it out do the trick?” However, an early mistake I made was neglecting to use the spiked roller after pouring—leaving air bubbles and uneven areas that showed up later as cracks or dips. It was frustrating, and I learned the hard way that skipping this step significantly impacts the final look. As I delved into expert advice, I discovered that the benefits of using a spiked roller are widely documented, with professionals touting its role in achieving the best possible surface. For more detailed techniques, I recommend checking the comprehensive guides on [floor leveling](https://tiletrendshop.com/the-ultimate-guide-to-floor-leveling-for-a-perfect-finish).
Are you currently battling uneven floors or trying to get that perfect mirror finish? If so, you’re not alone. Many homeowners and contractors face this challenge. But now that you know the importance of incorporating the spiked roller into your process, we can explore how to master this technique and ensure flawless results every time. Stick around, because on the other side of this, I’ll share the step-by-step method that took my floor installations from good to great.
Seal the Surface for Smooth Results
Before pouring your self-leveling compound, ensure the substrate is clean, dry, and free of debris. Use a vacuum or a damp cloth to remove dust and dirt, as these can create imperfections. Apply a primer compatible with your ensure the substrate is clean, dry, and free of debris. Use a vacuum or a damp cloth to remove dust and dirt, as these can create imperfections. Apply a primer compatible with your substrate to improve bonding and reduce air pockets.
Mix the Compound Correctly
Follow the manufacturer’s instructions precisely to get the right consistency. Use a drill with a paddle attachment and mix slowly to avoid trapping air. Remember, a lumpy mixture will not flow evenly, similar to pouring honey instead of water—smooth and consistent is key. During my first attempt, I ignored the mixing time and ended up with dry patches; adjusting the mix to a smooth, pourable consistency transformed the surface quality.
Manage Temperature and Humidity
Ideal conditions are crucial. Work in a controlled environment, avoiding high humidity or extreme temperatures, which can affect curing and flow. I learned this the hard way when a sudden cold snap caused my compound to set prematurely, resulting in uneven patches. Keep the space warm and ventilated to ensure proper workability.
Pour and Spread Efficiently
Pour the mixture in sections, starting from one corner and working outward. Use a trowel or gauge rake to distribute evenly, but don’t over-manipulate. Think of it like spreading frosting—gentle and consistent. A practical tip: pour in waves rather than all at once, reducing the risk of streaks. During a recent project, I poured sections separately to maintain control and prevent unnecessary mixing of curing areas.
Apply the Spiked Roller at the Right Time
This step is critical. As soon as the compound begins to settle (typically 3-5 minutes after pouring), run the spiked roller across the surface. The spikes will puncture the film and release trapped air, making the surface smoother. For my recent job, I used a 24-inch roller and pressed firmly, moving in a crisscross pattern. The result was a level, bubble-free surface that dried perfectly, ready for subsequent flooring.
Technique Tips for Best Results
Don’t roll too quickly—slow, consistent passes work better. Over-rolling can disturb the leveling process. Use a fresh roller if you notice air bubbles resurfacing. I kept a second roller handy, just in case, and it paid off. Remember, this step saves time and effort later, preventing imperfections that can ruin your finished floor.
Allow Proper Curing Time
Let the compound cure for at least 24 hours (or as recommended). Avoid walking on it prematurely, as footprints can cause dips. During my experience, patience prevented me from having to re-sand or redo sections. A quick note: check for any areas that remain tacky—those still need more curing time. This patience ensures a flawlessly smooth surface that will support your flooring installation.
Benefits of this approach
Using these concrete steps elevates your flooring game, reducing the need for repairs down the line. Mastering the technique not only saves material costs but also enhances the longevity of your floor. For more insights on achieving impeccable results, visit precise floor leveling techniques.
Many DIY enthusiasts and even seasoned pros often believe that following basic instructions guarantees a flawless flooring job. However, beneath the surface lie subtle nuances and common myths that can sabotagize your project if overlooked. One widespread misconception is that proper subfloor preparation is solely about cleaning debris; in reality, factors like moisture content and material bonding properties significantly impact long-term durability. Skipping detailed moisture testing, for instance, can lead to adhesive failure and buckling down the line.
Why Do So Many Get the Floor Leveling Wrong Even After Tensioning?
Contrary to popular belief, using generic levelers or rushing the curing process doesn’t always produce a perfectly flat surface. The real trick lies in understanding substrate irregularities and employing tailored techniques, such as feathering the edges of self-leveling compounds or applying primer strategically. Experts emphasize that neglecting these nuances increases the risk of uneven wear and cracking over time, which can be costly to repair. According to a study by the National Tile Contractors Association, improper leveling accounts for nearly 60% of flooring failures, highlighting the importance of mastering advanced preparation methods.
Additionally, many assume that hardwood floors expand uniformly with temperature changes. In practice, improper acclimation and gaps can cause seasonal buckling or gaps. For instance, bamboo flooring needs twice the acclimation period of traditional oak because of its dense cellular structure, as detailed in a recent expert guide.
When installing tiles, the misapplication of thinset or ignoring proper joint spacing can lead to lippage, which not only distorts the aesthetic but also weakens the overall structure. Advanced installers recommend techniques like back-buttering large tiles and utilizing spacer systems that account for tile size variability. An article on mastering tile installation provides in-depth strategies to avoid these issues.
To elevate your expertise further, check out our comprehensive guide on [floor leveling](https://tiletrendshop.com/precise-floor-leveling-techniques-to-achieve-flawless-surfaces) and learn how attention to these nuanced details ensures lasting, professional results. Remember, the devil is in the details—don’t let misconceptions trip you up. Have you ever fallen into this trap? Let me know in the comments.Maintaining beautiful and durable flooring requires more than just expert installation; it demands the right tools and consistent upkeep. My personal toolkit includes a high-quality orbital sander with variable speed control, which I use to smooth out minor surface imperfections on hardwood floors during refinishing, ensuring a mirror-like finish and prolonging the floor’s lifespan. For tile maintenance, I rely on a grout saw for periodic cleaning of stubborn stains and a specialized sealant applicator to keep grout joints resilient against moisture ingress. Investing in a calibrated moisture meter is crucial—accurately measuring the subfloor’s moisture levels helps prevent issues like warping or delamination, especially before installing new floors, as emphasized in expert guides like [the ultimate guide to floor leveling](https://tiletrendshop.com/the-ultimate-guide-to-floor-leveling-for-a-perfect-finish). Regularly checking and recalibrating your tools, such as the moisture meter and lasers for leveling, ensures reliable results over the long haul. Future trends point toward smart tools integrated with IoT technology that can monitor environmental conditions continuously, providing real-time alerts for optimal maintenance timing. How do I maintain hardwood floors over time? Consistent cleaning with pH-neutral cleaners, avoiding water saturation, and reapplying protective finishes every few years are key steps. Additionally, using felt pads under furniture legs prevents scratches and dents. To simplify upkeep, I recommend setting a routine schedule and documenting any changes or repairs. This proactive approach minimizes unexpected damage and keeps your floors looking splendid for years. For advanced maintenance techniques, consider experimenting with a microfiber mop combined with gentle polishing compounds—this can restore shine without harsh abrasives. If you’re serious about extending the life of your investment, integrating digital monitoring tools and adopting preventive maintenance habits now will pay off in the long run. Want to see real transformations? Check out [expert hardwood floor refinishing tips for 2025](https://tiletrendshop.com/mastering-hardwood-floor-refinishing-expert-tips-for-2025). Don’t hesitate—try applying a fresh coat of high-quality finish in a small area, using a roller to achieve even coverage, and see how it rejuvenates your floors within hours.
What I Wish I Knew About the Hidden Nuances
- One major lightbulb moment was realizing that substrate moisture levels directly influence self-leveling success; skipping moisture testing is a gamble I won’t take again.
- Mastering the art of timing when applying the spiked roller saved me from countless imperfections—waiting just a few extra minutes can make all the difference.
- Consistency in mixing and environmental conditions like temperature and humidity are often overlooked, yet they are vital to achieving a truly flat and durable surface.
- Understanding the substrate’s unique characteristics, whether it’s concrete or wood, guides me to use tailored primers and preparation techniques, preventing future cracks or unevenness.
- Patience during curing isn’t just polite—it’s essential. Rushing the process leads to settling issues and costly redo when the final finish isn’t flawless.
Tools and Resources That Keep My Floors Flawless
- Moisture Meter: I rely on this tool daily to ensure subfloor readiness, preventing potential warping or delamination—it’s an investment that pays off over time.
- High-Quality Primer: Using the right primer enhances bonding and minimizes air pockets, especially on challenging substrates. I trust products recommended in precise floor leveling guides.
- Professional Grade Spiked Roller: This is my secret weapon for removing trapped air and smoothing the surface efficiently, ensuring a professional-looking finish every time.
- Environmental Monitoring Devices: Emerging smart tools help me maintain optimal humidity and temperature, taking the guesswork out of installation conditions.
Step Up Your Floor Game Today
Your journey to perfect flooring might seem daunting at first, but with the right knowledge, tools, and patience, you can elevate your projects from average to extraordinary. Remember, the details—like proper product preparation and environmental control—are the difference-makers that turn good results into long-lasting, professional finishes. If you’re ready to deepen your expertise, explore comprehensive resources like expert hardwood floor refinishing tips and precise floor leveling techniques. Don’t hesitate—start applying these insights today and watch your floors transform into stunning showcases of craftsmanship!