
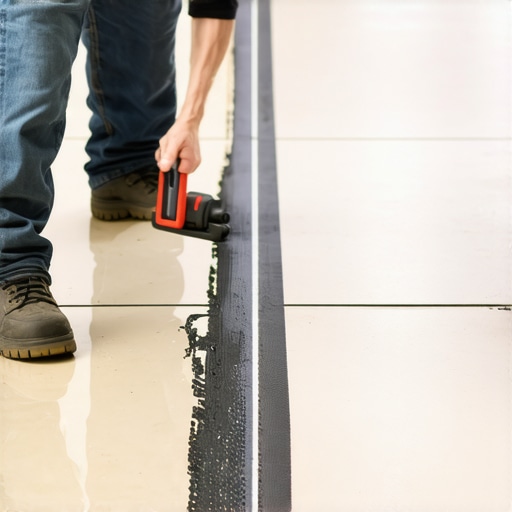
Ever set out to tile a long hallway, only to end up with crooked, uneven rows that make your space look amateurish? I’ve been there, standing at one end of my freshly tiled corridor, eyes squinting at the misaligned grout lines. The frustration? Real. The lightbulb moment? Even more so. It dawned on me that a simple chalk line hack could have saved me hours of redo—since then, my hallway projects have been flawless.
The Secret Weapon for Straight Tiles: The Chalk Line Hack
When I first started installing tiles, I thought I could eyeball the first row and proceed from there. Big mistake. Achieving those flawlessly straight lines is tougher than it looks—until I discovered the power of a well-placed chalk line. It’s like having an invisible guide that keeps your tiles in perfect alignment from start to finish.
But why is this such a game-changer? Simple: it eliminates the guesswork. No more measuring and re-measuring, no more second-guessing whether your tiles are truly straight. And trust me, once you see how reliably this technique works, you’ll wonder how you ever tiled without it.
Using a chalk line ensures your grout lines are consistent, which not only looks professional but prevents those annoying shifting problems that happen when tiles aren’t aligned properly. Plus, it’s cost-effective and straightforward—no fancy tools required. Just a chalk, a level, and a bit of patience.
If you’re tired of crooked tiles ruining your space, stick around. We’re about to get into the nitty-gritty of how to master this essential technique. Whether you’re tackling a small bathroom or a sprawling hallway, the right approach makes all the difference.
But before we dive into the step-by-step process, I want to address a common doubt that many DIYers have: is this method really worth the effort? Absolutely. And I’ll tell you why, in the next section.
Establish Your Baseline First
Start by measuring the width of your tiles and marking the center point of the hallway using a tape measure. Snap a chalk line across the entire length, aligning it with the center points to create a reference axis. This line acts as your guide, similar to laying down the backbone of a spine, ensuring all subsequent rows will stay aligned.
Create Precise Reference Lines
Using a level and a straightedge, extend perpendicular lines from the baseline at both ends of the hallway. These lines mark the starting edge and the reference point for your first row. Think of it as drawing the walls before hanging a picture—everyone needs an anchor point to stay true.
Apply Chalk Carefully for Clear Guidelines
Using a chalk daher or chalk box, carefully draw a line along the foundation line. This will be your visual guide for setting your first row of tiles. Remember, a neat, bold line prevents errors during placement, much like a fence marking the boundaries of a property—no stray movements allowed.
Set Your First Tile Row Tightly
Lay the first row of tiles along the chalk line, pressing firmly to embed the adhesive. Use tile spacers to create consistent grout lines. If your tiles are large, back-butter the tiles—applying thinset to the back to ensure full contact and prevent lippage. Think of it as buttering toast evenly; the smoother the surface, the better the final result.
Double-Check Your Progress Frequently
As you proceed, periodically lay a straightedge across your tiles and check alignment with the chalk line. Use a level to verify that rows stay flat and even. During a recent project in my hallway, I caught a slight bow in the row early, preventing a crooked finish. This routine check is vital—like steering a bike, small adjustments keep you on course.
Address Mistakes Before They Compound
If you notice your tiles drifting, gently lift the offending tiles and realign them before the adhesive sets. It’s easier to fix issues early, similar to correcting a recipe before it’s baked. The trick is to work swiftly but carefully, ensuring each tile sits perfectly aligned.
Remove Chalk Residue Properly
Once your tiles are set and grouted, clean off the chalk lines using a damp sponge. Avoid harsh cleaners which can erode grout. This step reveals your precise, clean lines—much like unveiling a masterpiece. Proper cleanup ensures your hard work looks polished and professional.
Keep Your Lines Straight and Your Floors Flawless
Mastering the chalk line technique transforms a stressful tiling project into a manageable craft. It’s simple, effective, and largely foolproof—once you get the hang of it. Just remember to measure carefully, draw confidently, lay your tiles with precision, and check your work often. This process turns an ordinary space into something extraordinary, with visually appealing, perfectly aligned grout lines that elevate your entire design.
Many DIY enthusiasts and even some professionals often buy into oversimplified ideas about flooring projects, leading to costly mistakes and subpar results. Let’s challenge some widespread misconceptions and reveal the subtle nuances that can elevate your flooring game. For instance, the belief that choosing inexpensive materials automatically saves money is false—poor-quality substrates or adhesives can cause long-term failures, which is why understanding the importance of proper surface preparation, like floor leveling, is crucial. When it comes to hardwood floors, many assume that acclimation is just a quick setup phase; however, as highlighted in expert guides, proper acclimation involves understanding wood species, humidity levels, and even climate shifts to prevent future buckling or gaps.
Stop Falling for These Floor Installation Myths
One prevalent myth is that all self-leveling compounds behave the same, but their chemical makeup varies significantly, affecting adhesion and durability. The key is to select the right product based on your subfloor and the flooring type, which underscores the importance of detailed knowledge—something professional installers master through experience and continuous learning. An overlooked nuance is the impact of subfloor imperfections—tiny humps or dips can cause visible lippage or creaking. That’s why advanced techniques, like the use of a flashlight to detect surface irregularities or employing proper trowel notch sizes, make a difference. For those willing to go a step further, mastering these intricacies leads to a flawless finish, far superior to the “good enough” approach many rely on. As for tile installations, the misconception that grout lines aren’t visible once sealed undermines the effort needed for precision—meticulous alignment and consistent joint widths are essential, especially when working with large format tiles. Check out professional tips to avoid these pitfalls and achieve professional-quality results.
What do experts know that amateurs often overlook in flooring installation?
The subtle factors—like the effect of humidity changes on wood expansion or the importance of proper expansion gaps—are what separate a durable, attractive floor from a temporary fix. According to a study on moisture’s role in flooring longevity, unnoticed shifts can lead to significant warping or cracking over time, emphasizing the need for thorough testing and preparation. So, before you start your next project, familiarize yourself with the complexities behind each step. For in-depth insight, reviewing guides on floor leveling or best practices for tile installation can be transformative. Remember, the devil is in the details, and mastering these can save you headaches down the line. **Have you ever fallen into this trap? Let me know in the comments.** For more expert tips, visit our comprehensive guides to ensure your flooring project turns out flawlessly.
Once you’ve completed your flooring installation, maintaining its pristine condition requires the right tools and a consistent care routine. Personally, I swear by a high-quality microfiber mop paired with a pH-balanced cleaner, such as Bona Hardwood Floor Cleaner, which effectively removes dust and dirt without damaging the finish. This gentle approach prevents scratches and preserves the sheen, extending the floor’s lifespan. Additionally, investing in a soft-bristled broom helps me tackle daily debris without abrasive contact, ensuring the surface remains smooth and unmarred over time.
To monitor the health of your floors, a moisture meter like the Wagner Meters Orion® 920 ensures the subfloor isn’t trapped with excess moisture, which can cause warping or mold. Regular checks around problem spots—near sinks or in basements—can catch issues early. When it’s time to handle more significant maintenance, such as refinishing hardwood or addressing unevenness, tools like orbital sanders with fine-grit sanding screens make the process manageable, provided you follow proper procedures outlined in our floor leveling guide.
How do I keep my floors looking great over the years?
Long-term results hinge on routine cleaning and protective measures. Using felt pads under furniture, for example, prevents scratches when moving pieces. Additionally, applying a fresh coat of finishing oil or polyurethane every few years can revitalize the surface. If you notice scratches or dullness, consider refinishing techniques that involve spot sanding, which I recommend practicing on a hidden area first—I’ve learned that patience pays off in achieving a seamless result. For hardwood floors, following expert advice from professional refinishing tips can help you decide whether to sand or screen the surface, ensuring longevity.
Moreover, utilizing tools like the Spiked Roller, detailed in our self-leveler troubleshooting guide, can improve adhesion and flatness when applying leveling compounds, ensuring your subfloor remains stable for years to come. As trends evolve, I see smart floor sensors becoming more accessible, offering real-time moisture and wear data to facilitate proactive maintenance. Staying ahead of these advancements means investing in quality tools now—like a digital moisture meter—and adopting regular inspection routines. Remember, the key to flooring that lasts is a combination of the right equipment, proper techniques, and consistent care. Give one of these advanced tips a try today, and you’ll be surprised at how much longer your floors will keep their beauty and function.
What I Learned the Hard Way About Tile and Hardwood Floors
One of the most valuable lessons I’ve discovered is that patience and attention to detail can’t be rushed, especially when it comes to flooring projects. Skipping surface preparation, like not leveling the subfloor properly, can lead to issues that aren’t immediately visible but cause long-term problems. My biggest lightbulb moment was realizing that understanding the nuances of each material—be it tile, hardwood, or vinyl—makes all the difference in achieving that flawless finish.
Tools and Resources That Make a Real Difference
Over the years, I’ve come to rely on a few trusted tools and guides. A high-quality moisture meter, for example, is essential for hardwood installations, helping me prevent future warping. The comprehensive floor leveling guide has been my go-to resource for perfecting uneven surfaces. For tile, investing in a professional-grade trowel ensures even thinset application, which is crucial for a flat, professional look. These tools and resources are worth every penny for anyone serious about their flooring projects.
Chasing Perfection Takes a Heartfelt Commitment
The journey toward flawless flooring isn’t just about the technical steps—it’s about cultivating patience, confidence, and a willingness to learn from mistakes. Each project taught me to respect the materials, plan meticulously, and double-check my work often. Remember, it’s not about speed but rather about creating something you can be proud of for years to come. Your dedication today will reflect in your beautiful, lasting floors tomorrow.