
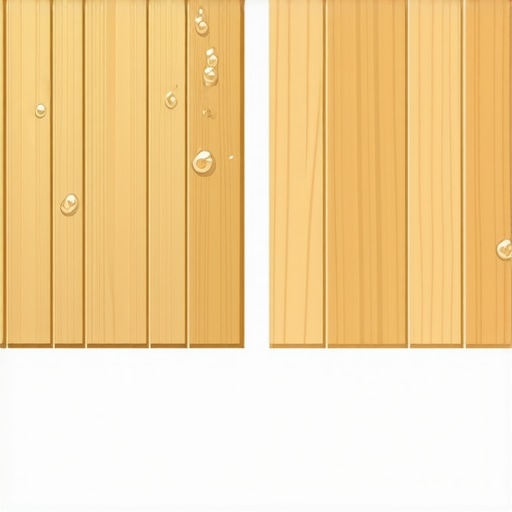
It was a sweltering summer afternoon when I stepped into my living room, only to find my beautiful bamboo flooring warping before my eyes. I had just installed it a few months earlier, excited about its eco-friendliness and sleek look. But now, it looked like a rippling pond, not a polished floor. That lightbulb moment made me realize how tricky humidity can be, especially with bamboo and other engineered woods.
Understanding the Humidity Difference: Why Bamboo Isn’t Always Fit for Every Room
Is Bamboo Flooring Actually Worth the Hype in Humid Climates?
Early on, I made a common mistake—believing that all wood floors behave the same way regardless of environment. I didn’t realize that bamboo, though technically a grass, reacts quite differently to moisture than traditional oak. My experience taught me that bamboo tends to absorb water more rapidly, which causes it to swell more noticeably in humid rooms. This isn’t just my anecdote; studies show that bamboo can expand up to 0.5% in moisture content, making it less stable in high humidity than oak, which has a more consistent reaction (source: Hardwood Information). If you’re considering bamboo for your space, understanding its sensitivity can save you a lot of headache.
Thinking about your current or upcoming flooring project? Have you faced issues with swelling or warping in humid seasons? If so, you’re not alone. Many homeowners dive into bamboo flooring expecting a low-maintenance, tropical vibe, only to realize it needs more care—especially in moist environments.
In today’s guide, I’ll walk you through the reasons why bamboo shows more swelling than oak and how to make informed decisions, from choosing the right type of flooring to proper installation techniques. Ready to stop surprises and start your project with confidence? Let’s get into the details that will help your floors stay beautiful, no matter the weather.
Prepare the Subfloor Thoroughly Before Installing
Start by removing all debris, dust, and old adhesive to ensure a clean surface—this is like preparing a canvas before painting; any dust or debris can cause uneven adhesion. Use a vacuum and a damp cloth to wipe the area, paying special attention to corners and joints. Check for moisture issues using a reliable moisture meter; high moisture levels can lead to warping or buckling later on, especially with materials like bamboo which are moisture-sensitive. If moisture levels are high, address the source before proceeding.
Level the Subfloor for a Smooth Base
Identify High and Low Spots
Lay a long straightedge or a level across the entire floor to spot uneven areas. Mark high and low spots with chalk or painter’s tape. Think of your subfloor as a rolling landscape; the goal is to transform it into a flat, even plain to prevent issues like creaking or uneven tiles. During my last project, I encountered a lumpy section that caused tiles to crack if not addressed. Using a self-leveling compound, I poured and spread it carefully over the uneven spot, following the instructions to avoid bubbles or pooling.
Apply Accurate Floor Leveling Techniques
Mix and pour self-leveling compound according to manufacturer instructions, ensuring consistent viscosity. Use a trowel to spread it evenly, and employ a spiked roller (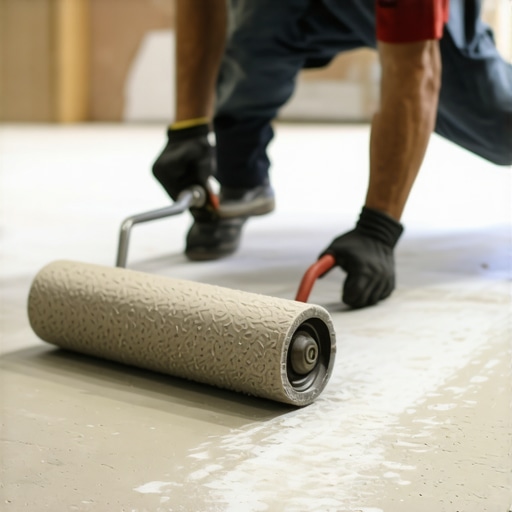 ) to eliminate air bubbles, which can compromise the surface. For larger areas, work systematically in sections to prevent premature setting, much like laying bricks in a wall to maintain straightness. For stubborn bumps or dips, consider shim placements or grinding the higher areas for precision. Consult detailed guides like this comprehensive floor leveling guide for sophisticated methods.
Install Flooring with Precision and Care
Measure and acclimate your flooring before installation to adjust for environmental changes, as bamboo needs twice the acclimation time of oak. Use spacers along walls to allow for expansion gaps; this prevents buckling in humid seasons. When laying planks or tiles, follow a staggered pattern for strength and visual interest—much like a brick wall—avoiding repetitive seams. Secure the flooring properly, whether by floating, glue-down, or nail-down methods, based on manufacturer recommendations. Overlap seams carefully, and use appropriate adhesives or fasteners to reduce movement over time.
Mind the Transitions and Edges
Install transition strips or reducers at doorways and between different flooring types to accommodate expansion and contraction. This is vital for maintaining a professional look and preventing tripping hazards. For example, when transitioning from tile to hardwood, use a metal or wood strip to bridge the height difference seamlessly, which can be achieved with precise measurements and suitable tools, such as a hacksaw or router. Proper planning for these details prolongs the lifespan of your flooring and improves aesthetic appeal.
Final Inspection and Adjustments
After installation, examine the entire surface for loose areas, unevenness, or visible gaps. Walk across the floor to test for squeaks or bounce—these issues often stem from improper subfloor prep or uneven leveling. If needed, use a floor repair kit or additional leveling materials to address minor imperfections. Regular maintenance, including cleaning and avoiding excessive moisture, helps preserve the integrity of your flooring over time.
Many homeowners believe that flooring installation is straightforward—simply lay down the boards and call it a day. However, this oversimplification can lead to costly mistakes and subpar results. One of the most overlooked nuances is the importance of proper acclimation; insufficient time for materials like hardwood or bamboo to adapt can cause future warping or gaps. It’s a misconception that acclimation is optional—professional installers often spend days ensuring optimal moisture balance, which underscores its significance.
Another frequent error is neglecting to verify the subfloor’s flatness before beginning installation. While everyone talks about leveling, many underestimate the criticality of addressing even minor humps or dips. Ihreroor-related issues such as squeaking, buckling, or uneven surface frequently trace back to poor subfloor prep. Using a high-quality self-leveling compound, combined with precise techniques (learn more at floor leveling guide), can prevent these common pitfalls.
Advanced questions: How does the type of adhesive influence the long-term stability of hardwood or tile floors?
Nuances like selecting the right adhesive or fasteners are often relegated to afterthoughts but are, in fact, vital. Different flooring materials and subfloor compositions demand specific adhesives to maintain stability and prevent issues like delamination or squeaking. For instance, using the wrong glue on a concrete slab with high moisture can induce bond failure, as detailed in industry studies. Properly matching materials not only extends your floor’s lifespan but also maintains aesthetic integrity. Don’t forget, diligent preparation includes confirming subfloor moisture levels and choosing products that accommodate environmental conditions, a step that can be your saving grace in avoiding future repairs. Remember, flooring is an investment that requires meticulous attention to detail—skipping these critical steps often results in avoidable repairs and headaches. Have you ever fallen into this trap? Let me know in the comments.Maintaining your flooring over time requires the right tools and methods to ensure durability and aesthetic appeal. One essential instrument I personally rely on is a high-quality moisture meter. I use the [Exactitude Moisture Analyzer](https://tiletrendshop.com/contact-us) because it provides precise readings that help me monitor subfloor conditions before and after installation, preventing issues like warping or buckling. Regularly checking moisture levels—ideally monthly in humid seasons—can catch problems early and save costly repairs. Additionally, a good floor roller is invaluable; I prefer a spiked roller because it helps eliminate air bubbles when applying self-leveling compounds, leading to a smoother surface that resists cracking over time. For polishing and touch-ups, I recommend an orbital sander fitted with fine-grit pads, which I use meticulously to blend repairs seamlessly without damaging the surrounding finish. Looking ahead, I believe automation and smart moisture sensors will become standard, allowing homeowners and professionals to continuously monitor their floors remotely for optimal health.
How do I maintain hardwood and tile floors over time?
Proper cleaning tools are crucial. Using microfiber mops for dust and gentle cleaners helps preserve finishes, while avoiding harsh chemicals extends the life of your floors. It’s also wise to rotate furniture pads regularly; I highlight this because heavy rotational stress can cause uneven wear. For long-term health, schedule bi-annual inspections with professionals who can assess for subtle issues like grout deterioration or heel marks. Remember, the initial investment in quality tools and proactive maintenance strategies pays off by minimizing major repairs and keeping your floors beautiful for years. For expert tips on hardwood care, see [here](https://tiletrendshop.com/hardwood-floor-care-secrets-to-longevity-and-shine). Start by incorporating regular moisture checks with your tools—it’s a simple habit that can prevent big headaches down the line.
Lessons That Changed the Way I Approach Flooring Projects
- Patience with acclimation is everything. Rushing the process ignored the subtle but crucial moisture adjustments, leading to warping down the line. Taking time to let bamboo and other materials breathe has saved me countless headaches.
- Always double-check subfloor flatness before choosing your flooring. A minor bump can snowball into major problems, whether squeaking or uneven surfaces. My experience with self-leveling compounds taught me that precise preparation is the backbone of durability.
- Invest in quality tools and moisture monitors. An inexpensive moisture meter might save a floor’s life—and your wallet in the long run. Monitoring moisture levels regularly helps catch issues early and ensures a perfect installation.
- Don’t underestimate the power of professional advice. Even seasoned DIYers benefit from expert insights—like those found in comprehensive guides or trusted sources—making the difference between a good and a great finish.
- Remember, a well-executed floor isn’t just about the materials but also about the environment and technique. It’s a layered process that rewards attention to detail and patience.
Tools and Resources That Guided My Flooring Journey
- My trusted moisture meter, the Exactitude Moisture Analyzer, provides precise readings crucial for avoiding warping. It’s worth every penny for the peace of mind it offers.
- The floor leveling guide helped me understand the intricacies of achieving a smooth surface, saving hours of guesswork and costly corrections.
- Professional-grade tools like spiked rollers and high-quality trowels made all the difference in ensuring even layers and bubble-free compounds. Trusted brands I trust have consistently delivered reliable results.
- Educational content and step-by-step tutorials from industry experts keep my techniques sharp and up to date, ensuring that every project I undertake is future-proof.
You’re Ready to Elevate Your Flooring Game
Armed with lessons learned, trusted tools, and a clear plan, you’re now positioned to transform your space with confidence. Remember, great floors are not just about good materials—they’re about the care and precision you put into each step. Embrace the process, stay patient, and your efforts will shine through in a beautifully durable home.
Have you ever faced a challenge during your flooring installation that taught you an unexpected lesson? Share your experience below—I’d love to hear how you turned it into a success story!