
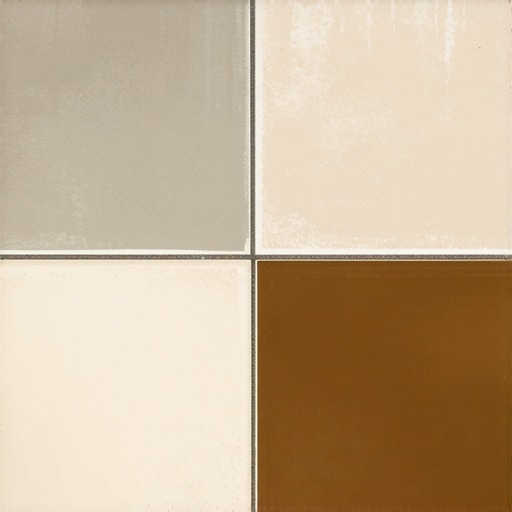
Ever spent hours tileing a beautiful backsplash or bathroom floor, only to watch your freshly grouted work turn into a two-tone eyesore? I remember one project where I thought I had everything perfectly planned — until I saw the drying grout developing an unexpected split personality. That light, uniform color I expected? Split into shades that looked like a failed experiment. It was frustrating, confusing, and honestly, a little disheartening.
The First Time I Faced Color Discrepancies in Grout
Back then, I was convinced I’d messed up something vital. Maybe I didn’t mix the grout right or skipped a step. But after some research and experimenting, I realized this isn’t just my problem — it’s incredibly common among DIYers and pros alike. The surprising part? The grout’s color variation often isn’t a sign of poor quality but a result of simple, overlooked errors or environmental factors. It’s easy to feel overwhelmed or even consider tearing out your work, but I promise — fixing this is usually straightforward once you understand what’s happening behind the scenes.
What Will We Cover Today
In this guide, I’ll walk you through the common causes of grout color inconsistencies, share personal tips to prevent them, and teach you how to fix that uneven look effectively. Whether you’re dealing with splotchy patches or darker streaks, I’ve got you covered. Plus, I’ll point you to essential resources, like why seasonal changes affect your flooring, that can help you avoid similar issues in the future. If you’ve faced the frustration of mismatched grout, you’re not alone — and there’s a lot we can do to get your project looking flawless.
Is Grout Color Variation Actually Worth Worrying Over?
At first, I thought those differences meant I’d failed completely. But in reality, these variations often mean you haven’t done anything wrong! Early in my career, I made the mistake of rushing the mixing process, which led to uneven color absorption. Trust me, a common misstep, but one easily corrected. To truly master the craft, it’s essential to understand the factors that influence grout drying, so your next project turns out picture-perfect from the start. Ready to dive in and uncover the secrets to perfect grout color consistency? Let’s get started and turn your grouting into an art, not a gamble.
Prep Your Surface to Prevent Color Discrepancies
Before applying grout, ensure your surface is thoroughly cleaned and free of dust, grease, or residual debris. I once skipped cleaning a tile surface and ended up with splotchy grout patches. Using a stiff-bristled brush and a mild cleaner, I scrubbed the surface until it was spotless, which significantly improved the grout’s absorption and coloring consistency. For stubborn residues, a mixture of vinegar and water can help level the playing field.
Mix Grout Correctly and Consistently
Grout should be mixed to a lump-free, creamy consistency, similar to smooth peanut butter. During my first few DIY attempts, I hurried the mixing process, leading to uneven color curing. I now use a paddle mixer attached to a drill, mixing in small batches, and always follow the manufacturer’s instructions precisely. This meticulous approach ensures uniform pigment distribution and minimizes color variation.
Control Environmental Conditions During Application and Drying
Temperature and humidity can dramatically influence grout drying and, consequently, its final color. High moisture levels or drafts can cause inconsistent hydration, leading to mottling. I once installed grout during a humid summer day and watched the color change unpredictably. To avoid this, I work in a controlled environment — using fans or dehumidifiers as needed — and avoid applying grout in extreme weather conditions. For detailed guidance, check out the [“ultimate guide to floor leveling”](https://tiletrendshop.com/precise-floor-leveling-techniques-to-achieve-flawless-surfaces) to ensure your base is perfect before grouting.
Apply Grout in Manageable Sections
Divide large areas into smaller sections to maintain control over spreading and cleaning. I once attempted to grout an entire bathroom at once, resulting in uneven color absorption because I couldn’t clean excess grout fast enough. Instead, I worked on one quadrant at a time, applying and cleaning before moving on. Use a rubber float at a 45-degree angle to press grout into joints thoroughly, ensuring even coverage. Proper tool technique makes a noticeable difference in achieving uniformity.
Work Quickly and Remove Excess Promptly
Timing is crucial. Allowing grout to set too long without cleaning results in residual grout haze and uneven coloration. I learned this lesson the hard way when I left grout undisturbed for over 20 minutes. Using a damp sponge, I removed excess grout in gentle, overlapping strokes, cleaning the sponge frequently. Regularly washing your sponge maintains a clean surface, preventing dirt from dragging across your tiles and causing streaks. For detailed removal techniques, visit [“tile installation pointers”](https://tiletrendshop.com/tile-installation-pointers-that-save-time-and-money).
Seal the Grout to Lock in the Color
Once your grout has fully cured (usually after 48-72 hours), applying a penetrating sealer enhances color consistency and prevents staining. I apply sealer with a small brush or roller, ensuring complete coverage. This final step not only preserves your work but also stiffens the grout, reducing absorption of dirt and moisture that could lead to discoloration over time. For the best results, follow the instructions specific to your sealer product, and consider periodic resealing to maintain the uniform appearance.
Practice and Patience: The Path to Perfect Finish
Achieving evenly colored grout is both an art and a science. My early projects often resulted in uneven patches, but consistent practices and patience transformed my results. Remember, each step — from surface prep to sealing — plays a vital role. With time, these techniques will become second nature, turning your tiling projects into showcase pieces that stand the test of time.
 When it comes to flooring, many DIY enthusiasts and even seasoned professionals fall into classic traps that undermine the longevity and appearance of their work. Contrary to popular belief, the most common misconceptions are not always about choosing the right materials but often about understanding the nuanced process behind proper installation. Let’s explore these overlooked pitfalls and how mastering them can elevate your craft beyond basic expectations.
Is Slipping Up on Subfloor Preparation the Biggest Mistake?
Many assume that choosing quality tiles or hardwoods is enough, but neglecting the subfloor’s condition can sabotage any project. Moisture content, surface flatness, and structural stability are critical. For example, if the subfloor is uneven, it may cause tile lippage or hardwood gaps over time. Professionals know that investing time in thorough **floor leveling** — as detailed in https://tiletrendshop.com/ultimate-guide-to-floor-leveling-for-a-perfect-finish — prevents future cracking and buckling. Overlooking this step is a trap many fall into, yet it’s foundational for a flawless finish.
Another common misstep involves the way materials are acclimated. Buyers often skip humidity adjustments, assuming wood or tile will adapt naturally. However, dramatic environmental shifts during or after installation can lead to warping or delamination. As highlighted in https://tiletrendshop.com/mastering-hardwood-floor-refinishing-expert-tips-for-2025, proper acclimation tailored to your climate is essential for durability.
One misconception that still persists is the belief that all adhesives and leveling compounds perform equally. In reality, choosing the wrong product for your specific substrate or environmental conditions can spell disaster. For instance, using a standard thinset on a moisture-prone concrete slab without a bonding agent can result in tile looseness or popping over time. Experts emphasize consulting manufacturer guidelines and environmental factors, as discussed in https://tiletrendshop.com/flooring-installation-mistakes-to-avoid-for-lasting-results.
Beware of the trap where new installers underestimate the importance of tool selection and application technique. Improper trowel sizes or inconsistent mixing of leveling compounds can create uneven surfaces or weaken the bond. For high-stakes projects, mastering tools and techniques — which you can refine via https://tiletrendshop.com/installing-tiles-like-a-pro-step-by-step-strategies-for-2025 — makes all the difference.
Now, some skeptics might wonder whether these nuances are worth the extra effort. The answer is yes, especially when considering the long-term performance and aesthetic quality of your flooring. Cutting corners on prep or technique may save time initially, but it often results in costly repairs or replacements. As research indicates, attention to detail significantly improves finish quality and lifespan (see https://tiletrendshop.com/why-your-hardwood-gaps-every-winter-and-the-fix-that-works).
Have you ever fallen into this trap? Let me know in the comments. Remember, understanding the hidden complexities of flooring installation isn’t just for professionals — it’s a craft everyone can optimize with knowledge and care. Elevate your projects by honing these nuances, and watch your floors stand the test of time and style.
Keeping Your Floor in Prime Condition
Proper maintenance is crucial to preserve the beauty and functionality of your hardwood and tile flooring over time. Regular inspection and periodic upgrades ensure your investment continues to impress. One of the most effective ways to maintain quality is committing to routine cleaning with appropriate tools. For hardwood floors, I swear by using a microfiber mop combined with a vacuum designed for hard surfaces. This combo gently lifts dust and debris without scratching the finish, as highlighted in hardwood floor care secrets.
Essential Equipment for Effective Upkeep
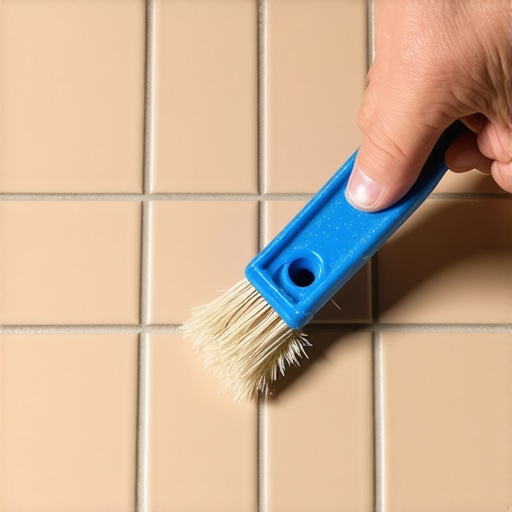
Investing in the right tools can make a significant difference. I recommend a battery-powered, adjustable angle vacuum that can reach into crevices—this helps prevent dirt buildup that can cause scratches or tile degradation. Additionally, a soft-bristled broom with natural fibers ensures your floors are swept clean without marring the surface. For tackling stubborn stains or grout discoloration, a dedicated grout brush paired with a gentle cleaning solution is indispensable. Remember, avoiding harsh chemicals preserves the sealant and finish, prolonging your floor’s lustrous appearance.
Advancing Your Flooring Maintenance Routine
As the industry evolves, so do recommended practices. In the next few years, smart cleaning devices incorporating UV sterilization and AI-driven dust detection will become commonplace. These innovations aim to minimize wear and extend the intervals between deep cleans. Staying informed about such trend developments means periodically reviewing guidance from trusted sources like expert design and maintenance tips. Incorporate training on these new tools into your routine for future-proofing your floors.
How do I maintain my flooring over time?
Consistent checkups are key. Schedule a bi-annual inspection to identify minor issues—such as loose tiles or veneer lifting—that can snowball if left unchecked. Reapply sealant on grout lines every 2-3 years; this prevents staining and maintains color uniformity. For hardwood, periodically refinishing the surface with a light sanding preserves its shiny, new appearance, but only after thoroughly cleaning and removing existing finish layers. Expert advice from hardwood maintenance strategies emphasizes that patience and attention to detail go hand in hand for long-term durability.
Finally, investing in quality cleaning solutions recommended by professionals minimizes damage and maximizes longevity. For example, I use a moisture-compatible cleaner designed specifically for hardwood to prevent warping or swelling—details of which are explored in best cleaning practices. Try integrating these advanced tips into your routine today and watch your flooring stay pristine for decades to come.
Elevate Your Maintenance Game
Maintaining floors is not just about cleaning; it’s about proactive care and utilizing the right tools efficiently. Keep an eye on emerging technologies and always adhere to expert guidelines for optimal results. By doing so, you’ll ensure your hardwood and tile surfaces remain as stunning as day one—long after installation. For more detailed strategies on flooring care, visit comprehensive flooring tips.
What I Wish I Had Known Before My First Hardwood Floor Install
One of the most valuable lessons I learned was the importance of meticulous subfloor assessment. Rushing through this step cost me dearly, resulting in uneven surfaces and squeaks down the line. Now, I always double-check moisture levels and surface flatness, knowing these are the secrets to a durable, flawlessly finished hardwood floor. This insight transformed my approach and saved me countless headaches in future projects.
Tools and Books That Changed My Approach to Flooring
The right resources make all the difference. I highly recommend investing in a high-quality moisture meter, like the [X Company Moisture Meter](https://tiletrendshop.com/why-moisture-meters-are-the-most-important-tool-in-a-wood-install), to ensure your substrate and material are perfectly prepared. Additionally, books such as The Complete Guide to Hardwood Floor Installation have expanded my understanding of techniques and best practices, helping me achieve professional results every time. Trusting expert advice and proven tools accelerates your mastery and boosts confidence in your work.
Why Patience and Precision Outperform Speed in Flooring Projects
Early in my career, I underestimated how critical patience is—rushing to finish often led to mistakes like uneven grout lines or mismatched planks. Now, I take my time, especially during mixing and sealing phases, appreciating that these small efforts yield stunning, long-lasting results. Remember, flooring isn’t just about speed; it’s about creating a work of art that withstands the test of time. Embrace a deliberate pace, and you’ll be amazed at how polished your floors can look.
Let’s Keep Your Floors Looking Stunning
Your dedication to perfecting each step—whether planning, preparing, or sealing—makes all the difference. By applying these behind-the-scenes insights, you’ll elevate your flooring projects from average to exceptional. Don’t hesitate to experiment and refine your process—each project is a chance to hone your craft. With patience and practice, you’ll turn flooring installations into lasting statements of quality and style. Ready to transform your space? Dive in and make every detail count!
Which flooring challenge have you struggled with the most? Share your experiences below, and let’s learn together!